Part 2: Weathering and Diorama Base
by Frank Glackin
Back to GMC Water Tank Truck – Part 1: Enjoying Italeri’s Oldie But Goodie
All Kinds of Weather
Weathering a model is more than just making it looking dirty and used. While the hobby’s peers have set the standards for building and painting, weathering is personal, and there is no definable level of how much, or even how little, can be considered as standard. As well as adding realism to a model, it can also add mood and atmosphere to the finished scene. A modeller even has a chance …. dare I say it … to be artistic! Great strides have been made in the five years since I joined the hobby, on weathering or “finishing” techniques, by modellers like Mig, AdamWilder and Michael Rinaldi, amongst others. It was in articles by these three, on rain streaks and oil streaks, which influenced my subject choice and also to attempt these methods.
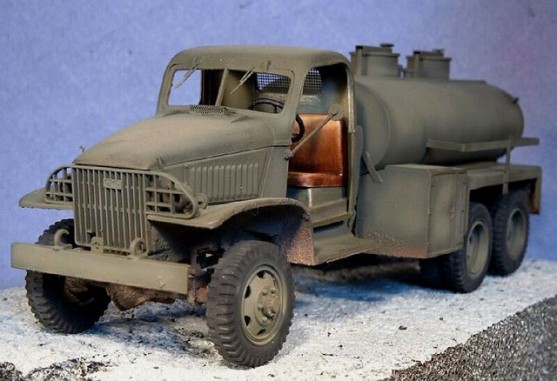
Before and after weathering. See text for details.
Firstly, pin-washes were made around all details with Humbrol matt black and thinner, to further enhance the details.
Then a light matt cote was misted over the vehicle. When dry, small dots of sand coloured enamel paint were made at the top of surfaces, and dragged downwards with a wide brush, damp with thinners. This was redone again with small dots of wet pigments. Most of this was concentrated on the water-tank area, as any settled dust would not be disturbed, but some were also made on the bonnet and hose compartment at the back. Some washes using buff coloured pigments were then made around bigger details, where more dust would settle.
Now the whole model was sprayed with a few filters. This could be best described as dirty thinner rather than thinned paint. Using Humbrol browns and grey/sand colours the whole model had this misted over, concentrating more on the lower areas. The front windscreen was masked to give the impression of working wipers.
When dry, the lower areas were given a light brushing with pastels using a large make-up brush.
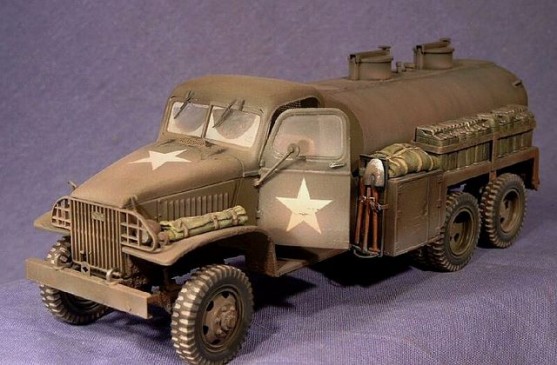
The final touch was to add some oil streaks from the fuel tank. Gloss varnish with a little black mixed in was dragged down from the spout first, and then again with red-brown and gloss. Finished!
The finished truck
From the Ground Up
The base started out as a picture frame. Because of the long, yet narrow, dimensions of the water truck, it wasn’t easy to find a base suitable in size. I finally decided on one, although it was a little too wide. There’s always something laying around to fill up that empty space! The sides were then heightened with 2mm thick balsa sheet, using some stronger basswood forms on the inside corners for strength.
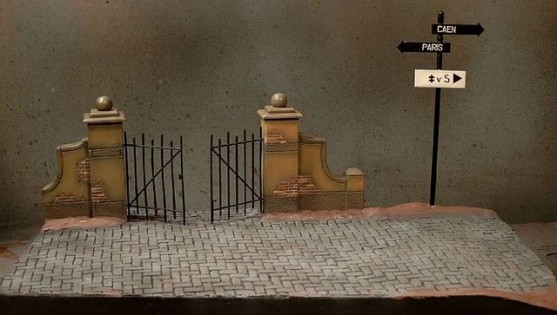
The inside of the frame was then filled with polystyrene sheet, cut to fit. The “space filler” was going to also be an Italeri item; the old but useful park gate (# 412). It went together easily enough, but looked too symmetrical straight from the box, especially on a small base. So I positioned it at an angle, hanging over one edge and marked this overhang. This was then cut off, and replaced with some plastic sheet, glued in place, and trimmed down to the same profile as wall end.
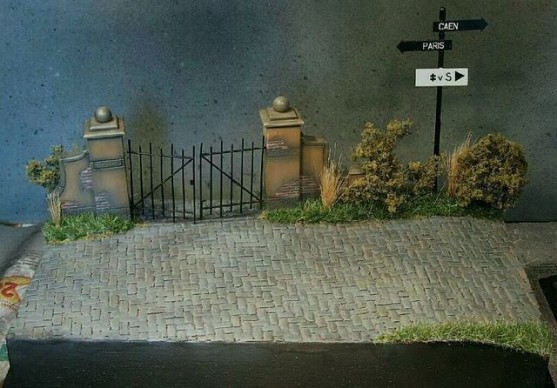
The cobblestones are a latex sheet item from Kancali Custom Modelling Accessories. These are quite handy to have, as they can easily be cut to fit with scissors and conform to uneven bases, not to mention the time saved. The final detail for the base was a road sign, from Tamiya´s generic road sign set (# MM167).
Everything was then painted in a similar fashion to the water truck, Tamiya base colours airbrushed on and Humbrol enamels used for detail painting. Decals were applied on the signpost, as described previously also.
Vegetation was then added at road edges and around the wall. Various railroading products were used, Heki static grass lined the road edge, and then the rest was filled in by prairie grass by Noch and long grass, again by Heki. The bushes are an item called fine leaf foliage and are by Woodland Scenics. Some small pieces of Heki flock were glued in between the different grass levels to make it more natural. The grasses were then painted with a thinned grass colour, and lightly dry-brushed with a faded shade to make them more uniform in colour.
Boys Will be Boys
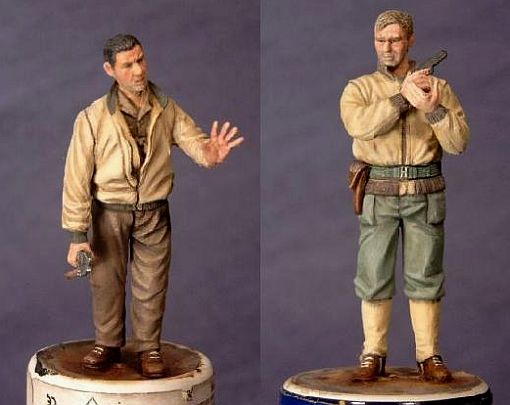
The figures are both by Dragon from the U.S. tank crew NW Europe 1944 set (# 6238). The figure on guard has been used straight from the box, while the figure opening the gate is carrying cutters from the spare box instead of a jerry can, has the right arm from the driver figure, and a hand from a Tamiya set. A simple little conversion that makes a unique figure, more apt for this particular scene.
As this set is one of the 60th Anniversary after WW2 sets it contained 4 extra, improved heads. Two of these were used instead of the original recommended heads with tankers headgear. The new heads are a big improvement over Dragons (then) normal characterless faces, and are only let down slightly by poor ear representations. The figures were primed with Tamiya and all details painted with Humbrols.
Figures in place
That’s a Wrap
That brings to an end, another fun project. Caution probably held the stronger hand, so weathering didn’t go too over the top. Attempting new methods is always challenging, and although it didn’t turn out exactly, what I had in mind, it was still rewarding and satisfying. Its better to have tried and fail, than never try at all.
This article was originally published in IPMS Stockholms Magazine in January 2007
