Dermatt Aircraft Kits
by Kai-Mikael Jää-Aro
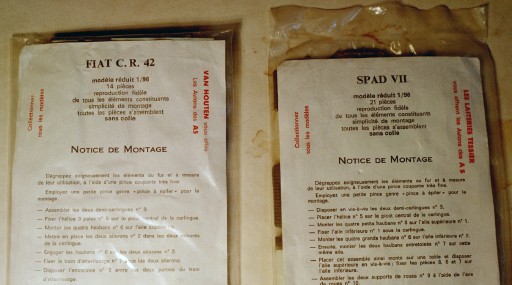
When is the last time you have seen plastic kits with this kind of packaging?
Enter the Plastiques Dermatt Fiat CR 42 and Spad VII.
Some while back, a friend of mine gave me two model kits he had found in a flea market in France, a SPAD VII and a Fiat C.R. 42. The kits were quite unfamiliar to me, a single sprue each, packed in tight-fitting plastic bags. The manufacturer was Plastiques Dermatt and the planes from their series Les Avions des As, biplanes in 1/96 scale. In addition the kit instructions were marked with Les Laiteries Tessier and van Houten – a dairy and a chocolate manufacturer, respectively. Apparently the kits had been some kind of PR giveaways. A bit of googling indicated that the Dermatt factory had burned down around 1974 and the kits were actually quite sought-after among collectors. Obviously I had to build the models to keep them safe from the collectors!
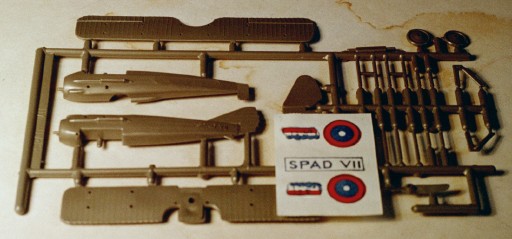
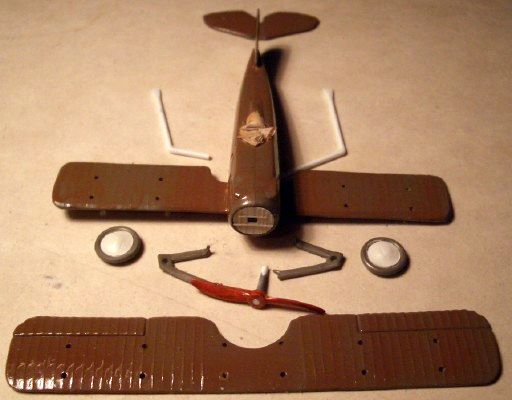
The SPAD sprue with sticker decals.
In the bag
Taking the kits out of the bags, it turned out that they were snap-together kits. The decals were in fact stickers and very low quality ones at that. Still, the general outlines of the kits were decent, so I decided to see what could be done about them. If nothing else, they would be useful practice objects.
The decals were obviously unusable, so I couldn’t do the “included versions”, but what to do instead? Inspiration struck, I would of course make a Finnish SPAD and a Swedish Fiat, so as to have a matching pair. Off to gather references…
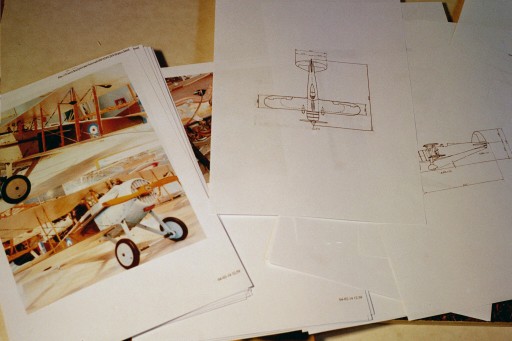
Thanks to the Internet, friends, and my bookshelf, I soon had heaps of images and drawings.
Accuracy
With time I had managed to get a number of photographs as well as scale drawings of both aircraft. I ran the drawings through a photocopier to get them into 1/96 scale and then placed the kit parts on them to see how good the kit shapes really were. They didn’t fit at all.
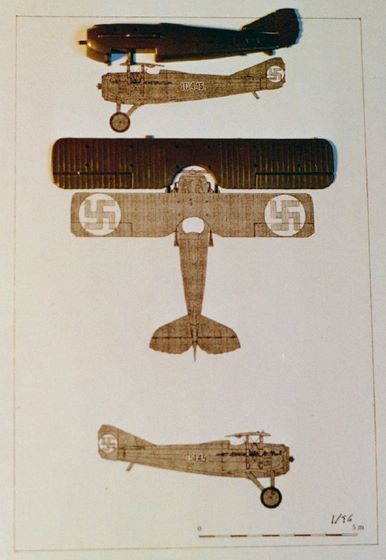
The drawing is carefully scaled to 1/96, why don’t the parts line up?.
I realised I had been rather naïve to assume that the stated scale on the kits actually corresponded to the true scale, but what was it really? I fiddled around with compass and ruler for a while and then it hit me: the “scale” in fact meant a 96 mm wingspan! This worked out to an actual scale of 1/81 for the SPAD and 1/101 for the Fiat. OK, off and do new photocopies of the drawings and then outline testing again. All right, the fit was not perfect, but it wasn’t completely awful either.
I assembled the list of things to fix on a SPAD. There was a whole slew of things:
- The fuselage had “SPAD VII” in raised letters on one side and a deep trench on the other, which had to be removed and filled in.
- The long and elegant exhausts that were so typical for SPADs were just oblong blobs along the fuselage sides. They had to be removed and replaced by scratchbuilt exhausts.
- The engine front needed to get a radiator.
- The cockpit was just a hole and had to be scratchbuilt.
- A windscreen had to be added.
- The air outlets in the nose needed to be added.
- The wings were too thick and had to be thinned down.
- The wing struts were clunky and had to be replaced.
- The stabilizer had to be repositioned.
- The wheels needed new hubs.
- I had no decals in the correct size, so I had to prepare these.
Revelation hits – 1/96 advertised on the packaging really meant that the wing span measured 96 mm!. Once the drawings have been redone in 1/81 the fit of parts was actually quite good.
Some highlights from the work
Galdecal 72005 contained the decals I wanted, but in 1/72 scale, so I bought them, scanned the decals and then created outlines in Adobe Illustrator so that I could scale them down. I started working on this on a resource computer at my work at the KTH (Royal Institute of Technology in Stockholm – Ed.). Since they were the easiest, I started working on the swastikas. One of the systems staff, who knew I was a modeller, came by and pointed out that he realised what I was doing, but it didn’t look very good, seeing as I was in a public space, so would I go do modelling stuff somewhere more private? I conceded the point and continued working on my own laptop, which actually ran Illustrator quite well.
The wheels had hub covers on only one side. To create nice symmetric covers, I oiled (with olive oil, as it’s healthier 🙂 one of the wheels and made an imprint of it in Milliput, let it harden and then oiled the mould and made two imprints from that. Careful sawing with a razor saw gave me two neat wheel covers that I could just glue onto the wheels.
The fuselage built (with cockpit inside), wheels have new hubs and new exhausts have been constructed.
A first coat of paint to see how it works.
The air grilles in the nose were made by taking Bare Metal Foil and using the sharpened end of a paper clip to create a regular louvre grid. Unfortunately, I think I sprayed the paint on too thickly, so the louvres didn’t come out as well as I had hoped, but unpainted they looked very good.
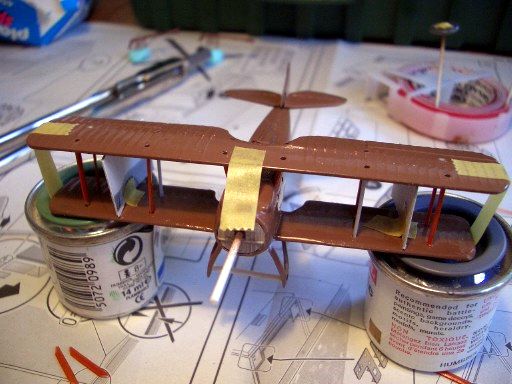
Struts really do stiffen up the wings. Cardboard jigs kept the wings in correct alignment while positioning and adjusting the struts. White glue turned out to be excellent for attaching wing struts, just the right amount of “stick” and drying time to be able to do final adjustments.
Cardboard jig, Tamiya tape and streamlined struts.
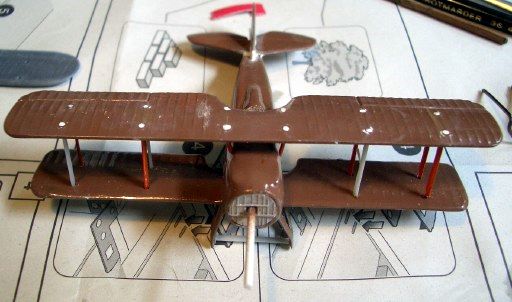
The original strut holes filled in.
Rigging really needs holes to pull the wires through, it’s not practical to attempt to tense the wires if they’re just glued to a surface. It doesn’t look very realistic either.
The machine was flown unarmed, and I was rather relieved to not have to scratchbuild a gun.
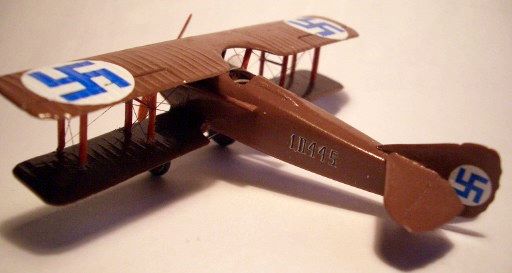
I did the whole aircraft in dark brown, but the wing struts in “laquered wood” in order to have a bit of contrast. The plane could have been painted dark green rather than brown, and in retrospect it may have looked better that way. I did no weathering, as I can’t do that well enough yet.
In finished Finnish state.
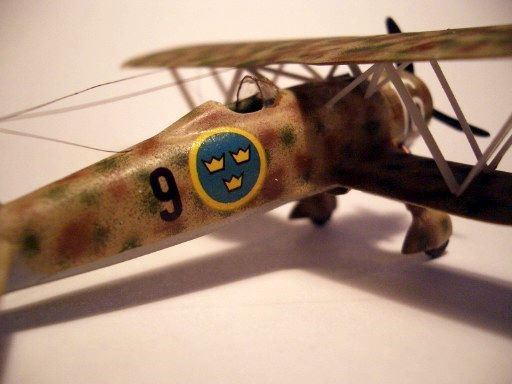
On to the Fiat CR 42
The Fiat also needed a bunch of improvements:
- Fixing the fuselage, as for the SPAD.
- Fixing the incorrect dip behind the engine cowling and scribing cooler flaps on the filled-in area.
- Adding the rocker arm bulges on the engine cowling.
- Extending the oil cooler air intake all the way along the engine cowling.
- Scratchbuilding an engine.
- Adding a spinner to the propeller
- Repairing a broken propeller blade.
- Thinning the wings.
- Replacing the wing struts.
- Filling in all the holes for wing struts
- Adding exhausts.
- Adding air outlets in the wings.
- Scratchbuilding a cockpit.
- Scratchbuilding a cockpit hood.
- Adding guns.
The fit, in particular between the lower wings and the body was very approximate, so an awful lot of Milliput was necessary to get smooth seams.
Milliput, Milliput and more Milliput.
I’m rather proud of the cockpit I built, in particular the gun sight.
Cockpit hood frame made from thin copper wire. Gunsight can be seen on the inside.
I first tried heat-smashing clear plastic to make the windscreen/cockpit hood, but found it difficult to get the correct shape. In the end I instead took some fine copper wire, bent to the shape I wanted and used Kristal Klear to make the panes. This ended up looking surprisingly good, even though I of course managed to bang up the part so that it had to be redone at least once.
Very typical for the CR 42 were all those bumps on the engine cowling. The kit cowling was all smooth, but little blobs of white glue became excellent bumps.
I filled in all the holes for the original thick and unsightly wing struts. It was in retrospect a mistake not to reuse these for the replacement struts, it was a pain to try to align the struts on a completely unmarked surface. In addition, the W-shape of the Warren struts made it almost impossible to use jigs to align the wings. In the end I must have ripped off the top wing at least four times and redone the struts.
The camouflage pattern is actually way oversize, but it looks OK at a distance, so I’m reasonably satisfied with it.
All done.
In conclusion
Well, the results were not quite as good as I would have wished for, but I got to test out some techniques and have learned a lot for the next instalment.
Thanks to Johan Näsström for the original models, Lars Befring for help with Adobe Illustrator and much other help, hints and tips along the way, Anders Nowotny for printing the decals, Ami Lappalainen and Mikko Saarela of IPMS Finland for information about the Finnish SPAD.
| Sources |
- J11 Fiat CR 42, Mikael Forslund. Mikael Forslund Produktion, 2001.
- Fighters 1939–45, Kenneth Munson. Blandford Press, 1969.
- Aircraft Archive Fighters of World War Two, volume 2. Argus Books, 1988.
- Fiat CR 32/CR 42 in action, George Punka. Squadron/Signal Publications, 2000.
- Suomen Ilmavoimien Lentokoneet 1918–38, Kalevi Keskinen, Kari Stenman, Klaus Niska. Tietoteos, 1976.
- Suomen Ilmavoimien Lentokoneet 1918–1993, Kalevi Keskinen, Kari Stenman. AR-Kustannus OY, 1992.
- World War I Modeling Page
This article was originally published in IPMS Stockholms Magazine in March 2007
