1/48 DML Focke-Wulf Fw 190D
by Lee Micheltree
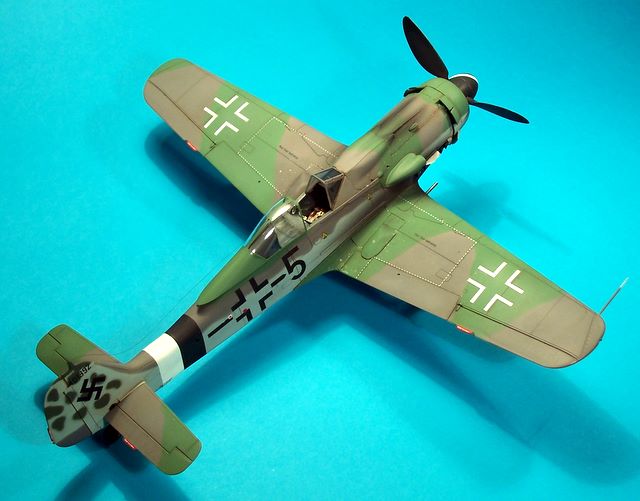
Yes, this Dora (that’s her name) came out pretty well……better than I’d hoped. She’s actually the first Axis aircraft I have ever completed, which is odd considering that I have been modelling for 35 years. Therefore deciding on her camouflage scheme was fairly stressful, as I didn’t want to bite off more than I could Chen.
I was always attracted by the amazing variety of colour schemes the Luftwaffe used in World War II but have always been reluctant to attempt one. Until one day a good friend gave me both the DML and Tri-Master 1/48th Fw190-D9 kits, along with an Aeromaster sheet (#48-638 – Too Little, Too Late – Part lll). After having a close look at the high quality of both the kits and the decals, I had to start at least one immediately…..and I chose the DML kit for practice.
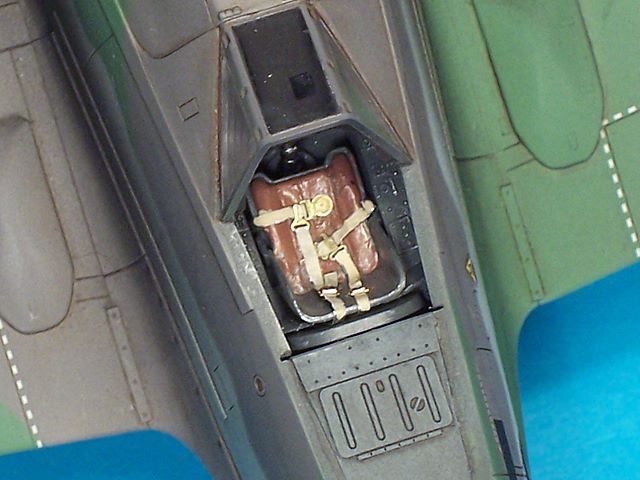
Not knowing a great deal about the Fw190, I decided to build her straight out of the box with the Aeromaster decals and some Reheat photo etched buckles for belts (generic, I’m afraid – not WWll Luftwaffe) being the only additions.
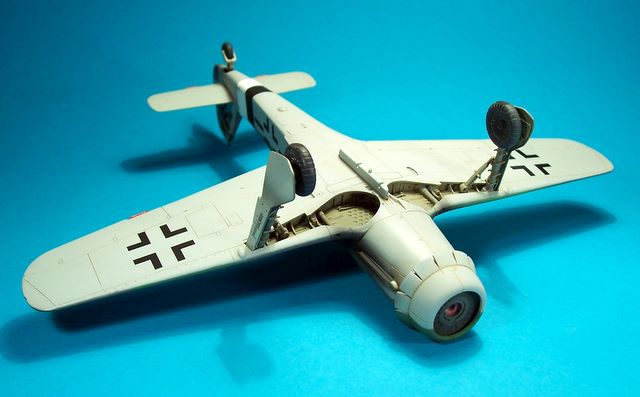
The kit comprises of 90 light grey plastic parts, 5 clear parts, and two frets of photo etched details. All parts are beautifully engraved – I must say that I was very impressed with the sprues sitting in the box.
I started with the cockpit, airbrushing almost all parts with Model Master Acryl RLM 68 Dark Gray and picking out bezels and other features with black, then dry brushing it all with light grey. Nothing else was added to the office other than the seat belts. The photoetched parts included with the kit were very nicely done, and very easy to use.
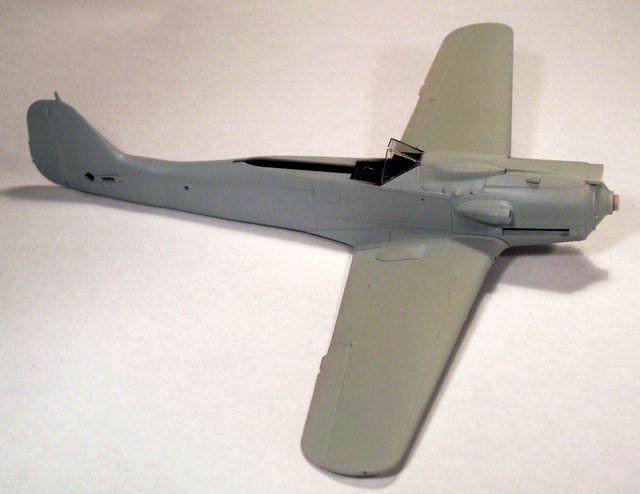
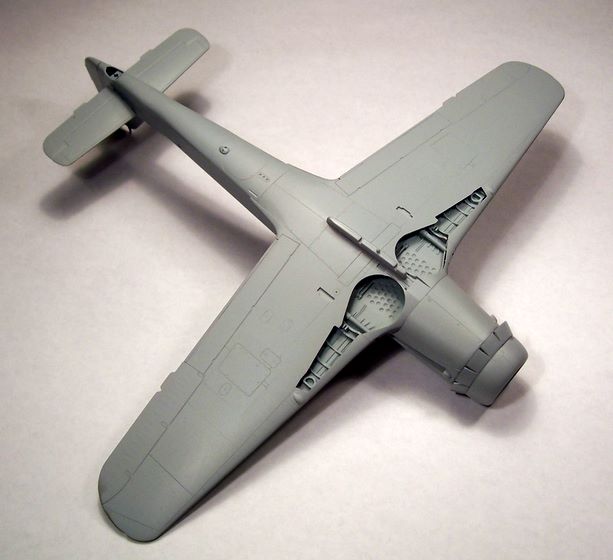
Next was the general assembly – which was trouble free, really – I found the fit very precise, and only used a small amount of putty on the fuselage undersides where the wing meets the fuselage. I wish all model manufacturers could duplicate this kind of quality.
Once the fuselage was together, I carefully added the wing tops to the fuselage sides, and added the wing bottoms later – this way, I can get a near perfect join at the wing root, as I didn’t want to have to sand putty around the machine gun access doors.
Painting Step-by-Step
The windscreen was added, masked with Bare Metal Foil (it’s easy and I get perfect results every time), I primed with Acryl light grey. I thin the paint to a great degree – probably 50-50 paint to isopropyl alcohol – I find that it takes more coats to obtain full coverage, but the total paint thickness ends up being extremely thin. I have to say that I was very impressed with the Model Master Acryl paints – possibly the finest pigment particles I’ve ever seen, and great colour coverage, even with the 50/50 mix of paint/thinner. This paint (with full colour coverage) ended up thinner than any paint I’ve used. Other than the colour, it’s hard to tell the difference between the painted and unpainted surfaces.
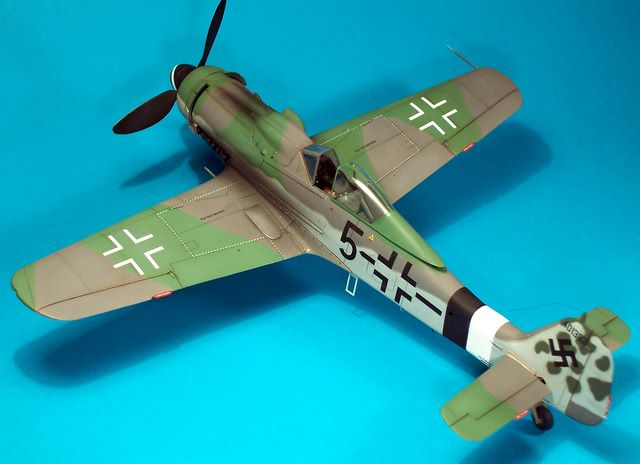
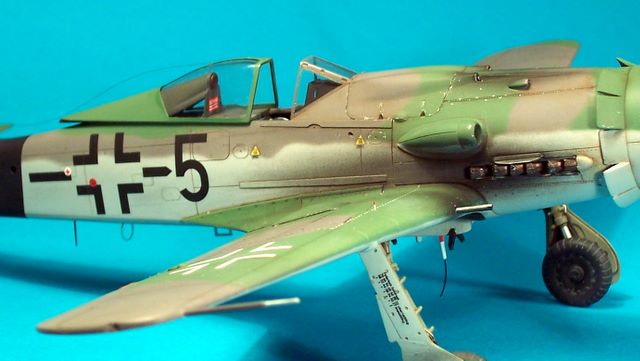
Once all the seams were tidied, the main base colour of RLM 76 Lichtblau was applied. When dry, I sprayed the wings with Acryl RLM 83 Dunkelgrun, then rolled long, thin worms of Blue-Tak to mask cammo pattern, and sprayed RLM 75 Grauviolet, taking care to spray at low pressure and low paint volume at 90 degrees to the masks to ensure a very narrow, feathered edge. It’s very easy and quite effective.
I did the same for the fuselage upper – a long thin strip of Blue-Tak running fore-to-aft – again, being careful to spray at right angles to the fuselage surface.
Once the masking and spraying was finished, I cut a paper mask with mottle shapes for the tail. This mask was held off the surface of the tail with little balls of Blu-Tak, and sprayed with RLM 82 Lightgrun, and once dry, the overspray between the tail mottling was removed with a draughtsman’s Staedtler plastic eraser cut to a sharp chisel point. I’d never tried this before, but it was very effective in removing the unwanted overspray without damaging the Lichtblau underneath.
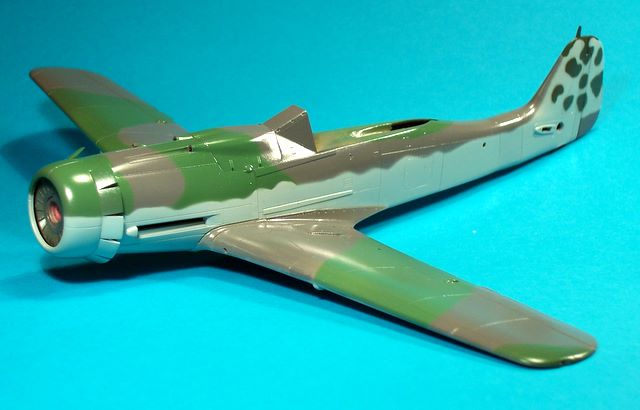
I sprayed a lightened coat of each colour in the centre of each panel – I dislike the stark effect of “pre-shading” panel lines – it just looks too unrealistic in my opinion.
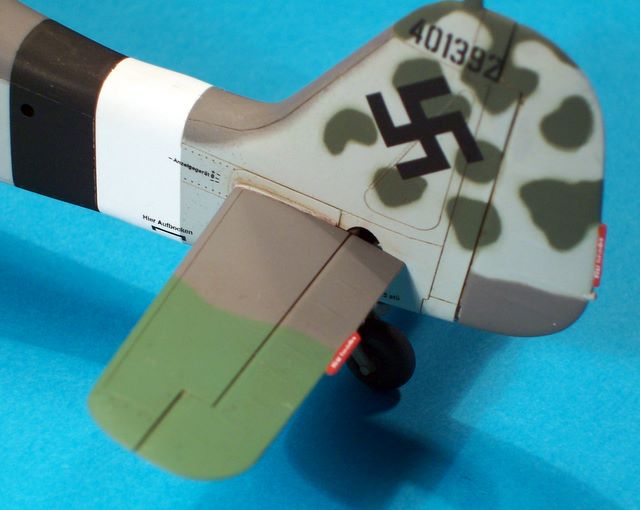
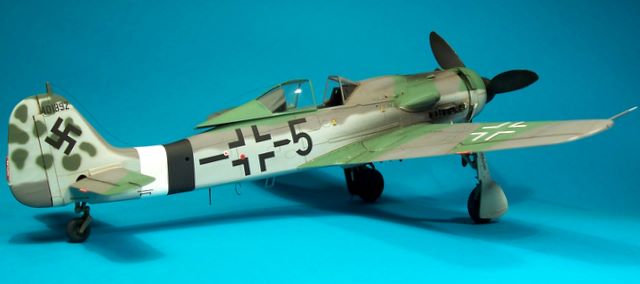
After a coat of Future, I applied the Aeromaster decals. The sheet has markings for 3 D9’s, and full stencils for 2 birds. The decals are beautifully printed, sharp and clear. They’re extremely thin, but tougher than just about any aftermarket decals I’ve ever used. They also reacted very well to the Microscale decal setting solutions. I was a little concerned that the Black/White Reich Defence Bands in front of the tail (2 halves, left and right) would be difficult to line up, but they ended up only needing a small amount of touch-up with black paint and a 0000 sable brush.
The guys at Aeromaster must have had a small brain-fade when producing the instruction sheet – the numbers for specific markings on the instructions are different than the numbers on the decal sheet – so I had to use the stock DML and Tri-Master decals to identify what was what on the Aeromaster sheet – something I wouldn’t have expected to need to do.
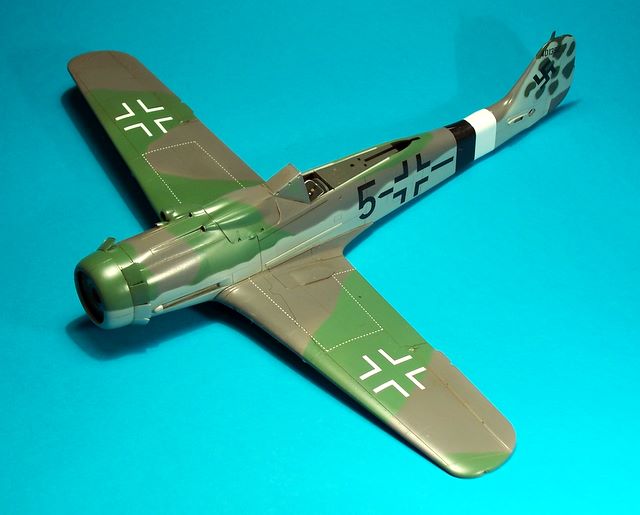
The decals ended up looking more like painted markings – I thoroughly recommend Aeromaster decals.
The exhaust and gun soot stains are almost entirely airbrushed. I used very dark grey, a little black, lighter grey, and light brown – in that order. My philosophy with weathering is “less is more”…….because when you weather an aircraft, there will come a point where just one more swipe of the brush will be too much, and the overall effect will be ruined.
After another coat of Future, I washed all the panel lines and the gear wells with burnt umber, grey and black oil paints. A coat of Humbrol Matt Cote thinned with white spirits finished the paint work – and a dusting here and there of ground pastels finished the job.
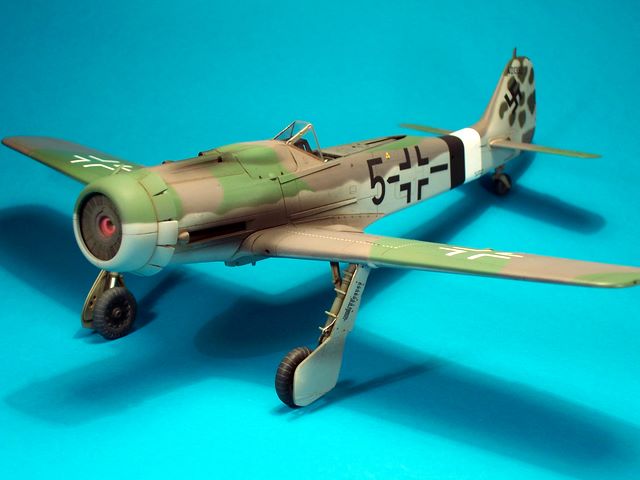
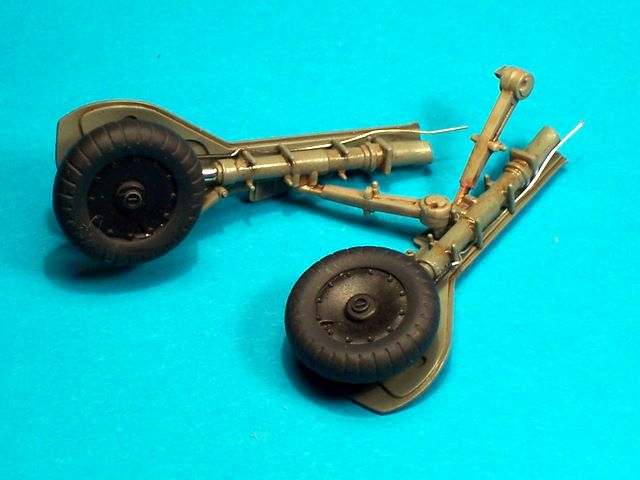
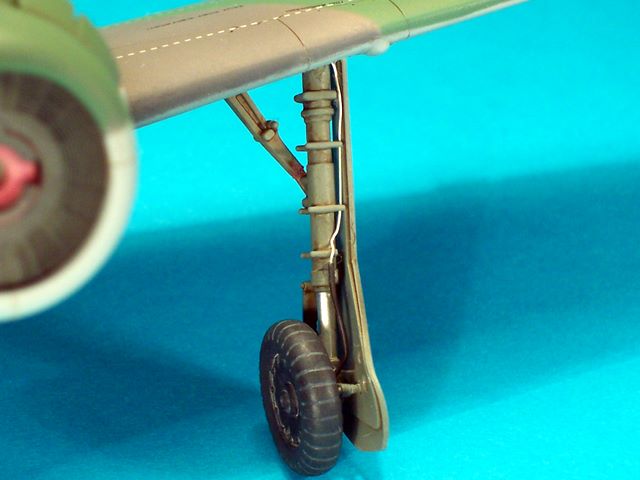
I’d found an article (In Hyperscale) about correcting the DML drag links (they’re just too short to fit properly) and made the necessary fix. The gear stance ended up more accurate than it would have without this change.
The landing gear on the DML kit are superb – very well moulded and very sharply detailed. Other than brake lines, they’re OOB. I used stretched sprue for the gear-down indicators on the wings – but didn’t bother with the tail wheel actuating wire on the right drag link.
The tail wheel is a 4-piece assembly – very impressive – and much better than the Tri-Master one piece white-metal
There’s no mystery about the rest of the details – fairly standard, really.
Overall, this was a great model, right out of the box. I’m looking forward to the Tri-Master offering.
I firmly believe that the secret to an excellent model is careful and clean workmanship and patience– and that’s harder to learn than the skills needed to build the things.
This article was originally published in IPMS Stockholm Magazine in December 2006