Using Photoshop Techniques for Finishing the 1/32 Bf 109 G-2
by Anders Hjortsberg
Introduction
I returned to this hobby about a year and half ago after something like a 13 year break, give or take a year… For some years now I’ve been doing paint schemes for flight simulator games as well as some profiles. Some of the profiles have been published in REVI Magazine the last year. You can also see some of my work at www.cptfarrels.com.
Usually it’s the other way around: digital graphic designers often try to imitate the real-world painting techniques, but I was surprised to see how much of what I learned in Photoshop was usable in plastic. With some practice I’ve managed to use the real-life airbrush to create mottles and weathering pretty much like on the computer.
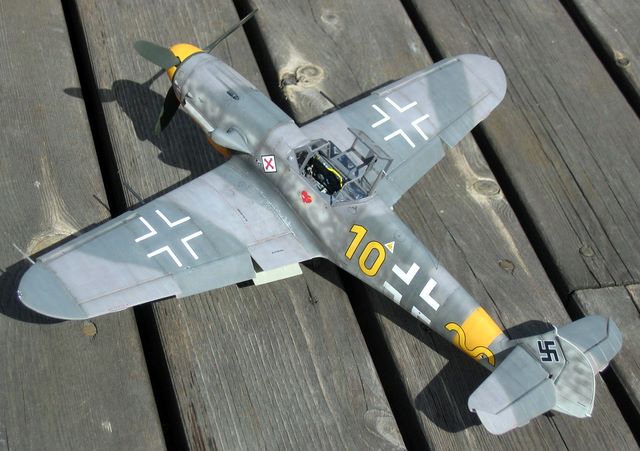
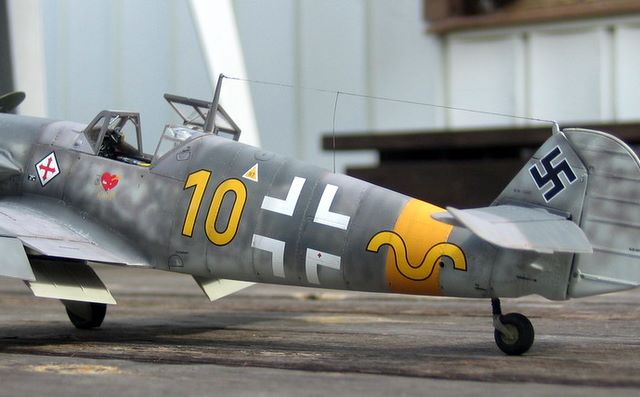
Having read the book Graf and Grislawski – A pair of Aces by Christer Bergström I knew instantly that I sooner or later just had to make a model of Alfred Grislawski’s Bf109G-2, ”Yellow 10”.
I ordered the 1:32 Bf-109G-4 by Monogram/Pro Modeller, which is basically the Hasegawa Bf109G-6 with a new top cowl for the rifle-calibre machine guns and early-type spoked wheels in resin.
Somewhere along the way I found an Model Design Construction (MDC) cockpit for this kit on EBay and I got the idea to pick up some more aftermarket stuff for this model. I wanted it to be something extra since the story of Alfred Grislawki’s personality impressed me a lot!
Finally, when I was ready to commence the project, I had:
- Cutting edge exterior detail set – rudder, elevators, MG151’s and exhausts.
- MDC cockpit set
- MDC replacement spinner,
- Eagle Editions oil cooler and supercharger intake
- Aires set of wheels, including also the tail wheel for the G-2 version
- Decals from Eagle Edition
Apart from that, just arrived from MDC was their great Rivet-maker – my first attempt at making my own rivets. Just when I was about to get started doing the G-2 ”my way” I discovered an article by Brett Green, describing his G-2 – the only difference from mine was that he used the spinner from Eagle Editions instead of MDC… (I think!). So much for my planned originality!
Lots of reviews and articles have been written about building this model so I’ll just stick with my experiences with the aftermarket stuff and the rivet tool before moving on to painting and weathering.
Getting Started
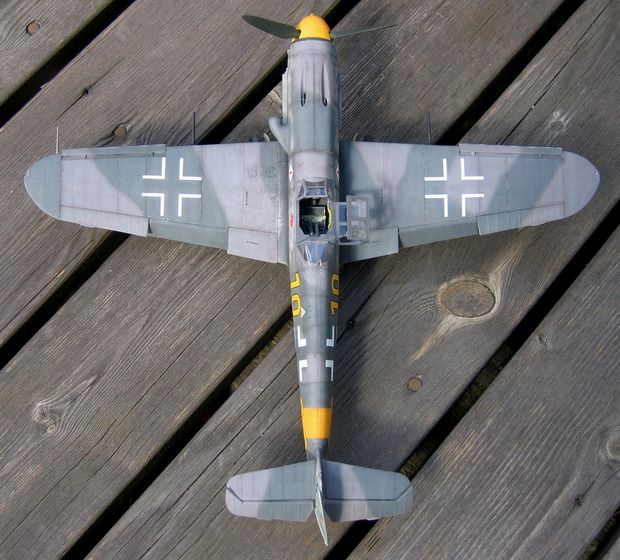
I recently purchased Floyd Werner’s DVD on building the Hasegawa Bf109G-6. This video contains some really useful tips in there that I followed. The first was to remove the sink marks on the main wing with the help of some Mr. Surfacer. Once that was fixed I started working on my very first rivets!
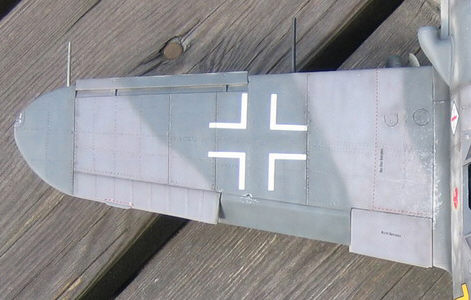
The Model Design Construction Rivet Maker is a great tool and it comes with some guides to help make straight and evenly spaced rivet lines. The instructions recommend using a pencil to draw out lines were the rivets should go. I used a strip of Tamiya tape that I moved around instead as it gave some extra support, helping the tool to line up for each rivet. Looking at close-up pictures of Luftwaffe aircraft it’s obvious that many rivets were neither properly aligned nor evenly spaced so don’t be afraid to use some freehand riveting as well!
Making rivets is a tedious task but once finished it’s well worth the effort. After assembling the model, some of the rivets had been sanded down and I redid those. A coat of primer is helpful when it comes to spotting rivets that need extra attention.
Aftermarket stuff
As mentioned earlier, I used a lot of aftermarket stuff for the model. First was the MDC cockpit. It is very nicely done with lots of great detail. I’m not competent enough to give it full justice but the result was still quite pleasing. I really liked the instrument decals that fit very good without any trimming needed.
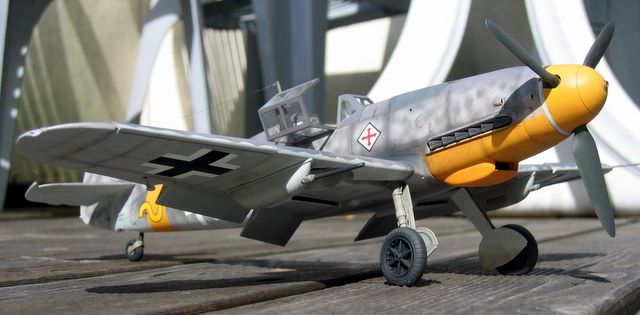
I used the oil cooler and supercharger intake parts from Eagle Editions. I followed the instructions and the fit was good after some sanding. These two parts really does a lot to help the general appearance of the kit.
Cutting Edge’s set of external details was used only partially, it is designed for the Bf109G-6 and G-14 models so some of the parts went into the spares box. I used the exhaust stacks, cannon and machine guns as well as the elevators and the rudder. After removing the kit rudder you need to thin down the inside of the fuselage for the new rudder to fit, as it needs to go into the fuselage slightly.
The spinner from MDC looks much better than the one in the kit. I ordered four of them since I had four 109’s in this scale waiting to be built. All of these spinners suffered from a poorly defined panel lines between the base plate and the rest of the spinner. On my coming models, that line will have to be rescribed, but this spinner was supposed to have a demarcation line between colours right on that panel line so I figured that it would work as it was.
Painting
I use Gunze colours for my painting, they flow easily and never clog up the airbrush. I used Gunze RLM 74/75/76 which looks close enough to the real thing, at least with some weathering. I’ve learned that it is more important to have colours that look good together rather than having the supposedly exact tone.
For the yellow parts I used Gunze RLM 04, but it needed a touch of red to look good in my opinion.
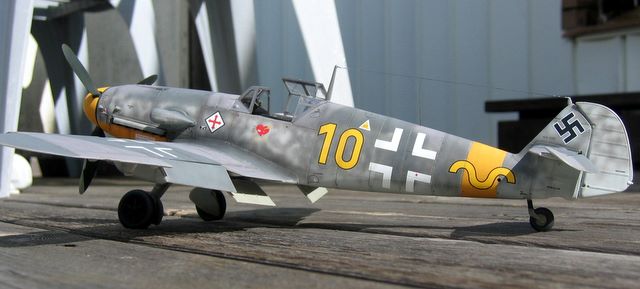
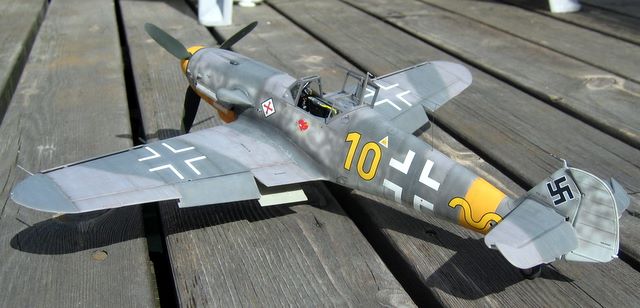
Looking at the photos and the profile of this machine chose a different paint scheme than the one recommended in the decal instructions. As can be seen in the pictures I settled for a somewhat wavy version of the camouflage pattern that was introduced in 1941 while the instructions calls for the earlier pattern introduced in the spring of 1940. Remember that I’m talking patterns here though, not colours, the instructions call for RLM 74/75 upper surfaces, too!
I finished the paint scheme with some blending weathering, using lightened versions of RLM 75 and 74. I was careful not to put lighter colours in the centre of the panels, as this is rather unnatural and just doesn’t look right in my opinion.
The Mottling á-la Photoshop
Doing the mottle pattern I began with RLM 75 along the fuselage sides, using a thin mix of colour sprayed here and there, criss-crossing and generally being sloppy. If the colour is thin enough, you will hardly see any colour streaks at first. Gradually, random mottles will start to build up where several layers meet. I have practiced this hundreds of times on the computer and it works, but it might be tricky in the beginning… Then I went over it with a slightly thicker mix of RLM 74 doing real spots, darkening up the mottle and making more obvious spots in the mottle as well as doing the crude overpainting fore and aft of the fuselage Balkenkreuz.
Decals
As mentioned earlier, I used Eagle Cals decals and they worked as flawlessly as ever. Enough has been written about these decals earlier and I don’t have much to add really. With all those rivets it was just more important than ever to use lots of Micro Set and Micro Sol.
Weathering
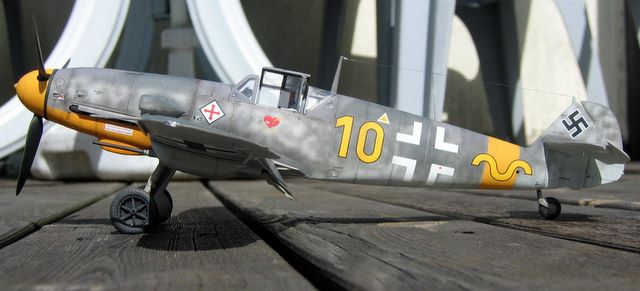
Weathering began by spraying a very thin mix of Tamiya Flat Black and Flat Brown along the panel lines. I then used this mix spraying streaks and random dirt along the fuselage and wings and around the oil cooler. A thicker mix was then used for oil stains and exhaust stains. When I was happy with that I gave some of the panel lines an additional oil wash. I only used oil around the engine cowling and the cockpit area and wing roots were there is usually more dirt. I also used the oil wash to pick out the rivets around the cockpit and wing roots.
For the undercarriage I used Tamiya’s Weathering Set A. The mud and dust really works nice for that, specially as this aircraft was stationed in primitive conditions in southern Russia.
I finally used an artist’s silver pencil for chipping along some of the panel lines and the wing roots and so on. When weathering I like to keep a balance between weathering that blurs and breaks up the camouflage and weathering that enhances and picks out the panel lines. The better that balance get, the better the model will look!
I sealed the model with a flat coat which really looked good. I don’t mind having a satin coat in some cases but this aircraft and the conditions in which it served certainly calls for a flat coat!
I enjoyed building this kit once the rivets were done. They make a great addition so I really need to keep doing them for my 1/32 kits – which, ehm, probably is the reason why my last three models were in 1:48…

This article was originally published in IPMS Stockholm Magazine in December 2006
Beautiful work. Love it.