by Frank Spahr
Filling
Being a dentist by profession, and modeller by interest, I have been using some tools and materials from dental supply that I think might be interesting for other readers of these pages.
What can dentistry do for the modeller? Quite a lot, actually, apart from dental prophylaxis and therapy :-). When you see what dental technicians do at work, the similarities with our hobby are evident. Many techniques easily blend into our modelling work. For some, you’ll only need some basic materials, for others, the aid of a dentist or a dental technician.
Using Dental Wax as Filler
One of the jobs that I wholeheartedly dislike is filling gaps. I am always in imminent danger of smearing the putty over all those beautiful details (here comes my favorite term recessed panel lines), and I positively hate sanding. It vividly reminds me of the monstrous resin tooth we had to make quite early in dental school, a tooth 9 cm long and 3 wide and deep, and I can tell you, that meant lots of sanding.
As long as the filler is not required to improve the model’s structural stability and it need not be applied over wide areas, dental casting wax is a very suitable and time-saving alternative. Nowadays, most filling means closing comparatively small gaps, most often at the wing roots of aircraft models, and this is where wax is the winning alternative.
Dental technicians use a number of different waxes for various purposes. For plastic models, we need a wax that has a comparatively high melting point and is rather hard, so that it can be scraped to a certain form. These demands are met by casting and aesthetic dental waxes, normally used to produce models of inlays, crowns and bridges that are used as masters for casting in metal. The required narrow range of tolerance in this process ensures that dental waxes used are of high quality. You can buy them in smaller or bigger sticks as well as in various colors, including red, green, yellow and blue. I use Schuler’s Ästhetikwachs, which is ivory colored.
Tools and accessories
Some special tools will be required to use the wax. As a heat source you will need a small spirit burner. On the German modelling scene, electric wax heaters are currently available, but I find them a bit oversized and much too expensive for my purposes.
You will also need two tools. First a waxing tool – I recommend a cheap copycat of the PK Thomascolor #1 applicator (it’s always gold in color) or another of similar shape. When buying one, take the #1 rather than #2 – it is smaller and more versatile.
The other accessory required is a small waxing knife, similar to the laboratory technician’s common Le Cron knife, but smaller and sharper.
Apart from these, you will only need an old paintbrush, some Kleenex tissues, Q-Tips and white spirit.
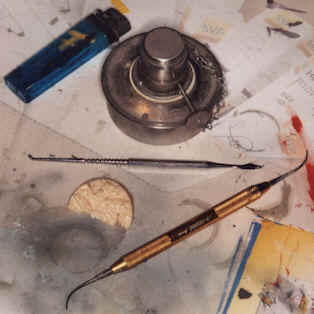
Here are all the necessary tools.
From top to bottom: Spirit burner, Le Cron knife and wax applicator.
Applying the wax
With the heated applicator, take a portion of wax and apply it to the model. Repeat that until you have filled a bit in excess. Allow the wax to cool down for a while. Now remove the excess wax with the knife, then smoothen and polish the surface with Kleenex and white spirit.
Of course, every new technique takes some practice to perfect. Make your first attempts on a piece of scrap plastic and try to find out how much heat is required, and how to handle the applicator with the wax on it. You positively don’t need to heat your tool red-hot, which is contraproductive in several ways. Equally important is the temperature on application: too cold means that the wax will not leave the applicator’s tip at all or so hesitatingly that it will settle down on the plastic in a single blob. Too hot means that you might damage the plastic with the overheated tool.
Generally, stay rather on the cooler side, since you can always touch the wax with the freshly heated instrument, melting it again and allowing capillary forces to do their work. They are your real helpers with wax. The properly heated medium will be literally drawn even into the smallest crevices. This feature is especially useful in areas where it is difficult to apply conventional putty.
Another big advantage is that you can correct nearly anything. You can scrape away the wax without doing damage to any model detail, quite different from using putty. You can reapply, scrape, smoothen and redo as long as you like.
To smoothen the filled area, use the waxing knife. When using Le Cron knife, be aware of its curvature. Try to avoid scratching deep into the filled area. Work from various angles in order to avoid producing grooves and scratches.
Finally, use a rather coarse brush to clean the waxing debris and always clean the surface with white spirit to assure paint adherence later on. Areas filled with wax can be painted regularly, but they may need an extra coat of primer. Ready!
The filled seams may not be exposed to heat and physical stress.
Casting wax melts somewhere between 50-60 ºC, but softens earlier. A conventionally puttied area will have roughly the same strength as the rest of the model, but waxed areas are considerably weaker! Beware of flashlights on modelling contests…
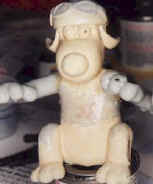
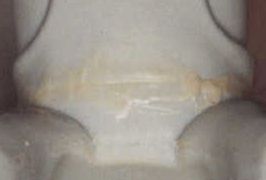
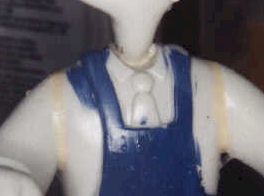
To illustrate the technique, I liberally used wax on my Wallace and Gromit model, as seen in the pics.
The wax applicators are also beautifully suited when making antennae and rigging. I like the wires as thin as possible and consequently use only stretched sprue of an appropriate diameter. It can be easily attached with cyanoacrylate glue in a slack position so that it hangs somewhat. Tightening is achieved by carefully holding a heated wax applicator in the vicinity of the sprue until it tightens out on its own. It takes several attempts and a learning phase until this works, but in my eyes, it pays off greatly.
Taking Impressions and Casting Resin
Taking impressions is a very basic dental technique which I found useful even in modelling. A modeller won’t need dentist’s impression material. More useful is the material that laboratory technicians use for duplicating parts – normally the substructures for the bases of partial dentures. These materials are 2-component-silicones, they are available from various manufacturers, and you won’t need the more expensive brands. The requirements are obvious:
- fine representation of surface details
- little formation of bubbles (but that’s rather depending on your skills)
- structural stability
The basic outline of the moulding process used in dentistry should sound familiar to many scale modellers.
- Provide a pattern (master) part for duplication
- Embed your pattern part in the silicone mixture to produce a mould.
- Fill the mould with resin to produce a duplicate
- Clean up the duplicated part
A sensible way of going through the process is as follows.
Preparing a Pattern
Pick your pattern part. Usually your master would be a kit part – like a propeller blade, engine exhausts – or something that you have scratch-bulit yourself.
Mount your pattern on a shaft. The shaft will provide an opening in the mould for filling it with resin, and will result in a resin ”sprue”. It is important that the pattern part is securely mounted on a shaft, yet is easily and clearly detachable from the part. A propeller blade for instance, should be mounted vertically on a cylindrical shaft with an easily recognizable demarcation line for sawing it off. Dental wax can be used for this purpose. Laboratory technicians use special gluing waxes, use these too.
More complex patterns may require multiple shafts and some thinking in advance. You can cope with only a limited amount of undercuts when removing the resin part from the form, so it is up to the individual case how you mount it and whether it might be better to build it from separate components.
Making a Mould
Now mount the pattern part to the base plate. I recommend fashioning the base plate form Lego bricks (we’ve all had those, haven’t we?). For a propeller blade, attach it’s shaft to the plate, the blade itself standing in upright position. Again, you may attach the pattern to the base plate with wax.
With the pattern steadily attached to the base plate, complete the form by building up walls around it to the appropriate height. Lego bricks are excellent for this purpose because they fit tight yet allow for building a form of any shape you need.
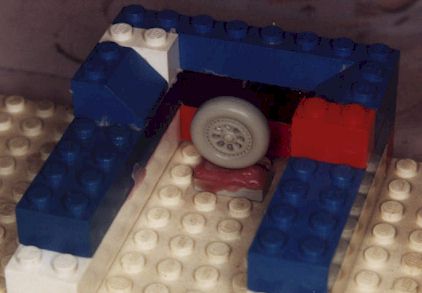
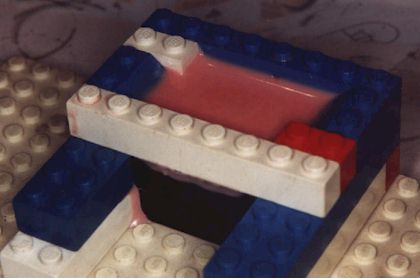
Here is the original part securely attached to the base plate,
the form being built around it with Lego bricks
Now you are ready for the silicone application. After proper mixing, let the goo flow steadily until it fills the form. You might use a disposable brush (available for dental adhesives) to apply silicone to all details and recesses of the pattern part to avoid bubbles. In my eyes it is the best alternative to desktop vibrators that technicians would use 🙂
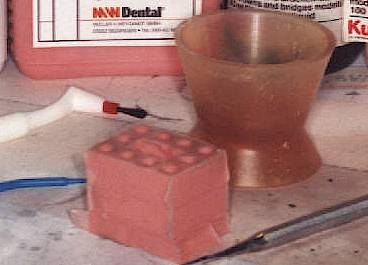
After the material’s setting time, it’s time to remove the pattern from the mould. Start by turning your entire assembly upside down and removing the base plate from the silicone cube. Now you can pull the pattern part out of the silicone, a quite hair-raising moment. Again, patterns more complex in shape will make it necessary to cut the mould open (very carefully) to remove them. If cut into pieces, the mould can be later reassembled in your Lego cradle. If everything worked out fine, you will arrive at the undamaged silicone mould or at least one that can be properly reassembled, with a clean opening where the base plate was.
Casting
Now comes the real tense part. You will need a dental resin used for
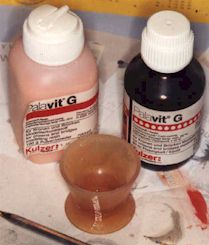
casting models, such as G-C’s Pattern Resin, Kulzer’s Palavit G or – better – a cheap copycat material. Mix it in a silicone cup rather thinly, so that it flows with consistency somewhere between condensed milk and honey and let it flow gently but steadily into the opening of your mould.
Now this is a moment where a laboratory vibrator would really come handy… Ask your dentist, or perhaps you know a laboratory technician, maybe they help you getting one. The trick is to avoid air bubbles being trapped inside the mould, and as always: the damn thing takes practice – and a dose of luck!
Refer to the instructions on the package to determine the setting time of the resin. Rather wait a bit longer than you might deem necessary before trying to pull the part from the form. Dental resin described above hardens in less than 2 minutes, but usually you will have it mixed in less-than-perfect ratio and it will harden in the mould with only minimal exposure to air, so 5-10 minutes of waiting won’t hurt you nor the part.
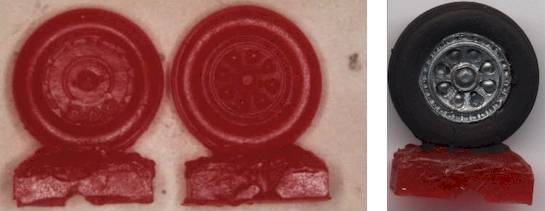
Now remove the resin part from the mould just as you did before with your pattern.
Finishing
Having removed the part from the form, you have to finish it by sanding. Working with resin is different than working with styrene. Resin is much harder, so you can’t cut or sand it as easily as styrene, but it won’t smear as soon as styrene, and its stability is far superior. This also means that it’s rather brittle, so it won’t bend but rather break on stress.
Any air bubbles left may be filled with wax as previously described, but only after you’ve finished with the sanding process – or the wax will melt.
Casting in Hard Metals
Don’t you really dislike the styrene’s poor stability? Haven’t you ever cursed the stuff when you needed a firm part but hadn’t it? Soft, bending, breaking? I won’t even speak of all the (non-) ”working” features of the kits in our youth, such as retractable landing gears, closing wheel well doors, movable control surfaces, most of which had to be glued tight sooner or later for structural fatigue.
One of the most unnerving things to me has always been rigging plastic model ships, especially since I’ve also built wooden ones and can compare. In plastic kits, the upper spars are so soft that you have to be very careful during rigging in order not to bend the masts. And if you succeeded in doing so, this does not prevent from material fatigue over the years, until one clumsy touch can break your USS Constitution’s bowsprit and leave you with your hands more than full of work – as happened to me recently.
If you have got good contact with a laboratory technician, you might somehow talk her or him into casting some of your most critical styrene stuff into metal, a thing with obvious benefits. With a little luck, you might even arrive at a price that satisfies both parties…
Dental technicians cast not only gold alloys, but also non precious metals, such as a Cobalt-Chromium-Molybdene alloy that is very stable yet lightweight. Even very thin parts may be cast into a very rigid copies.
The other possibility is casting in brass, which is used as ”phantom” metal for training purposes instead of gold alloy. Brass is much softer than Co-Cr-Mo, so that you might finish the parts yourself – the latter would rather require industry-standard equipment to obtain the smooth surface finish. Still the brass parts should be sufficiently rigid in most cases.
There is no problem in using styrene parts as masters for such casting. You should only remember to polish the styrene part to good surface finish as possible before casting, this implies less finishing work!
Since the casting itself needs to be done by a professional, we don’t need to get into details of it. The technician will also normally remove the rests of the molding material with acids and sandblasting before he hands you the cast. Using fine-grit sandblasting already leaves surfaces that are not all too bad.
Finishing process on your side will involve separating the part from the sprue,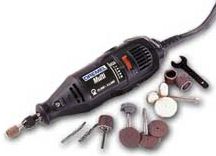 removing any seams or bubbles and smoothing the part. Since the metal is much harder that plastic, you will need a Dremel tool or the like for the job. The sprues can be separated with a carbide disk, excesses then trimmed with grinding stones.
The surface can then be finished using rotating brass brushes and finally rubber polishers of varying coarseness, depending on the degree of shine desired.
Summary
Hard-metal casting is by no means everyday technique, nor is it cheap. Still it might pay off with models that require more rigidity for antennae, landing gears, tail hooks, masts and so on. Just remember all the items on your models that have broken over time, and ask yourself if your next work of art should be able to withstand some handling during years after it’s finished… And you might team with several fellow modellers in order to reduce costs.
This article was originally published in IPMS Stockholm Magazine in January 2000.
