by Joachim Smith
The Spitfire PR Mk XIX is, in my opinion, the most beautiful aeroplane ever built; certainly she is the most well-proportioned of the Spitfire breed, without ugly bumps and gun barrels defacing her harmonious shape, the overall PRU blue livery emphasising her elegant lines
My own fascination with the Mk XIX goes back to my preschool days, when I got a balsa model kit of the S31 (S31 is a Swedish AF designation of Spitfire Mk XIX – Ed.). It was never finished, but I still have fond memories of the big five blade prop and the flowing lines…
These days, a number of recent 1:72nd and 1:48th kits of Griffon Spits make an S31 model a fairly straightforward affair. However, the Mk XIV and its descendant, the Mk XIX, have a number of subtle features which are not always well represented and which are worth while correcting. These include the underwing radiator shape which is frequently misunderstood, the wooden Rotol prop blades, the different length of the ailerons and sundry minor details. Below is a brief rundown of the merits and shortcomings of current kits that I’m familiar with.
Ventura 1:72nd PR Mk XIX
A short-run kit with white metal parts and two vacformed Falcon canopies. Coarse injection gates and thick fuselage walls belie the overall finesse and excellent shape of this little gem. The white metal prop blades are the best of any of the 1:72nd kits and could just do with a general thinning down.
The underwing radiators need some attention to correct the shape, otherwise the dimensions seem spot-on. The Ventura kit is not the shake-the-box-build-itself kind, but with dedication and extra detailing a superior model can result.
Swedish company Daedalus produced a variation of this kit, with Swedish decals and new canopy, but I can’t comment on the quality of this upgrade since I haven’t got one.
Fujimi 1:72nd PR Mk XIX
Fujimi kit boxartState of the art moulding and detailing still 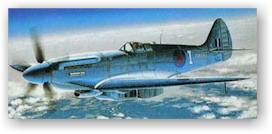 leave some problem areas. Some of these stem from the fact that Fujimi has broken the kit down to accommodate every variant of the Mk XIV as well as the Mk XIX, and so several extra joints need attention.
The radiator housings are OK, with a correctly slab-sided plan view but in profile the centre part is rounded whereas it should be straight, sloping up slightly towards the outlet part. The outlet flap is too short and should be replaced. The nose is not quite right either – the cylinder bank covers begin too far back.
The prop blades taper too much but the roots can be improved by judicious sanding and checking against reference photos. The aileron on the top wing has to be corrected – it should be extended to meet the detachable wing tip. More of a problem is the lack of enough dihedral and this should be corrected. Cockpit detailing is rudimentary. Reheat makes a fancy-looking etched sheet for this kit, but it’s not too accurate. Personally, I much prefer the magnificent Cooper Details resin set.
Academy 1:72nd Mk XIV
This could have been the definitive 1:72nd Griffon Spit kit. Detailing and scribing are first-rate and the shape is virtually perfect, including correct dihedral. In fact, Academy credits UK IPMS members with research! The cockpit is fully equipped and the nice wheels even have subtle bulging flats moulded in.
Academy 1/72 kit boxartUnfortunately, the kit is spoilt by the 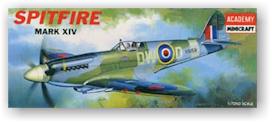 underwing radiators. These have a spurious rounded shape in plan view, but it doesn’t matter much since they are unusable anyway. They are moulded integral with the wing and, to allow the wing to be withdrawn from the mould, they have an absurd trapezoid shape when viewed head-on. The only remedy is to replace the radiators with items from the Fujimi kit (if you feel like spending money), or scratch build them – it’s not too difficult.
As on the Fujimi kit, the ailerons have to be rescribed and extended to meet the detachable wing tip. The spurious over-wide roots of the prop blades also need to be sanded down.
A strange error, repeated in Academy’s 1:48th kit, concerns the aft cockpit canopy which is too short. This is because there is a fictitious step in the raised cockpit sill behind the entry hatch. In reality, the sill should be raised immediately aft of the hatch.
Conversion to Mk XIX includes removing the cannons with associated bulges and filling the related hatches, adding the fuel booster pump bulges in front of the landing gear wells and drilling out camera ports under the fuselage and in the port radio hatch aft of the cockpit, which needs to be scribed on the model . The cockpit entry hatch should be glued in place and the joint filled, since the Mk XIX didn’t have a hatch. A cabin pressurisation air intake must be added below the port exhaust stacks and the standard windscreen replaced by a curved one.
MPM 1:72nd Mk XIX
MPM kit boxartAn early, limited-run effort of this Czech firm, the kit 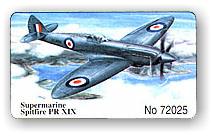 has several outline errors and is not worth bothering with. If you like short-runs, go for the accurate Ventura kit.
Academy 1:48th Mk XIVc
In quarter scale, this kit is the obvious choice for conversion to S31. It is absolutely beautifully moulded, on par with Tamiya’s best, and this time the radiators are almost spot-on – more accurate than most drawings, in fact. The rounded fillets, fairing the radiator housings into the wing, are missing but easily added with Milliput. The subtle shape of the Rotol blades is also well captured.
With this near-perfection, it’s a bit of a shock to discover a glaring error in the aft canopy with a fictious ’step’ between the rear edge of the hinged entrance hatch and the raised cockpit sill aft of it. This results in the aft canopy being much too short and the frame carrying the head armour being located too far aft. This just has to be corrected for the model to look right by filling in the step with scrap plastic and heat-forming a new canopy part (easy, since it’s single curvature only).
A few other minor errors are more easily dealt with: a spurious  vertical hinge line across the rudder horn balance must be filled and the ailerons should be rescribed if you are building an S31. All other conversion features for the 1:72nd kit apply (including the port radio/camera hatch).
In this scale, some distinctive cockpit equipment should be added: the camera control box replacing the gun sight, the three oxygen tubes aft of the seat and the plexiglass (perspex) tube containing silica gel for dehydrating the pressurised cabin air behind the head armour. Don’t forget to add a rear pressure bulkhead closing off the fuselage aft of the cockpit. If you are a stickler, add a pressure bulkhead forward of the rudder pedals, too.
A suitable windscreen can be found on the PR Mk IV canopy in the Falcon Clearvax #3 Fighters WWII, (the sliding hood with the side bulges isn’t used, of course). An S31 decal sheet is available from Rebell Hobby; an enlarged version of the very nice Flying Colors 1:72nd sheet with all the stencilling and the distinctive F11 griffon badge.
Hasegawa 1:32nd Mk V with Warbirds Production Mk XIVE resin conversion kit
Hasegawa kit boxartIf you must have a 1:32nd S31, this is the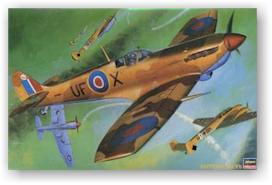 way to go. The Hasegawa kit is a winner and the extensive conversion is made that much easier by the Warbirds quite complete kit, containing a replacement wing, radiators, fin and rudder, the Griffon nose with spinner and prop blades and some bits and pieces, some in white metal, such as exhausts, wheels, etc.
That said, this is by no means an easy conversion, even if you can get hold of the Warbirds kit.
The Warbirds designer has skimped on the radiator housings, which are the wrong shape, and there are no recesses for the actual radiators in the new wing. Apart from this, most parts are of an excellent quality but the extra work to convert the Mk XIV to a Mk XIX must still be done as per above. Of course, the bigger scale demands meticulous detailing in the cockpit. The curved windscreen has to be scratch built and the Swedish decals will call for ingenuity. The national insignia might be found on old Specialtryck sheets and the F11 griffon badge can be made in a photocopier on yellow decal film, but the stencilling is something else. I won’t start my S31 conversion just yet…
Rounding up the selection of models, let me just add that the elusive PRU Blue colour is available as paint #X8 in the Xtracolors range from Hannants.
This article was originally published in IPMS Stockholm Magazine in August 1998.
