Tamiya M20 Armored Utility Car
by Serge Haelterman
The six-wheeled, 6×6 drive M8 Greyhound is arguably the most recognizable US wheeled armoured vehicle of World War II.
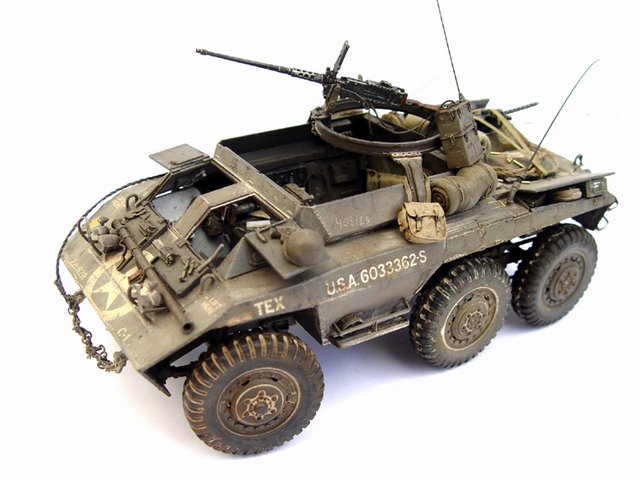
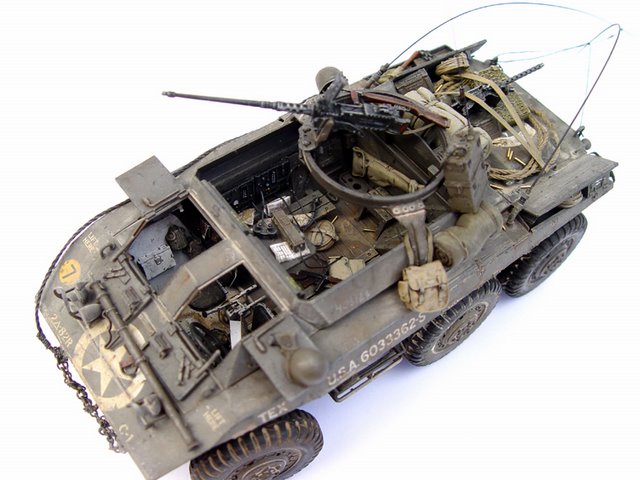
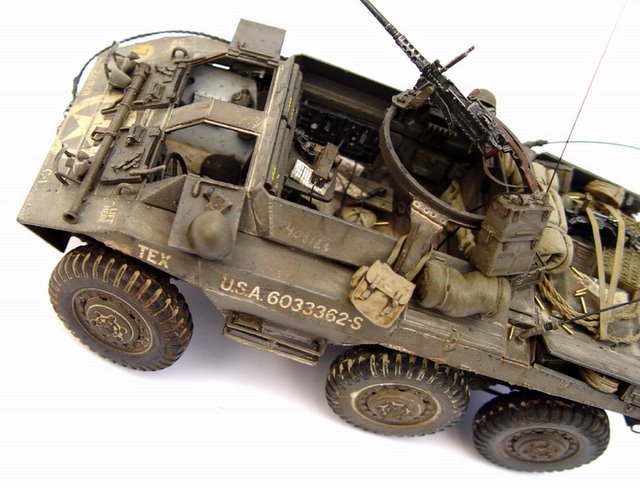
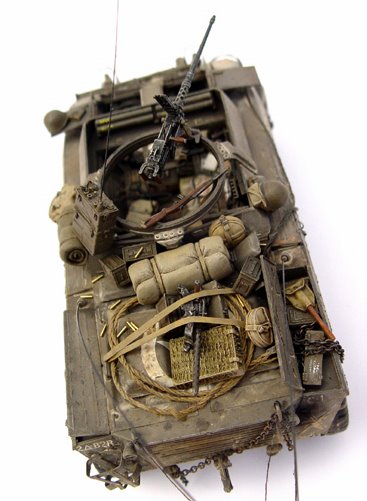
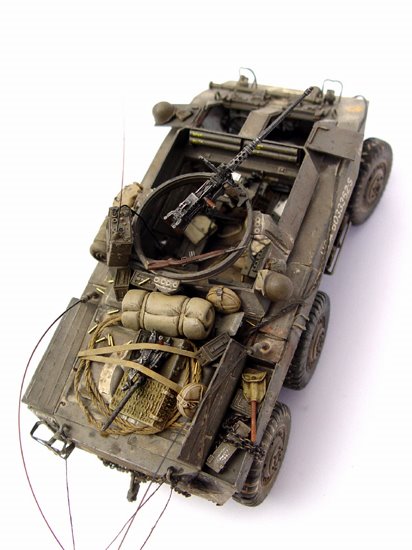
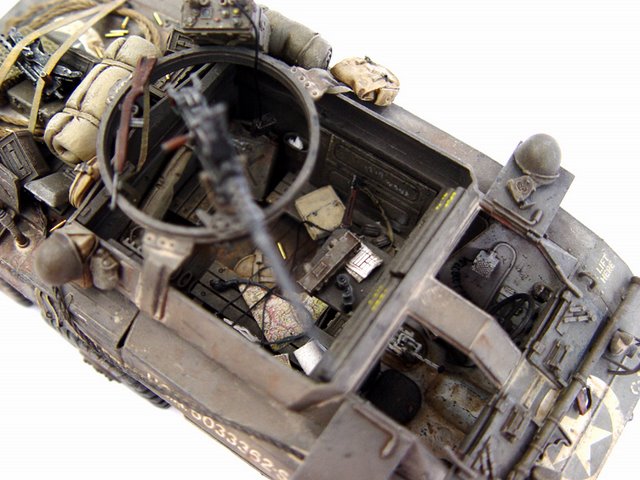
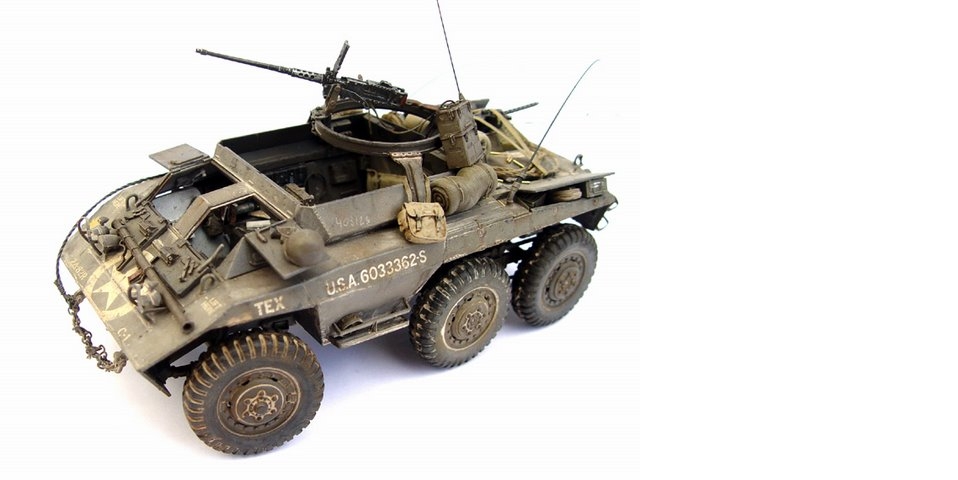
Following on from the earlier and much-acclaimed release of the M8 Greyhound, this newer Tamiya kit is a logical elaboration on the same subject. The M20 Armored Utility Car was essentially a Greyhound with the turret removed. This was replaced with an open-top superstructure and an AA ring mount for a 0.50″-calibre M2 heavy machine gun. A bazooka was provided for the crew to compensate for its lack of anti-armour weaponry.
The M20 was primarily used as a command vehicle and for forward reconnaissance, but many vehicles also served as personnel and cargo carriers. Offering high speed and excellent mobility along with a degree of protection against small arms fire and shrapnel, it was well liked by those who used it.
3,680 M20s were built by Ford during its two years in production, 1943-1944.

The Model
Besides the 1/35 Tamiya M20 kit, my model features both Verlinden resin updates for the M20, Mission Models’ superb empty 50-calibre shells and some scratchbuilding.
It was a nice, easy build. Like the preceding M8, everything in this kit this just falls together. In fact, the two kits share the same hull and suspension, so the quality should be the same. For the M20, Tamiya has rightfully added a sprue with modified interior of the turretless version. It is OK, but the interior will benefit from extra detailing.

Painting
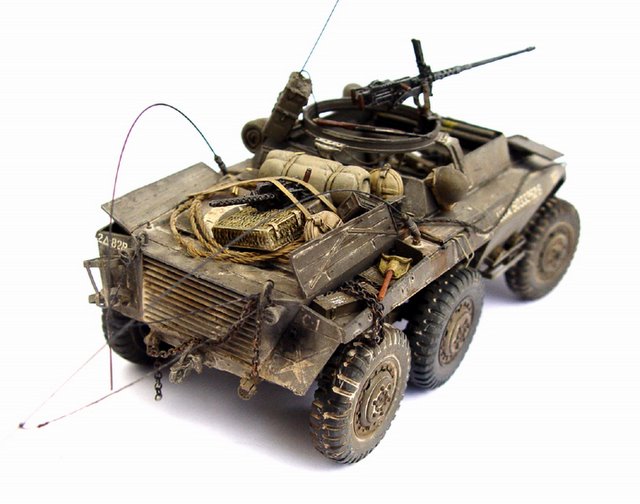
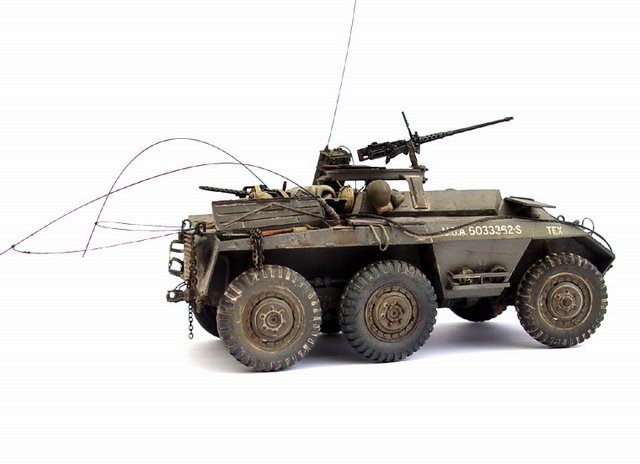
Painting was done with Tamiya acrylics. First a base coat of Olive Drab was applied. Then the centre of the panels were resprayed with progressively lighter variants of the base colour.
At this point I applied several coats of Valejo satin varnish to liven up the colours. When this dried (I love the hairdryer), decals were fixed followed by a new coat of the satin varnish.
Next, several areas of the model were dusted with heavily thinned Tamiya Buff. This mixture acts like a real dust, removing the satin sheen on the sprayed areas and leaving a nice contrast between ”clean” and ”dusty” areas.
Weathering was done with artists’ oils – black, raw umber and burnt sienna thinned with Tamiya thinner. After this a subtle drybrushing with Valejo paint. Then came the obligatory chipping, performed with Valejo Greasy Metal mixed with black, raw umber oil and enamel silver and graphite pencil.
Finally, I used some Mig pigments, applied with Tamiya thinner, to finish up the job. I hope you like the result.
-

- Tamiya M20 Armored Utility Car