Academy’s Kit Built OOB
by T J Tang
A few years after the end of WWII The IDF (Israeli Defence Force) had a larger fleet of U.S. Sherman tanks than any other country in the world. Beginning with ex-British WWII era vehicles, more Shermans were purchased from a number of different countries.
Following the tradition of improving
and upgrading their  Shermans, the M51 ISherman was the ultimate version of this tank.
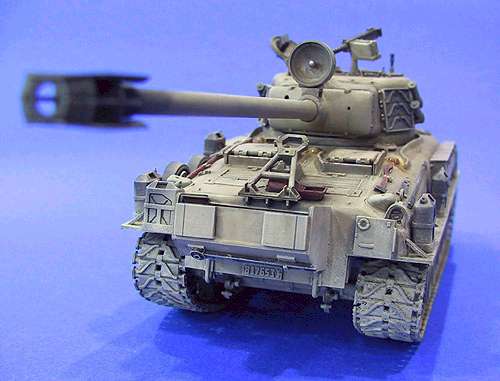
Basically a number of old M4A1 hulls were stripped down and re-equipped with a new engine, suspension and tracks as well as new gun housed in a turret modified with a new mantlet and bustle. Further modifications included a searchlight and smoke dischargers.
I have been modelling IDF tanks and armoured vehicles for many years. I have always wanted to build an Isherman ever since I saw Shep Paine’s diorama in his fabulous How to build dioramas. To this date I still love that article, even though M26 Dragon Wagon was never used by IDF! I believe that to be modelling in its best form
One of the major combat experiences for the M51 was the six-day war in 1967 and the 1973 Yom Kippur War where Israeli tanks fought T-55 and T-62s from Syria and Egypt with great success.
The chance to fulfil my desire to build a M51 occurred when I decided to build a friendship gift to an US collector that bought some of my IDF dioramas, and I took the opportunity.
Construction

This is the Academy M51 kit. Assembly was pretty straightforward except a few areas that needed to be taken care of.
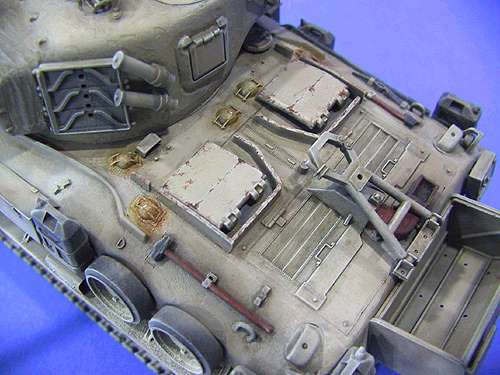
The only major problem would be the gun mantlet canvas cover. The construction requires putting a top piece of the canvas cover to a lower piece and these two don’t meet. In fact the lower piece is too small for the upper one. I superglued them together and built layers of gap-filling glue on the lower pieces until I get a full thickness on the lower part. Immediately I sanded the filled area smooth and then recreated the canvas creases using knife and sandpaper. An easier way would probably be to use epoxy putty, but as it would take over a day to dry I preferred the superglue-and-accelerator method as it allowed me to process immediately!
The simulation of texture on cast turret and hull on the Academy kit looks a bit artificial. I used normal Tamiya cement to coat these areas and tone down the casting effect.

Painting
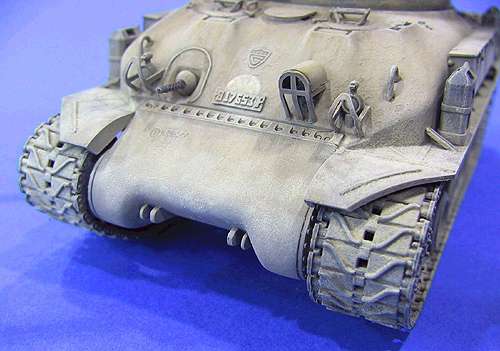
The entire model was first sprayed black and allowed to dry for 30 minutes. I mixed a non-specific Sinai Grey shade using Tamiya Buff and Medium Grey. It was subsequently oversprayed on all areas leaving out black corners and crevices.

Weathering
The usual washing and drybrushing was applied to the model. Chipping was applied extensively to the commander cupola and loader hatch areas. With suggestions from ”MIG” Jimenez of the Missing Links fame, I added in some fuels stains on the hull caps areas and rust chipping on the hull back.

Conclusion
This is overall a straight from box project and it was really fun doing it compared to some of my earlier projects which involved major modification and scratch building. Every once in a while, all serious modellers should try doing an out-of-the-box project to relieve their tension. After all, modelling should be fun and enjoyable!
My special thanks go to MIG (Spain) for his kind assistance through the internet on how to improve my models.
This article was originally published in IPMS Stockholm Magazine in October 2002.