…or How My Airfix Auster Survived for 20 Years!
by Magnus Fridsell
That magic ”first model”
Very few people’s “first models” seem to have survived, according to the tales one hear at the club meetings, many met an early death in the form of a match, firecracker or even an air-gun bullet! I was always a very careful child and maybe for that reason my first model is still around. Another thing that seems to be unique was that I painted it, but more on that later!
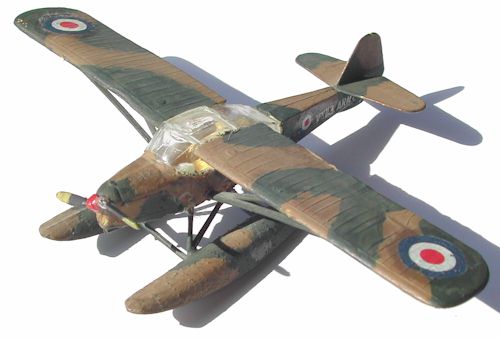
I got my first-ever plastic kit as a Christmas gift in 1982, when I was 10 years old. The reason for the Airfix Auster to enter my wish list was that I was a Biggles-fan and had recently read a book where he flew one. It wasn’t even one of the good ones, it was one of the later books where he is a flying policeman! Also, I had no idea that he most probably didn’t fly this mark which is an AOP VI. And he surely didn’t fly one on floats either, which by the way is totally incorrect for this paint scheme. The floats were attached for one reason only: they look cool! For being a Series One kit, the number of options are really great: Wheels, skis and floats. Too bad that there only was one decal option included…
Isn’t she lovely! The combination of floats and camouflage is…well…original…
A rhapsody in glue
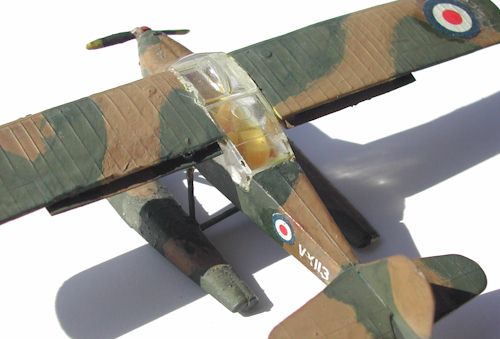
The kit was built in one session, using some kind of dangerous-smelling household glue. It seems to have been rather “hot”, resulting in a wavy trailing edge on one of the wings. It also went badly together with the clear parts, leaving large foggy areas on the cockpit glazing. I was however rather happy with the result at the time! Looking at the model today, it is remarkably straight and square except for the floats that were a tricky fit. By assembling the model in one session, I ensured that I never would be able to forget that the kit was cast in yellow plastic. The cockpit is populated by an extremely yellow box, probably a radio, and a pilot of the same unhealthy colour!
Covering it all in paint
Using Airfix paints, the model was painted in two sticky and thick layers, carefully following the instructions on the back of the box. I remember having enormous problems painting the lower surfaces of the aircraft, only top- and the two sideviews were shown! I still have one of the tinlets but I suspect the contents are rather solid by now. I also remember my mother’s comment that buying all the paints that Airfix recommended actually cost more than twice the model’s price! That was still the golden times when someone else paid for my hobbies…
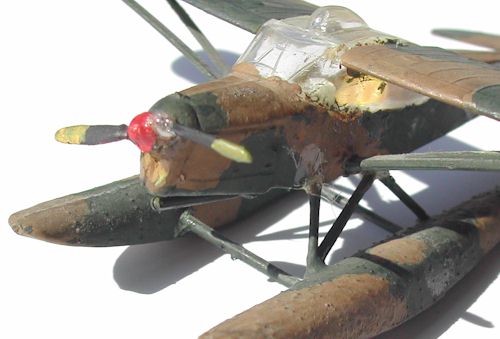
A much-needed repair has been carried out to the prop. Lots of glue means lots of strenght but I doubt if it does any good for the balance…
Decalling the dry way
Decals were initially peeled off the backing paper and attached using a rubbery photo glue. A few months later my one year younger cousin (who started his modelling career several years before me) discreetly suggested using water. Thank God for the rubber glue, all the decals could be easily removed from the model, dipped in water and re-attached! How on earth I got the decals off their backing paper without water in the first instance is still a mystery, I doubt I could manage to do it today even if I tried! And no, the decals were NOT applied on a gloss undercoat, at that time I would probably not spot “silvering” even if it attacked me in the street!
A few years later, I overpainted the decals with Humbrol clear laquer, I hade some kind of idea that it would stop them falling off in the future. It did obviously work quite well, even if the gloss spots don’t do anything for the appearance, the decals are still there!
Note wavy trailing edge and yellow interior. One can really see my talent for this hobby, ten years or so before I became Magnus the Master Modeller!
So, more than 20 years later, it still has its spot in the display cabinet. A lot of models built after this one has either been scrapped or “recycled”, but this one has survived. Of course, some battle damage has occured but nothing that I haven’t been able to fix using a blob or two of glue! The only thing lost over the years is the water rudder from one of the floats and I can live without it.
Wheels and skis are still around in the scrap box, they have been on their way into one project or another several times but always survived, still in that splendid yellow plastic! The drawing is also there somewhere in my files so the only thing missing is the box. If this was a full scale aircraft, it would probably be put up for sale with an ad looking like this:
Budget warbird for sale
Rare Auster AOP VI on floats, 95% complete (missing water rudder).
Full paperwork, skis and wheels available. Serious offers via e-mail to owner!
A few words about the Airfix Auster
The kit was first released in 1958 as the ”Auster Antarctic”, which is the reason for the skis being included in the kit. This beautifully orange aircraft is preserved at the Aerospace Museum at Cosford in the UK.
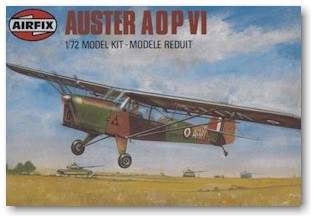
Boxart for the artillery spotter version, thanks to Eduardo for the image!
The second release came in 1979, this time as a camouflaged artillery spotter from Middle Wallop, but still cast in yellow plastic!
The kit isn’t available today and especially the Antarctic version fetches high prices on the collector’s market. So, if I had stashed the kit away and sold it today, I would have been fairly rich. On the other hand, I have never been a collector and since this was the starting point for this great hobby for me, I consider I got a fair deal out of it anyway!
This article was originally published in IPMS Stockholm Magazine in June 2003.


