Building Dragon’s Kit of the Russian Main Battle Tank
by Mikael Isaksson
History of the T-80
At the beginning of the 80’s, a new Soviet main battle tank was to be developed from the T-72 concept. Having solved the technical problems with the automatic loader that was installed on the unreliable T64, the very same loading procedure was to be used on the new tank. The technique allowed laser-guided missiles to be fired through the main gun. Since the Americans were equipping their new Abrams tanks with gas turbine engines, the Russians decided to do the same with their vehicle.
Serious problems arised when the new gas turbine intended 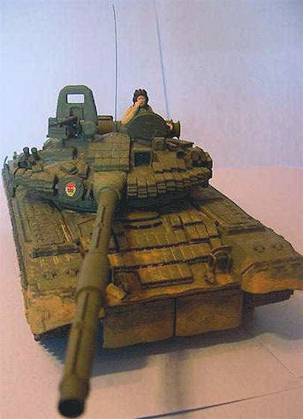 for the tank proved to be both unreliable and far too thirsty. Instead, a conventional diesel engine was upgraded and installed in the engine compartment of the first production machines.
The T-80, as the new vehicle was called, also became the first Russian tank with a integrated thermal sight providing major improvements in fire control. The different auto loader and room for gas turbine engine implied the T-80 being slightly larger than the T-72.
Ever since the World War II and the introduction of HEAT warheads, tanks have had a hard time. Decades were spent on perfecting these weapons for tank-fighting aeroplanes, helicopters, APCs’ and even personnel-carried anti-tank weapons .
Obviously the Russians were seriously concerned by the growing record of Soviet-made tanks being wrecked by anti-tank weapons in various conflicts around the world. A radical solution introduced on T-80 was a new kind of additional armour, invented in Norway and first used by Israel – Explosive Reactive Armour (nowadays just being called Reactive Armour). When a HEAT warhead detonates against an ERA block, the energy sets off the explosives packed inside the block. Thus the incoming jet beam has to conquer the additional energy of the explosion. The jet is disrupted and weakened so that it can no longer burn through the armour of the vehicle.
As the ERA provided such efficient protection it was more or less a godsend. It effectively made impossible – or at least very hard – for the infantry to knock out tanks with HEAT weapons. However, the collapse of the Soviet Union brought the full-scale service upgrade program to a halt.´Today only the most modern tank units are believed to be equipped with full array of ERA.
The Kit
The T-80 is quite similar in appearance to the T-72 with some distinguishable features like side skirts and turret-mounted grenade launchers. I liked the extra ”mean” look that the ERA boxes gave to the vehicle.
If you wish to build a modern Russian AFV like the T-80 you don’t have much of a choice. Dragon is the only one of the established manufactures who have a number of Soviet/Russian AFVs in their inventory.
Turret
This kit is made up of 262 parts and after building it, I’m convinced that about 250 of these goes on to the turret.
I started by painting the inside of the turret matt black since it makes the lack of interior less apparent. When you glue the turret halves together a join line will appear at the turret’s back. It should be sanded down once the glue has set. You shouldn’t attach part A64, it is better to leave it off and keep the commander’s cupola loose. Both the gunner’s and commander’s hatches are supposed to be workable but the configuration of the commander’s is so cramped that it wouldn’t work. As it also lacks interior I decided to fix it in the closed position. Even if the inside of the gunner’s hatch is wrong I kept it workable since I intend to add a crew figure in the future.
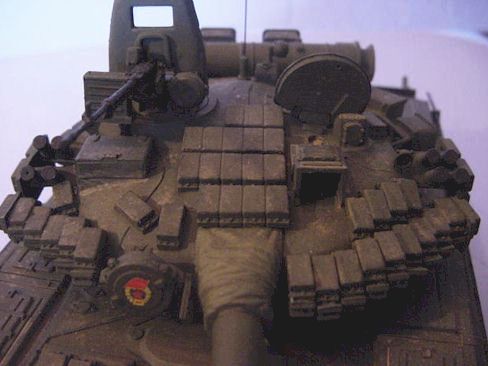
The most tricky part of the model is the turret ERA. The bricks that go on the turret’s roof went on easily. Then there were the wedge-shaped ERA rows on the front part of the turret – and these require some tedious twiddling to get right . The reason for this is that the inner pairs are made up of individual bricks while the outer pairs are moulded together. While the inner pairs are mounted on angled supports, the outer pairs have none so that they must be attached to the inner ones. During this tricky assembly I managed to sandwich the parts together resulting in less than perfect alignment. In retrospect I should have split the outer pairs and install them individually.
Installing the smoke dischargers was just as difficult, setting all dischargers at just the right angle proved to be more or less impossible – well, at least for me. My only advice is to keep an eye on the dischargers while the glue sets.
Thereafter I went on to install part E3 (more ERA blocks) when I discovered that it came too close to the dischargers and that the part would not fit. I remedied the problem by splitting the part in individual bricks and then rearranging them. Like in the domino effect, the cover for the laser range finder (piece A13) wouldn’t fit now either. I thinned the side of the cover and forced the piece into place. You can see in the pictures just how tight the fit really is.
The main gun demands a lot of attention since the barrel and dust sleeve aren’t moulded in one piece – in fact, there are 5 different pieces making the gun assembly. To make things even more difficult, there is only a tiny location pin which doesn’t offer proper support for the barrel. The same problem occurs when attaching the gun to the turret, the support is non-existent. I glued a piece of sheet plastic to the lip of the gun mount (piece B1) to strenghten the joint and help align the barrel.
Finally, the last cluster of ERA (E4) was to be attached. Once again the kit surprised me. The piece balanced upon the dust sleeve and looked like anything but a row of ERA. I shaved off the location pins and used some scrap plastic to fill up the gap behind the dust sleeve. After that the parts fit correctly.
Next was the main searchlight and yet again the 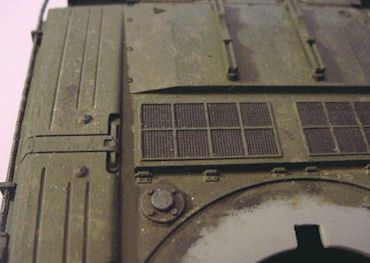 turret ERA caused trouble, overlapping the inteded position of the light. I had to make a new location hole closer to the centre.
Same thing happened when I tried to attach the snorkel container. A box (pieces A12, A19) residing on the rear basket fouled the snorkel. I removed the entire basket, installed the snorkel and reattached the basket.
The NSVT AA machine gun contained in the kit could have been more detailed – but considering the other problems already encountered I decided to use it anyway. The commander’s cupola includes a winter manoeuvre screen which is rather nice but it wouldn’t accept the machine gun. The machine gun handle (piece A46) had to be repositioned in order to install the machine gun. Needless to say, at this point I began wondering if there were any parts in this kit that would fit as intended…
The Hull
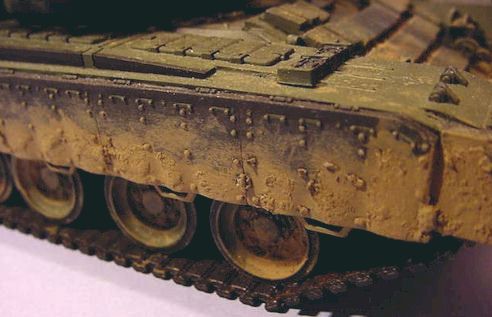
When assembling the lower hull I saw little use in attaching the return rollers as this part of the running gear is covered by the side skirts. The rollers went to the spares box.
All the road wheels had prominent moulding lines on the rubber rims, but nothing that couldn’t be remedied by some gentle sanding. Also the drive sprockets demanded some clean up work since the mouldings were a bit on a heavy side.
The location pins proved to be worthless and both drive sprockets became slightly off-line. Also did the idler wheels end up somewhat missaligned. I think it’s best to shave of all the location pins and just glue the parts together free-hand.
Fit problems continued with the running gear assembly. Either the drive sprockets of the kit were too narrow or the tracks too wide – anyway, the tracks wouldn’t fit on the drive sprockets. In order to make them fit I had to sand and cut each part, a process which included use of some bad language. It took me two days to wrap the tracks around the drive sprockets.
After the tracks were laid around the sporeckets there couldn’t possibly be any more problems with the rest of the running gear, could there? Yes, there were! The mountings for the idler wheels and drive sprockets were too short which cause the tracks to come to close to the hull. I solved it by using brute force coupled with a ton of glue but the configuration still looks somewhat twisted when viewed from front. This finally completed the track assembly. As I mentioned earlier I left out the top run of the tracks since they aren’t visible on the completed model.
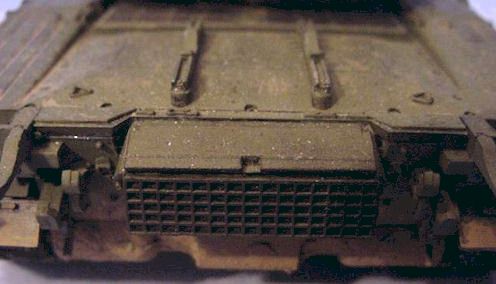
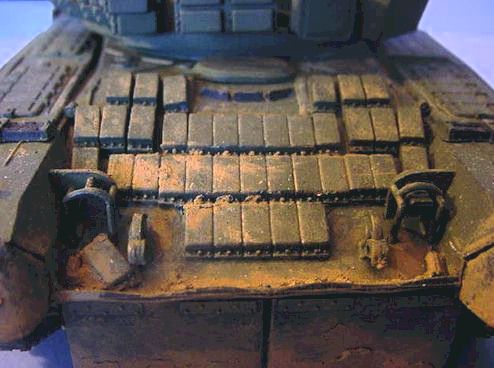
The upper hull proved to be the most painless part of the construction. I had to cut off the location pins at parts C9 (two of them) to get at decent fit. At first I couldn’t decide how to mount part C10 but after guessing that it is part of the dust suppressing flaps beneath the front I attached it at a high angle.
Finally I just had to glue the main subassemblies together into a complete model and admire the result.
Painting the Model
I painted and weathered my model using Humbrol enamels. The excessive mud stains were created with Italeri putty stippled with a old brush.
The single crew figure comes from Tamiya T-72 kit.
Even if it the Dragon kit was quite difficult kit to build with numerous frustrating fit problems, the end result captures the look of a T-80. If you carefully dry-fit everyting prior to assembly, and take special care when arranging and attaching the turret ERA blocks you won’t be disappointed.
Still, if Tamiya just for once could release a kit of modern Russian MBT we would have some competition in this subject area.
This article was originally published in IPMS Stockholm Magazine in May 2001.
