From Model to Kit
by Ricardo Dacoba

Long-time readers may recall my earlier article on the sole Argentinean jet fighter project, the Pulqui (see Camouflage & Markings: Pulqui – Argentina’s Jet Adventure – Ed.). I always wanted to have a model of Pulqui II in my collection. T thought it was both a graceful and significant airplane, developed by Kurt Tank and his team out of the experience of the final years of World War II.
There was no available kit of the Pulqui II. The only effort in the area was a 1/72 resin kit of a IAe. 27 Pulqui I released some years ago in resin by Czech company Alliance. But mid you, Pulqui I and II were completely different aircraft. The former was an unsuccessful airframe designed by Dewoitine, and only after its failure did prof. Tank get involved in developing a completely new airframe.
Scratchbuild or wait
Given the impossibility to buy a ready-made kit, I made the decision to build my model from scratch. Planning the project, I also decided to make parts reproducible with perspective of issuing a resin kit of it at a later stage.

An interesting comparison of pre-assembled master components for my Pulqui II and the Ta 183 show just how close these two airplanes were in configuration.
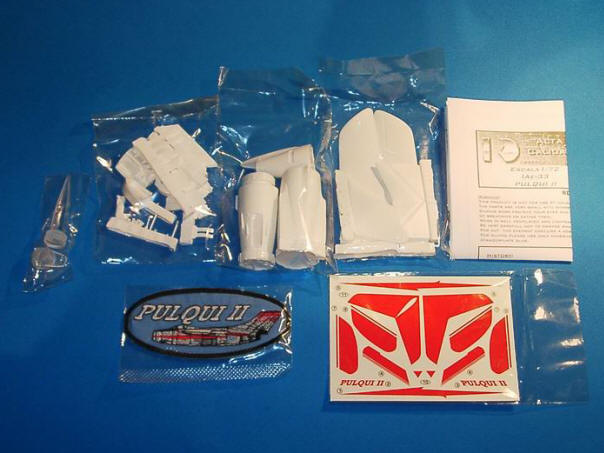
The task of making the model from the ground up took about four months, which was pretty fast considering the 40 master parts that had to be developed and then cast. The references on the aircraft are scarce. In particular, I could not find any reliable drawings of the Pulqui II, so I had to work the shapes out of the many pictures of the airplane that I fortunately took in the Aeronautical Museum of Moron.
The resulting item was a kit made completely in white epoxy resin. Even the cockpit transparency is cast in transparent resin.
For assembly of the kit, superglue was used throughout.
Painting and finishing

The purpose of using white rather than coloured resin to cast the airframe components wa
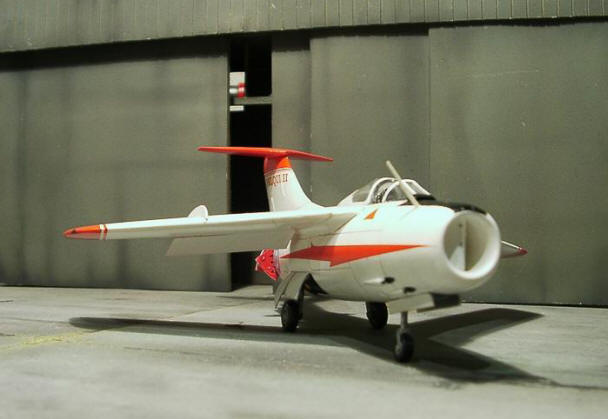
s to achieve parts with colour well suited for covering with the projected paint finish, which in this case is glossy white. It has been applied with airbrush and left to dry thoroughly – 24 hours minimum.
Designing the decals for this model I included all the red trims on the sheet. However, I finally decided to paint them on the model. It required a lo
t of masking, but painted markings will always look that bit better on large surfaces such as these. I used Tamiya X-7 for the trims. The flaps and airbrakes were also painted in red.
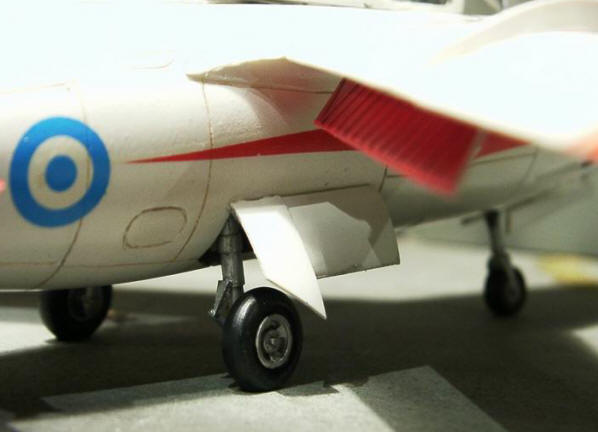
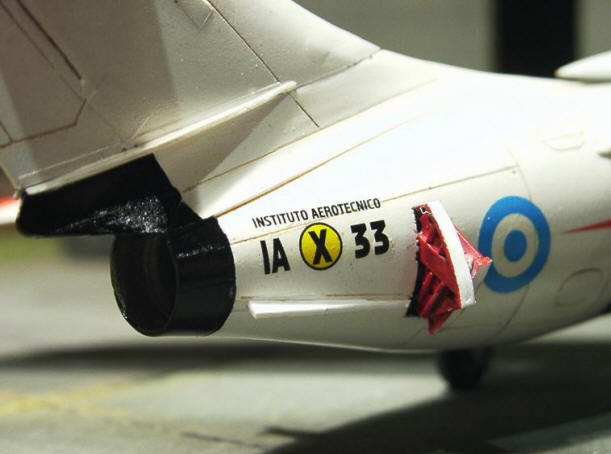
A final colour accents were the black anti-glare panel in front of the windshield and the exhaust pipe of the engine. The undercarriage wells and legs were painted in aluminium colour.

With the basic paint scheme completed, all panel lines were enhanced by a wash of dark brown watercolour, applied with fine brush. After that the remaining decals were applied. The white areas of the roundels etc. on the decals were printed as transparent, so that the underlying white colour and the panel lines would show through. When all the markings were in place, the model was given a final coat of gloss varnish. All that remained was attaching the canopy and undercarriage.
I’m glad to have made this model. It resides now in my display cabinet next to a Ta 183 and MIG 15, an undeniable proof of the family resemblance.
And another source of satisfaction is the RD Resin’s first full kit!


References
- IAI Dagger & Finger, Colección Fuerza Aérea Argentina Nº1, Jorge Núñez Padín.
- Halcones Sobre Malvinas, Ediciones del Cruzamante, Cáp. Pablo Marcos Carballo.
- Argentine Air Forces in the Falklands Conflict, Warbirds Illustrated No. 45, Salvador Mafé Huertas & Jesús Romero Briasco.
This article was originally published in IPMS Stockholms Magazine in December 2004.