Building an Italeri F4U-7 in 1/72nd scale
by Martin Waligorski
If one can talk about trends in aircraft modelling, one of the currently popular subjects is the aircraft of immediate post-war period. New kits of Meteors, Skyraiders and very-late mark Spitfires seem now to be almost as popular as Messerschmitts, Mustangs and Focke-Wulfs.
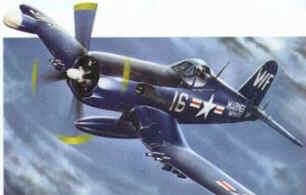
When Italeri produced a new tooling for a F4U Corsair, they chose, very trendy, to include only the post-war developments of this gull-wing Goliath. Two kits have been released in 1995, a F4U-5/N night fighter of Korean war period, and an ultimate ”French” version, a F4U-7.
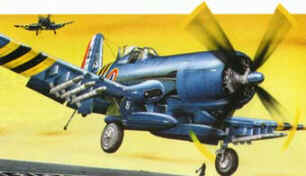
My usual subjects are pre-1945 aircraft, but when I saw a box art of the U-7 kit, I couldn’t resist the attractive paint scheme of the French Naval Air Force. A quick look inside the package convinced me even more, as did the low price, so I bought the kit, brought it home, and started the construction the same evening!
First impression
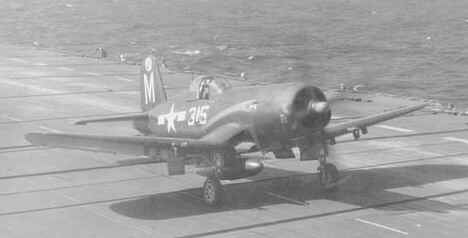
When I looked closer at the kit instructions, I realized that the box label is very misleading. It tells you that the kit represents a F4U-7, and it can be finished as a French navy machine, or in American colors of VMA-323 from Korean war period. This is not right. The U-7, last production version of the Corsair, was produced for and flown by the French exclusively. The American machine is, in fact, an AU-1 Corsair, a ground support version, differing from the U-7 by having a more powerful engine with different cowling. The optional parts are provided to build a correct AU-1, so don’t let yourself be fooled by the box label if you are more interested in American than French aircraft!
Other than that, the kit features two dark blue and one transparent sprue. Optional parts are provided for different cowling versions. Many parts are identical with the F4U-5/N kit. The most prominent features are:
- recessed panel lines, not very sharp, but really good compared with other Italeri kits.
- cockpit interior with a decent seat, instrument panel, side panels and floor.
- two-piece canopy, but without an easy possibility to model it in open position.
- very nicely detailed undercarriage legs, wheels, covers and wells. The wells quite shallow, though.
- the engine rendered as front row of cylinders only.
- lots of extras like drop tanks and rocket missiles.
- nicely moulded small parts like arrester hook, antennas, exhaust pipes and gun barrels.
Does it sound promising to you? Let’s start with a construction!
Cockpit and fuselage
The construction starts traditionally from the cockpit. The kit provides a nice seat, detailed floor and stick. The instrument panel and side control panels have nicely moulded raised detail. All this look quite nice when painted. Adding seat harness completed a generally good impression of detail. Another easy thing to improve is a protruding gun sight, which is molded in solid plastic. I shaved it off and glued a small piece of transparent plastic card on top of it.
The instruction tells you to paint an instrument panel in Zinc Chromate. I believe that the correct color would be black. Please not also that there were quite many color-coded buttons, switches and grips in the cockpit. Painting them will improve the model further.
Before glueing the fuselage halves together, you need to place an engine rear bulkhead (part 7A) inside one fuselage half. Be careful: there is no positive location for this part, the picture in the instruction is unclear, and you can end up with an engine protruding unnaturally from the cowling! The engine should end flush with the cowling ring. Dry-fit everything carefully and you won’t make the mistake that I made.
The engine is fairly well detailed, but consists of only the first rows of cylinders. That simplification is not very noticeable on the finished kit. Again, the instructions tell you that the engine crankcase cover should be painted steel. I painted mine in gloss grey, and I think I’m closer to the truth.
The canopy turned out to be quite thick, effectively distorting the view of everything extra you might have done in the cockpit. I treated mine with a coat of Future Floor Wax and it improved the view enough for my taste, but if you care more than I, you might consider replacing the canopy with a aftermarket item, or moulding one yourself. This would have an additional benefit of being able to place it in open position.
Wings and tailplane
Dry-fit of the wing halves revealed that the trailing edge is very thick. Fixing it could be more tricky than you think. The upper wing surface as it comes fits perfectly to the slot in the fuselage. Thin the wing down, and you would get an unpleasant gap. I recommend that you thing the wing trailing edge very carefully, from the inside, and leave it slightly thicker just at the wing roots. Dry-fitting is a keyword.
The assembled wings fit well to the fuselage. Filler is required only at the bottom centerplane-to-fuselage joint – the only moment during the entire construction when I needed any filler.
At the beginning I was disturbed by the shallow wheel wells, but I can assure you, these are not visible on the finished model.
The horisontal tail slips into position easily, and the parts breakdown makes it impossible to accidentaly swap the left and right stabilizer.
Undercarriage
The undercarriage is beautifully detailed, comprising no less than five components for every main leg, and wheel well covers with detailed interior faces. The fit is good, and there is not need for complicated adjustment. Only front undercarriage covers (parts 21B and 30B) are too long and need shortening at the upper edge.
Again, I was confused about the color instructions. Where the wheel wells really painted Zinc Chromate on the inside? I checked with a few color photos of Korean Corsairs that I have, and I am quite convinced that the inner faces of wheel covers where painted in a dark color, probably the same dark blue as the rest of the aircraft. The tail hook and the complicated struts of the tail wheel where for sure painted dark blue (the instruction would have you paint them in silver). I used dark blue on my model. Maybe someone else can confirm this?
This photo of the F4U-5 shows the correct position of underwing tank – see text below
Final details
The underwing stores are, unfortunately, full of problems. Drop tank fairings (parts 43A and 44A) are supposed to be glued to the wing’s bottom surface without help of any locator holes. This is a difficult task considering that the instruction suggests that you place them backwards! Furthermore, the drop tanks themselves have locator stubs that are too long and would result in drop tanks hanging strangely close to the ground. I shaved off locator tabs on my drop tanks and mounted them flush to their fairings.
The kit provides ten underwing pylons with rockets. No problems were encountered with the pylons, but when I begun mounting the rockets, it turned out that their fins where much too big, so that all rockets couldn’t be placed in position. The easy solution would be to leave the pylons empty. I resolved it by spending some extra hours on the rockets, shaving off their fins and replacing them by rectangular pieces of plastic card. This has an additional benefit of obtaining a scale-thin fins, and my model displays an impressive load of armour!
Other small items went on without problems. Nevertheless, I have something to say about many antennas of this aircraft. According to my references, the blade antenna on the fuselage spine (part 46A) is swept back too much – go after the instruction drawings to be on the safe side. Moreover, it seems that Italeri made a mistake in parts numbering. the two T-shaped antennas, part 36A and 37A should be swapped, so that the longer part goes onto the fuselage spine.
Painting and finishing
The French machine that I modelled is a no.20 of the Flotille 15F. I painted my model with a mix of Humbrol and Xtracolor enamels.
I painted my model according to the box art, with yellow-and-black stripes, which gave it a really striking look. Actually if you think that masking off and spraying stripes is too much work for your taste, you might just as well omit them. The stripes where carried only for the short period of time during Suez crisis in November 1956, the French Corsairs where usually dark blue overall.
The kit decals were excellent. Thin, covering even on a dark background, and perfectly in register – what more can I say? Aha – they responded well to decal setting solutions. Full marks, Italeri!
Conclusion
I must say that I really enjoyed building this model. Except for the canopy, it appears to have everything to turn it into a real showpiece, and the paint scheme is both unusual and eye-catching! The finished model certainly captures the powerful look of this giant fighter. For the beginner however, there might be just too much confusion introduced by the faulty instruction sheet.
I recommend this kit to everyone with a little experience in building aircraft models.
This article was originally published in IPMS Stockholm Magazine in December 1997.


