Bang for the Buck, Part VI
by Rafi Ben-Shahar
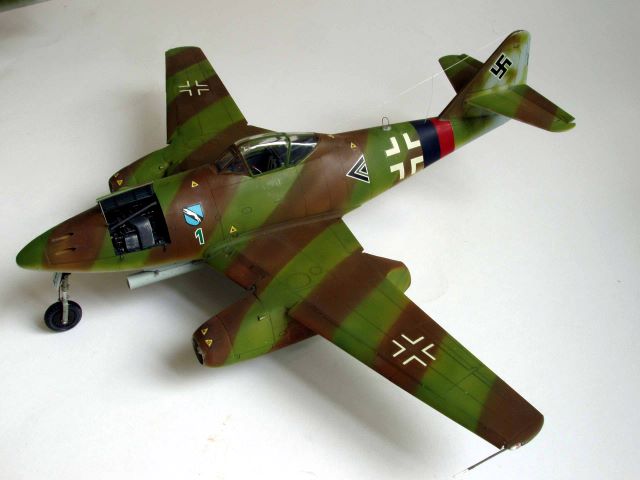
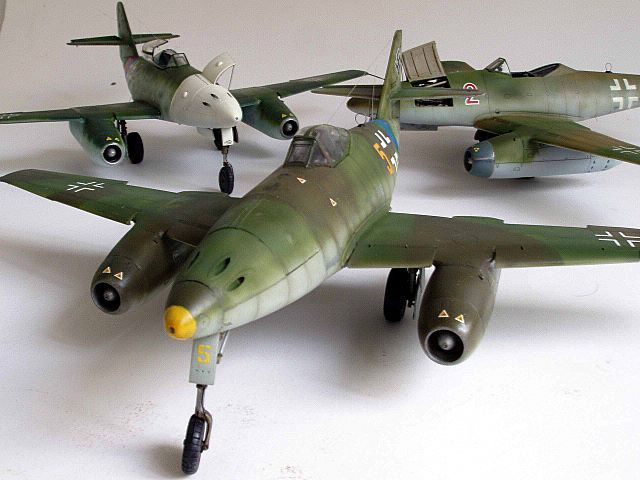
If you are fond of 1/48 scale aircraft modelling, then the ubiquitous Dragon Messerschmitt 262A variants are likely to be familiar to you. Released in the 1990s, Dragon’s kit reigned as the ultimate plastic rendition of the World’s first jet fighter for about ten years. More recently, Tamiya introduced a competitive kit which was better engineered and moulded than Dragon’s offering, but shared the same or lower level of detail. Also, unlike the Dragon kit, Tamiya does not allow for modelling the slats in extended position.
In the modelling marketplace, second-best kits are often being disposed of, and currently it is possible to acquire the Dragon kits for about half or a third of the price of the Tamiya kit.
If you are into exploring the Messerschmitt Me 262A variants, then purchasing the expensive Tamiya kits can put you off from having a really enjoyable experience. On the other hand, Dragon kit provides a much better bang for the buck. The good news is that you would not need to invest more money into aftermarket products other than decals. The bad news is that this kit is among the most complex models that I built in the scale and require an extra amount of patience and skill. You will also probably like to upgrade some of its components to bring it in par with the best of modern kits.
Dragon Me-262 Tweak List
To upgrade the Dragon kit to a level that will surpass the Tamiya kit in accuracy and certainly please the eyes I brought here a few points to consider:
- The vertical tail unit requires considerable sanding to minimize the thick frontal area. In plan view, both Tamiya and Dragon Me 262 are spot on with respect to the real aircraft.
- Many photographs show the elevators in the up position. You would need to cut and reposition these flying surfaces and if you are really into detailing, then drill a hole at the end of the weight balances and add the actuators for the trim tabs.
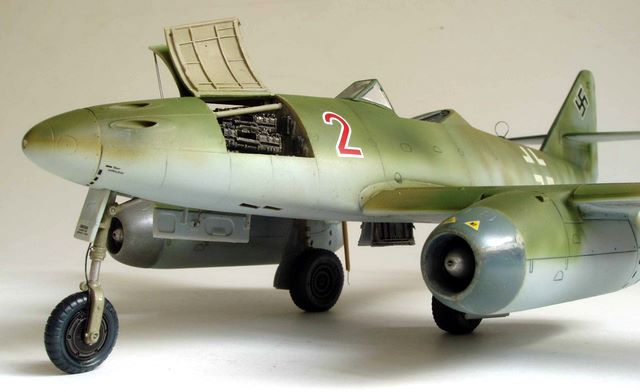
- Canopy should be in the open position to hide the cleavage at the base of the canopy where the hinges are located if your end up with an old mould.
- I cut thin stripes of Tamiya tape to model the paper strips that identify different fuses at the fuse box.
- Instrument panel is relatively poorly represented in comparison with the rest of the cockpit area. Unfortunately, not much can be done about it unless you acquire an aftermarket equivalent.
- It is possible to thin the base of the restraining cable for the canopy, but it won’t be too visible anyway
- Cutting and extending the flaps adds much to the sense of realism, but requires considerable amount of work.
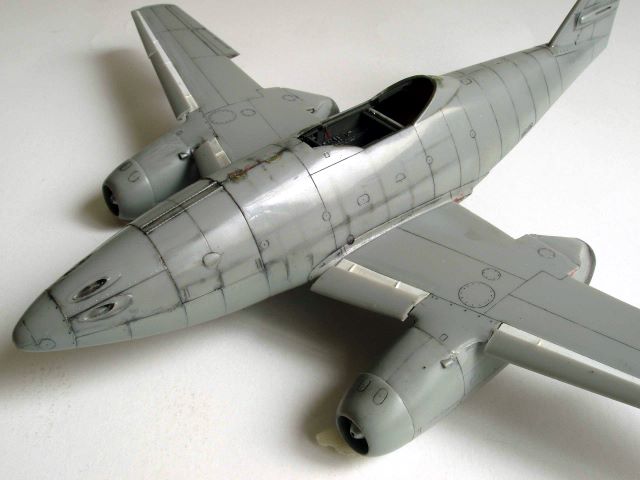
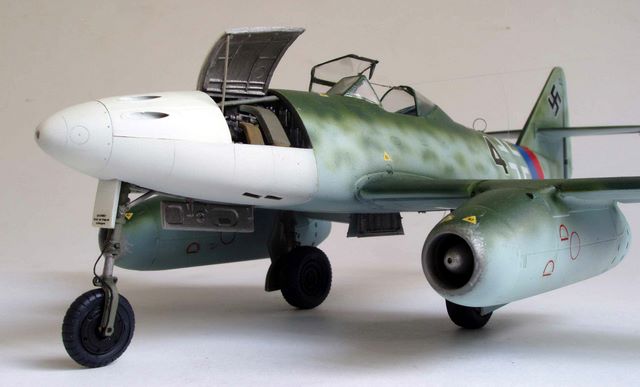
- Cutting and mounting the slats in open position is a must as these aircraft had automatic slats that were in extended position when the aircraft was parked on the ground. After experimenting with all the available aftermarket products, I came into conclusion that scratch building the slats gives the best results.

- Engine nacelles are a chore to attach. Although I developed a method to overcome much of the filling required, I forgive my imperfection on this component and leave the Dragon mark to be.
- Engine intakes have a small and incorrect diameter. I do not see the difference with the correct Tamiya kit as significant.
- The attachment of wings to the fuselage is problematic. I glue a thin plasticard of about 1 mm or less for each upper wing root section. In most cases, the wings snap in position like a Tamiya kit and some filling may be required at the bottom wing fuselage joints depending on the quality of the mould. Watch out not to level the wings beyond the dihedral angle.
- Vinyl tyres are not a problem as many may fear. Out of the 20 such models that I built, only 2-3 had the problem with vinyl eating into styrene plastic. All you need to do in such a case is to separate between the components with a strip of aluminium foil.
- Brake line of the front wheel is a prominent feature and should be added as opposed to the brake lines of the main wheels which were well hidden from view.
Happy Schwalbe modelling!


This article was originally published in IPMS Stockholms Magazine in November 2007