by Anders Nowotny
Helsingborgs Modellbyggarförening, Sweden
The origin of SAAB Safir
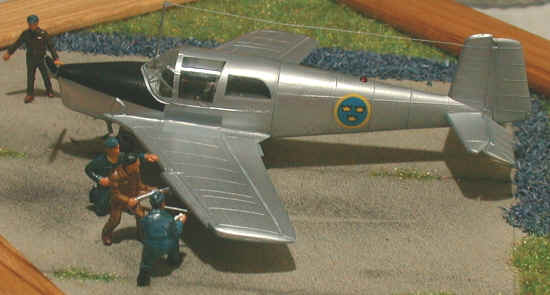
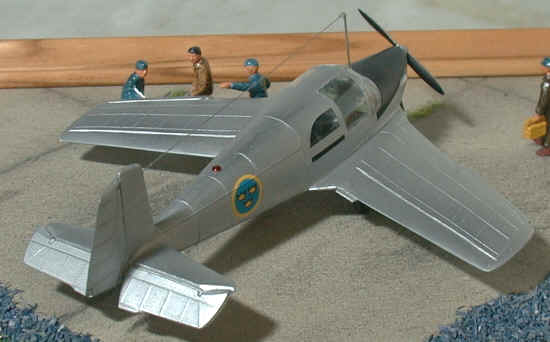
If you have the Heller 1/72 SAAB Safir in stock there is now the possibility to build the experimental aircraft SAAB 201 or a Safir A. This is due to a newly released conversion kit from Broplan of Poland.
Safir A was the first version of this aircraft, built by SAAB in 1945. The major difference from later versions was the engine, a Gipsy Major 1C of 120 hp in the first three aircraft and a Major 10 of 145 hp for the following. The fuselage has due to this a more pointed appearance than the later, Lycoming-powered versions. The canopy differed as well with smaller areas of glazing to the rear of the cabin. There were also a number of different propeller designs, some fixed-pitch with a small spinner and some variable-pitch both with and without spinner. Slightly weaker front landing gear and less elaborate instrumentation are other variations.
SAAB 201
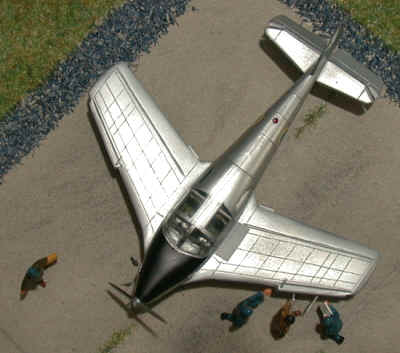 The SAAB 201 was the rebuilt first prototype, 90001, with Swedish civil registration SE-APN. It was used by SAAB for testing the aerodynamics of a scaled-down J29 Flygande Tunnan (Flying Barrel) wing. The tests carried out were mainly concerned with the settings of the slats. All adjustments were done on ground, there were no facilities to alter the slat-settings while airborne. These tests went on for a couple of months during 1947 and 1948 after which the aircraft was rebuilt once more, this time with scaled-down Lansen wings. This time, the model name was changed to 202 and this is also available in kit form from Broplan.
Preparing for the conversion
The kit consists of a pair of vacuum-formed wings, divided into three parts with nicely recessed surface detailing. A clear vacuum-formed canopy, injection-moulded nose in three parts and an exhaust pipe make up the rest of the kit. Documentation is provided in the form of a drawing with colours and markings advice for both the 201 and Safir A. In addition to this, Heller’s SAAB Safir kit, a propeller from Aeroclub (EP001) and a decal sheet with the relevant Swedish markings are needed.
I started with building the 201 but except for the wings, everything in this article is valid for the Safir A as well.
Wings
Starting with the wings, the first operation is to open up the undercarriage wells. The edges are marked in the plastic and I used an old dentists’ drill to open them. All the parts are then scribed and sanded off from their moulding sheets. Of great help is a so called T-al, this is from a series of different-sized aluminium T-beams to which parts can be tacked using tape. The parts are sanded flat on a Sandvik-plate, a metal sanding board. The advantage of this method is that it ensures a thin and straight wing. Care is recommended since it is easy to remove too much plastic.
To strengthen the wing, I attached thin strips of plastic sheet, sized approx. 4×30 mm, into the wing to act as a beam. In order to get some strong points to attach the main gear to, some small pieces of plasticard went into the undercarriage wells to serve as attachment points.
On to the Fuselage
The fuselage can be glued together without the cockpit parts, these can be inserted from below afterwards. The engine covers can also be assembled and sanded smooth now.
On the right side of the engine covers, a small air scoop should be drilled out and the cooling gills should be filled in. The holes in the front need to be adjusted according to drawing. I also inserted a fake engine in the form of a plastic rod with thin wire wrapped around it. Also, I filled every possible space with lead shot to ensure that the finished kit rests properly on its landing gear.
It is quite easy to see where to cut off the original kit nose but it is always clever to leave a small margin for sanding. The cooling gill on the left side is split between the kit fuselage and the new nose but will fit quite well after some adjustments.
The wing fillet has to be removed from the kit fuselage since the 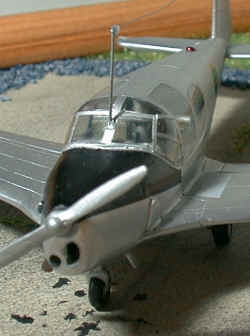 new wings fit directly onto the fuselage. The beacon on the fin must be removed and the one on the fuselage spine should be moved further aft.
Putting it all together
Fuselage and wings fit together very well, simply assemble the wing parts and glue them against the fuselage. Some adjustment may be needed around the left cooling outlet and on the underside of the wing there will be two ”ditches” needing filling. Inside the fuselage, I built a floor from scrap plastic sheet to seal of the wheel-wells. Be careful not to ruin the fit of the cockpit!
The vacuum-formed canopy was nerve wracking! It was incredibly thin but despite of this it was also slightly cloudy. It looks good on the finished model but it took a lot of adjustment even if its shape is not too complicated. Be careful since only one is supplied, which is a great pity. To make the canopy clearer, try using Bare-Metal Plastic Polish, then painting it with clear varnish inside and out. Another alternative is to use the kit canopy with a modified rear part but that one is thick and does not fit too well either. Fixing it in place is rather awkward as well, there is nothing to glue the thin plastic against. My advice is to build a small rim of plastic strip around the edge of the cockpit and then carefully the canopy against it.
Cockpit is in need of detailing, more is seen through the canopy than expected. I used masking tape for seat harness and added some extra levers to the instrument panel. Also, the very prominent support bars behind the seats are needed. Finally, the luggage net that protects the passenger from loose objects in the cabin needs to be added. From a photo in [1], a guesstimation was made on the subject of interior colours. On my model seats are Olive Drab, side walls grey and the instrument panel is a lighter green, all this dry-brushed in a variety of lighter colours.
Exterior finals
Port wing in natural metal finishAfter a final filling and sanding,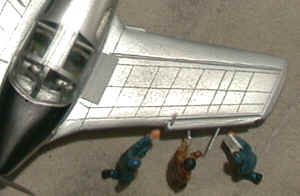 it is time to restore the recessed panel lines. Combining the raised lines of the fuselage with the recessed ones of the wings does not look too bad. Some additional ones need to be scribed as well but these are clearly seen in the drawings of the kit.
After masking off all glazing with Maskol, I sprayed the model with an undercoat of Humbrol 128. Since the aircraft was flown unpainted, it was then given a coat of Testors Metalizer aluminium. A small piece of clear decal was also painted to be used for the thinnest frames of the canopy. Other spots of colour include the black anti-glare panel and grey walkways on the left wing.
Decals consist of Swedish national insignia, diameter 9 mm on the fuselage and 14 mm under the wings. The under wing roundels were cut-off slightly behind the two upper crowns. Under the left wing, there are three black rectangles that probably were some sort of reference marks for photography. On the right hand side of the fuselage, around the rear entrance hatch, a black stripe can be seen. This was probably a tape sealing the hatch.
Now it is time for final assembly. Landing gear, pitot tube, exhaust, beacon on the spine and an aerial mast, drilled through the canopy just at the front edge. The white metal prop was the final thing added, and also the weight that tipped scales so that the aircraft did not become a tail-sitter, talk about minimal margins!
To add some final comments, this was a reasonably simple vacuum formed kit to build and could be recommended to anyone who wants to try a vacuum kit. This is valid with exception for the canopy but, as stated in the article, it is possible to use the one from the kit. As a hint to the manufacturer, an extra canopy would certainly not hurt. A small mistake is the lack of a correct propeller.
Thanks a lot to Ted Burnett who supplied the kit. Any advice and corrections would be happily received by the author.
References :
(mostly Swedish but Midland Counties might stock some of them)
- Saab Safir by Anders Annerfalk, pages 18 and 93
- Flygande Tunnan by Lennart Berns, page 12
- Flyghstorisk Revy No. 27: Saab Tunnan, page 8
This article was originally published in IPMS Stockholm Magazine in October 1998.
