Two Versions of the Sword Curtiss SO3C Seamew in 1/72 Scale
by Peter Ibes (IPMS Netherlands)
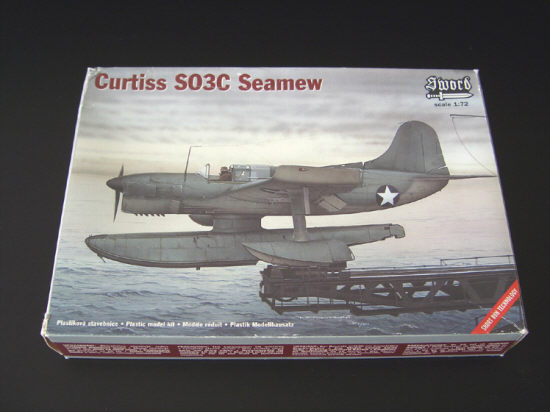
When you talk about lesser known aircraft of World War 2, the Curtiss SO3C Seamew is truly one of them. If it were not for Sword from the Czech Republic it is very doubtful any manufacturer would ever have produced a kit of this aircraft. Anyway, I was very intrigued by the Sword box cover and just had to buy one. And as the kit progressed, was so pleased with the fit and detail of this little little short run kit, that… I bought another one.
A Little Historic Background
The Curtiss SO3C Seamew was a two seat, single-engine scout plane, equipped with a choice of fixed undercarriage or a large centre float with two outrigger floats. The plane was intended as the successor of the Curtiss SOC Seagull biplane for use on the cruisers and battleships of the US Navy. The aircraft was developed to the same specification as the Vought-Sikorsky OS2U Kingfisher and was to be launched by catapult and hoisted back onboard after returning to the ship. Apart from the US Navy, the Seamew was also operated by the US Coast Guard and the British Fleet Air Arm (FAA).
Unfortunately for Curtiss, the Seamew’s newly-developed Ranger air-cooled V12 engine was plagued by the chronic lack of power. Initial impressions of the prototype got even worse when it was discovered that the aircraft was unstable in flight on all axes… To rectify this, production versions received grossly enlarged vertical and horizontal tail surfaces as well as upward-angled wingtips. The new tail looked as if it came from a Curtiss SBC Helldiver bomber. Nevertheless, in spite of all changes and a stronger version of the Ranger engine, the Seamew remained a difficult airplane to fly and quickly gained the nickname “The Reluctant Dragon”.
The service career of the Seamew was only brief. Once in service with the US Navy the airplane was quite often replaced with the one it was supposed to succeed; the antiquated but reliable SOC Seagull biplane. Curtiss redressed the situation later on in the war though, with the development of the single seat, radial-engined Curtiss SC1 Seahawk. This type proved successful and served right into the early 1950s.
A remarkable feature of all Seamews was that they were supplied to the US Navy with a fixed wheel undercarriage. These were replaced by the Navy with EDO-manufactured floats when the need occured.
| Technical data |
Specifications of the SO3C
|
The Kit
The Sword SO3C is a typical Czech short run kit. Most major parts are injection moulded, but the front and rear cockpits and the fixed undercarriage are produced in resin. Seat harnesses, radar antennae, radio mast and a few other small details parts are supplied on an etched metal set, while the clear parts are vacuum-formed.
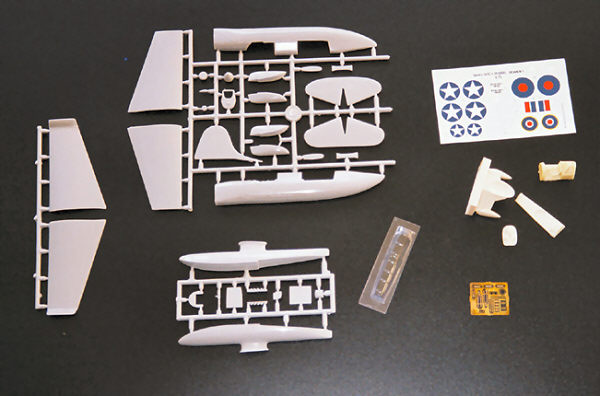
For a short run kit, the fit is excellent; the sprue gates are reasonably thick, there is no flash and the parts are sharply moulded with delicate panel lines. Just a tiny amount of putty was needed to fill gaps on the bent wing tips and the nose. The only disadvantages as far as I’m concerned were the missing bomb racks and the lack of tail hook for carrier use. Furthermore I found that the exhausts were a bit roughly executed.
The Interior
As usual the construction of the Seamew started with the interior. The front cockpit was very easy as it consisted of a single, well detailed resin plug that included a seat, stick, instrument panels, etc. Everything only required some minor sanding to make it fit. I just added a few extra handles and boxes, based on images from Steve Ginter’s book on the SO3C.
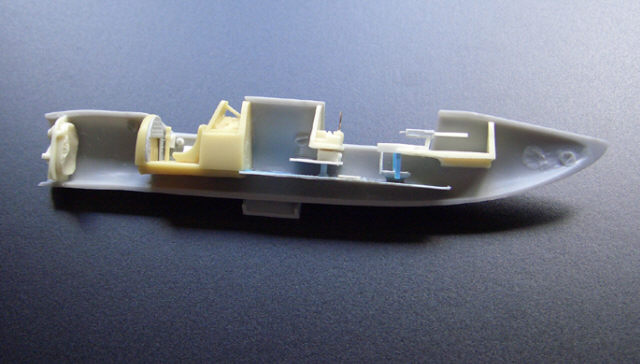
In contrast with the front cockpit, the rear observer cockpit is in dire need of some surgery. Again using the Ginter book as a guide, I removed the front part of the decking and thinned down the remainder rear to a more realistic thickness. Under the radio box I created an extra shelve and radio box as well as a new floor from sheet styrene. I also added some further detail to the observer position with styrene strips and a ring made from Evergreen tube, on which I placed the 0.50 gun.
With all the additional parts in place, I painted everything Interior Green (Humbrol H102), with the instrument panel and various boxes in black (H33). For the 0.50 and the engine front I used my own ‘metalizer’ mix of black and silver. After allowing the paint to dry, the various details were highlighted by dry brushing with silver. As a final touch the etched seatbelts from the kit were painted and added.
The fuselage halves could now be joined, and the tail surfaces and engine cover attached. The last one needed a tiny bit of filler to fit properly. Then the vacuum-formed clear cockpit parts were cut out using a sharp blade, trimmed to fit and glued in place with white glue. This kind of glue helps to fill any gaps that might occur without any risk of fogging the clear parts.
With the fuselage complete, my attention turned to the wings. The various parts were well moulded, even with a realistically thin trailing edge. Fit proved good as well, with only a tiny amount of filler needed at the wingtip joint. I added more detail in the shape of little extensions for the navigation lights from Evergreen rod, substituted the pitot tube with one from the spares box and added bomb racks from the same source. The wings were now complete and could be attached to the fuselage.
Wheels or Floats?
Next came the difficult choice whether to build the float plane or the wheeled version of the Seamew. As mentioned previously, I couldn’t make up my mind so I decided to buy another one and do both in two very different paint schemes.
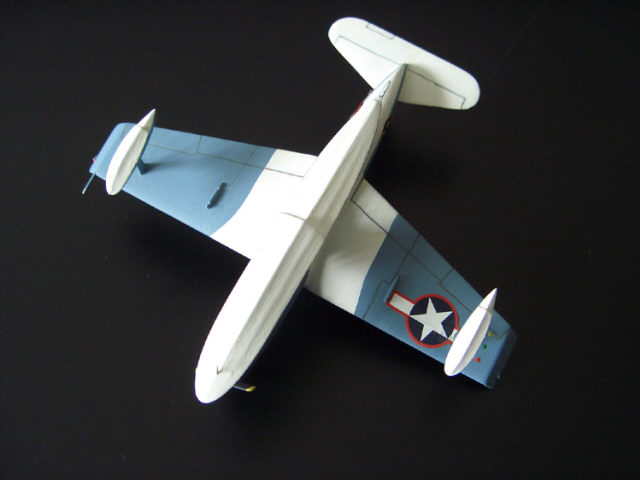
The floats were injection-moulded parts and after gluing and a light sanding of the joints could be attached to the fuselage and wings using normal plastic cement. The only addition here was the hook for the recovery sled on the central float.
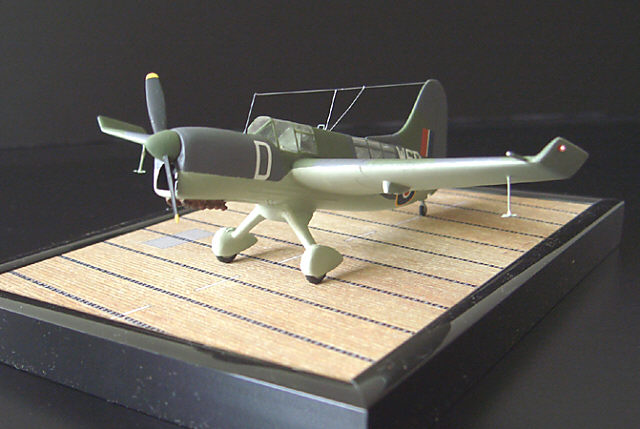
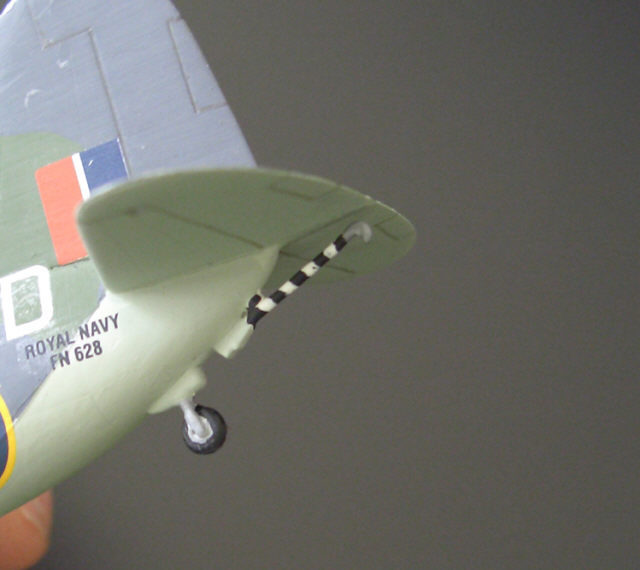
The main wheels, spats and struts for the land version were cast as a single resin piece. This made lining up the undercarriage really easy. Added details here were a few strips of stretched sprue to represent the steps on the top of the spats. The tail wheel was injection moulded, but strangely enough Sword forgot to add the tail hook, so this had to be made from rod and thin plastic sheet.
The final assembly stage includes adding all small etch metal exterior parts, such as the antennae, hoist eyes, etc.

Camouflage and Markings
The Sword kit includes decals for two versions. One is an anonymous US Navy float plane in the early war scheme of NS Blue Grey and NS Light Grey, while the other is the land version as supplied under lend-lease to the FAA in standard Royal Navy camouflage.
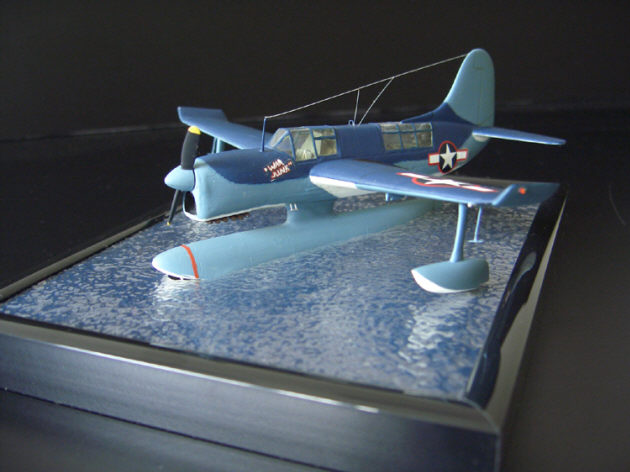
For the float version I opted not to use the kit decals, but instead chose an SO3C of VCS-13, flying from USS Biloxi in October 1943. This airplane was camouflaged in the US Navy tricolour scheme of NS Sea Blue, NS Intermediate Blue and NS Insignia White, with the ‘Stars ‘n Bars’ outlined in red and suitably adorned with the name “War Junk”. I used various Humbrol and Testors paints for the camouflage, while the insignia came from an Eagle Strike decal sheet. “War Junk” was hand painted on a piece of clear decal sheet and then added to the model.
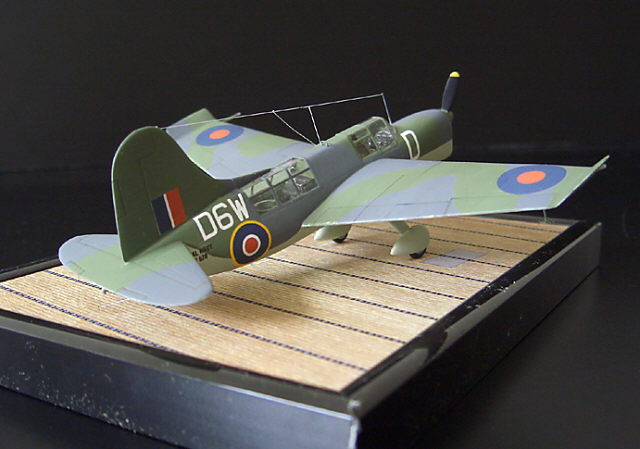
For the landplane the Sword kit includes decals for a machine from 755 Squadron, Fleet Air Arm, in April 1944. This machine had the standard Royal Navy camouflage of the era with Dark Sea Grey and Dark Slate Grey on top and Sky undersides. The tail hook was white with black stripes (or was it black with white stripes?), while the hook itself was painted aluminium. Various Humbrol enamels were used for painting this model.
Both models were coated with Modelmaster Dull Cote, and lightly weathered using a non-waterproof fineliner to accent the various flaps, rudder and hinge lines. This leaves a tiny amount of ink in the panel lines after rinsing off the excess in running water. Exhaust staining was simulated with a thinned mixture of grey, black and brown colours. The final additions to both models were the antenna wires from stretched sprue.
A final word for 1/48 scale modellers: Czech Model from the Czech Republic offers an injection moulded kit with engraved panel lines, resin cockpit, engine face and detail parts and markings for two USN aircraft.

| References |
|
This article was originally published in IPMS Stockholm Magazine in September 2006