Small Scale Aircraft Straight From the Box:
Tamiya 1/72 Focke-Wulf Fw 190D-9
by Anders Isaksson
Background
It was time for a small project that would build fast and let me end up with the satisfaction of actually completing a model. That was the idea and the Tamiya 72nd scale Fw-190D-9 fit perfectly in my plan. I estimate only 10 to 12 hours went into the model… but still this project lasted for about a year.
The kit
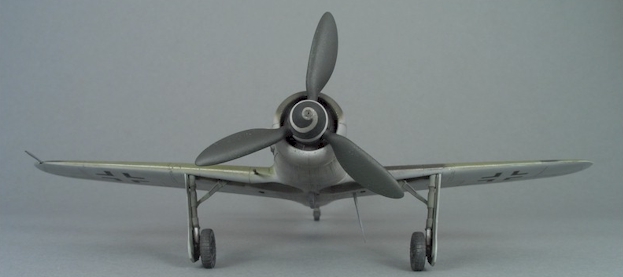
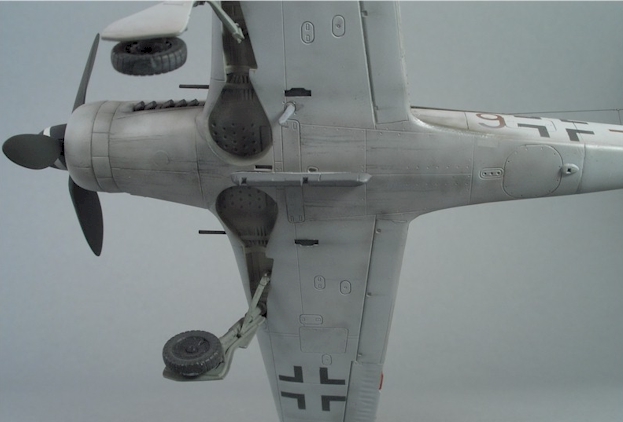
As with all of Tamiya’s 72nd scale kits their D-9 is basically a scaled down copy of the 48th scale kit. This means that the model features the same excellent engineering and fit of parts. Unfortunately this also means the same errors are present. The gun cowling has some shape problems, the belly area, including the arrangement of the shell ejector ports, is wrong and does not include the exposed rear section of the engine inside the wheel wells. Also, the wheels are said to be a bit small in diameter and also the main gear legs are reported to be a tad short. I think the cockpit detail is enough for the scale – but only just enough.
Construction
I built this kit straight from the box. Tamiya kits are well known for their ease of assembly and this kit is no exception. Still, I managed to end up with a few areas needing attention with filler. As usual, this is more of a testament to my poor skills in gluing pieces of plastic rather than a negative comment on the Tamiya kit.
During cockpit assembly I managed to destroy the decal for the instrument panel. After some cursing I choose to hand paint the dials to the best of my ability, which in the end turned out to be less than great. Well, with the fuselage closed up very little of the instrument panel would be visible so I decided to leave the area as is and move on with the project.
The only additions to the basic kit to add a set of seatbelts from Eduards line of colour photoetch, and the single modification made was to exchange the outer section of the underwing antenna with stretched sprue. The antenna wire running between the canopy and tail was made from sections of hair.
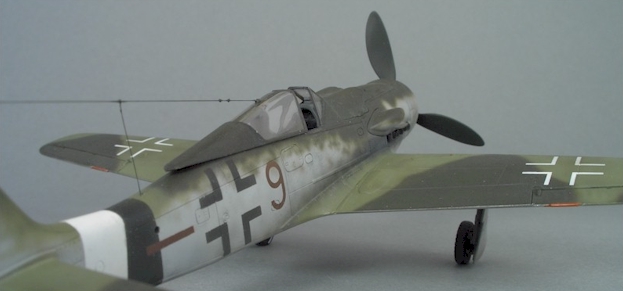
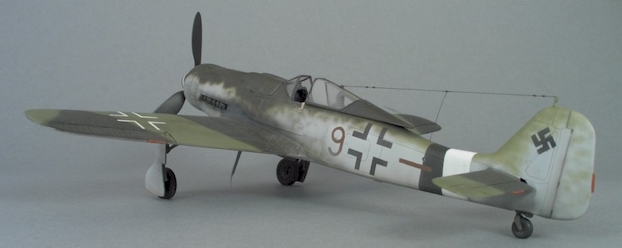
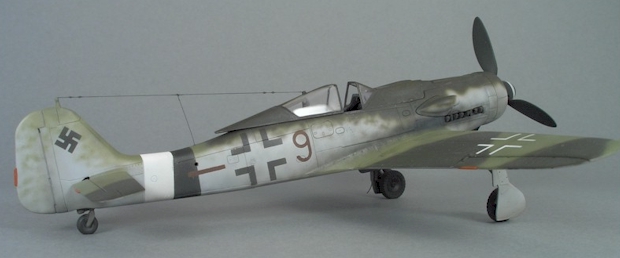
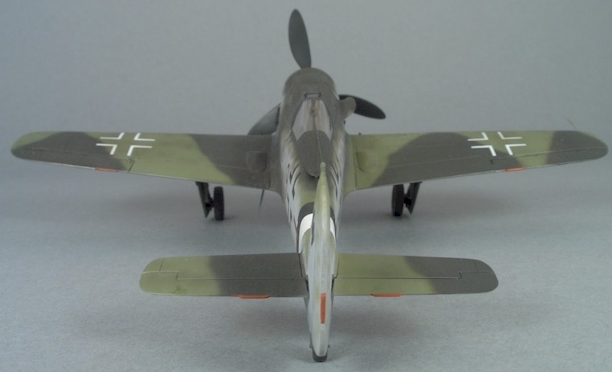
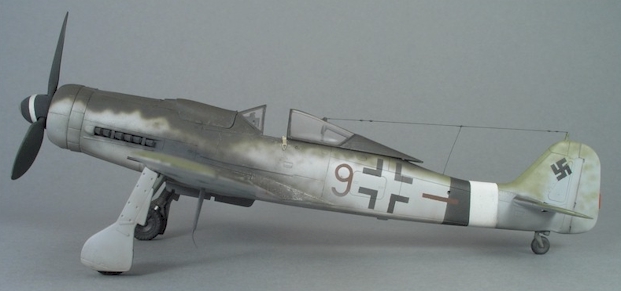
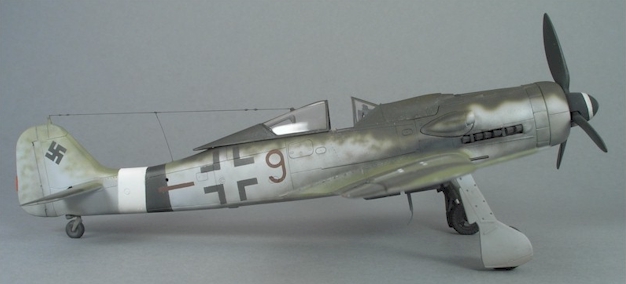
Paint and markings
The assembled airframe was airbrushed with a mix of Tamiya and Gunze Sangyo acrylics in the RLM 82 and 83 over 76 scheme. The landing gear and bays were finished in Tamiyas rendition of RLM 02. As usual the Tamiya decals looked rather thick so I first decided to use set of decals from Aeromaster. However, having a few sets of Eduard paint masks in my possession I finally opted to airbrush the markings. This was a first for me and I must say that the final effect was most satisfactory.
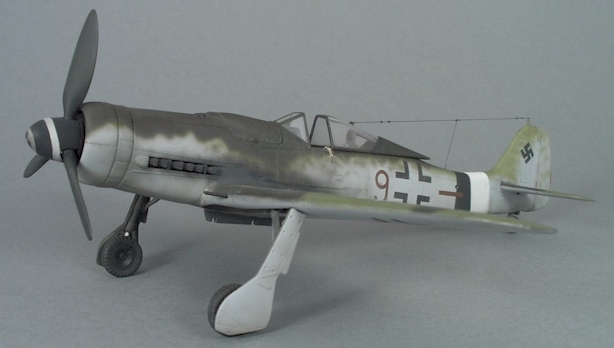
Following the markings for ’Brown 9’ of JG26 I pieced together the major markings from the various mask sets. Everything worked rather well, with the exception of the number ’9’ coming out a little thin. Also, the swastikas turning out looking a bit small and thick. I suspect this happened because the masks were actually designed for the Bf-109, which has a smaller tail fin.
Ever heard of E-Z Mask? If not, give their sets of painting masks a try. I used their stuff for masking the clear parts and I must say they worked wonderful in all aspects. Highly recommended.
Weathering
Using Chris Wauchop’s amazing work as an inspiration I relied on my airbrush for most of the weathering. With a thin mix of black and brown I tried to reproduce general grime and miscoloured surfaces. Repeated applications with a darker mix (more black added) along the fuselage simulated exhaust streaks.
Scuffed and chipped paint was simulated with artist pencils in various light colours like grey, beige and tan as well as pure silver for areas with heavier wear along the wing roots and around the cockpit coamings.
This article was originally published in IPMS stockholm Magazine in January 2006