Building Revell/Monogram 1956 Chevy Nomad
by Niclas Proos
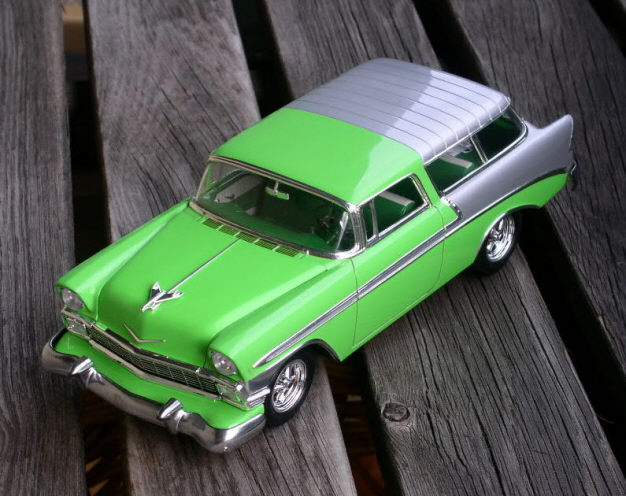
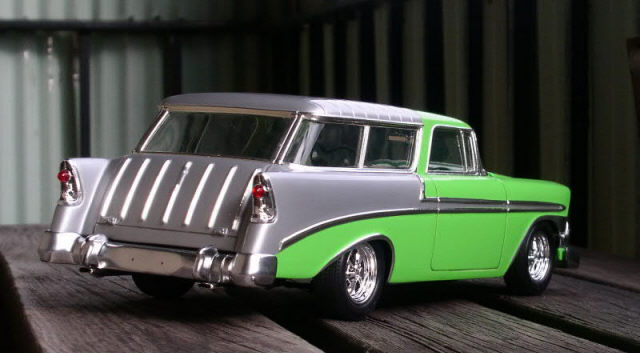
Several years ago I bought a Revell/Monogram 1956 Chevy Nomad at a local toy store. I didn’t have any special feeling for the car at the time, the kit was just cheap and that was sufficient enough to let it follow me home. I placed it ”in the storage” where it eventually became a test object for different paint schemes. Then suddenly I came up with the idea to build and paint it in an odd but almost stock paint scheme. Home from the hobby shop I had a hideous green hue and some silver both from Tamiya’s spray can range and some clear varnish to top it off with. The idea was to keep it on the green side so to speak.
Engine Compartment
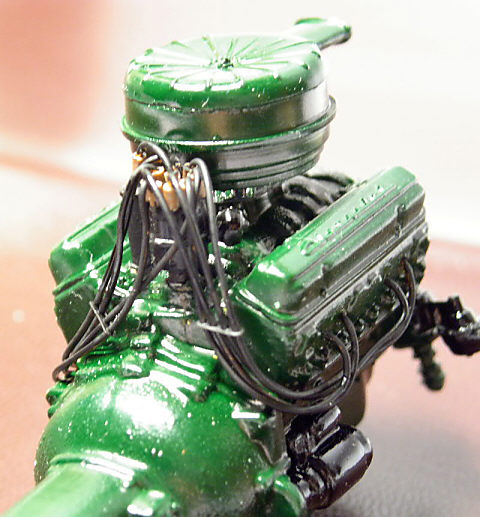
The construction of the model was a walk in the park with no major fit problems, but some built-in inaccuracies that will be described below. Staying with the green theme the engine couldn’t get the original Chevy red. Instead I opted for a more industrious looking dark green. Other then that I kept the car in stock configuration with no modifications whatsoever. I added fuel lines, spark plug wires (in correct firing order) and that was about it. Later on, I also added the engine brake line, washer bottle with hose and battery cables to give the engine room a more busy look.
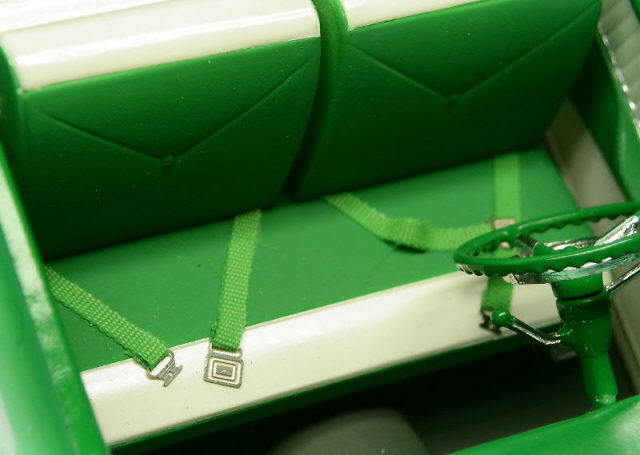
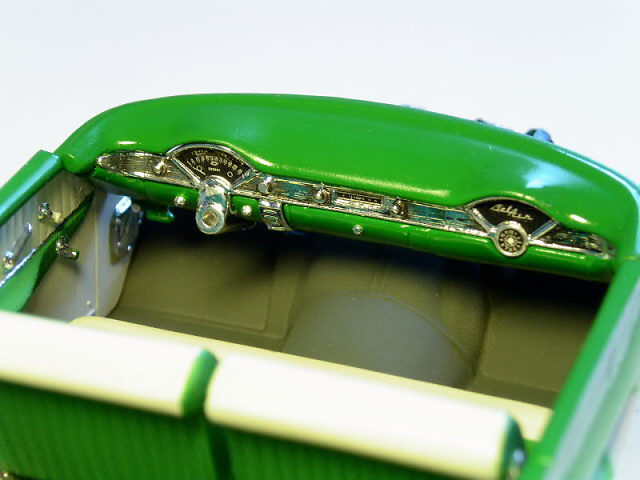
Interior
Moving inside the car the theme continued and I tinted the pale areas with just a hint of green even if the resulting finish looked more grey than green in hue. Other then the collection of everyday items spread around the interior and the seat belts, the interior is box stock, just painted and where appropriate, chrome-plated with Bare Metal Foil (BMF). I’ll tell you more about the gadgets later. The dashboard was finished exactly as it came in the box and I think it looks quite convincing.
The Paint Finish
On with the exterior! There is lots of chrome on these old cars, replicating it with Bare Metal Foil is time consuming-but fun and it really adds to the overall look of the model compared to the silver fox from Humbrol that I grew up with. After some putty and sanding it was ready for the primer, then green and silver. When the surface was smooth enough by my standards the green came on. I usually shake the aerosol cans under lukewarm water to heat the paint a bit which makes it flow far better then if it’s sprayed cold.
A couple of mist coats with approximately 15 minutes between coats, a couple of medium coats with the same drying time and then one or maybe two heavier wet coats and you’re home free with the first step. Because the paint is rather thick at this moment it’s best to let it rest for a couple of days before commencing masking for the silver areas. The same procedure was followed with the silver as with the green. Then the model was left aside for a week or two before proceeding with the clear coats. I found that the Tamiya Clear varnish is best applied after the underlying paint is allowed to harden for a time this long, otherwise it may cause it to crack.
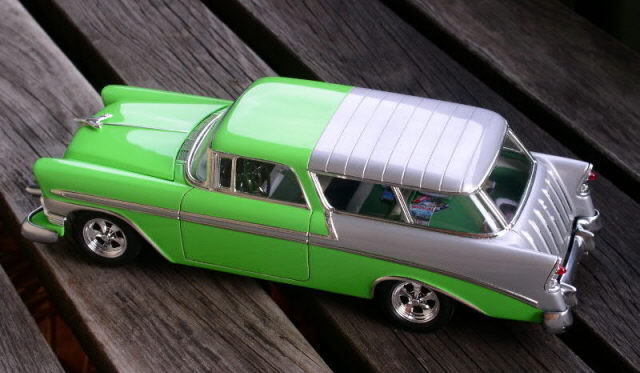
After sufficient drying time it’s time to get dirty and use some elbow grease polishing the whole thing out. I use a Micromesh system but usually I skip some of the steps in it. Start at 3600 and go to maybe 6- or 8000 and then hit it with real automotive polish and wax. That’s about it to get a good-enough shine in the paintwork. When this is done out comes the Bare Metal Foil for all the chrome and after that the glass is put in place and the main body is finished prior to the marriage with the chassis. Speaking of which, the chassis was put together as per kit instructions with the only modification being a lowered front end and some Keystone mags instead of the steelies with hubcaps.
I’m seldom very impressed with the pre-chromed bumpers as they tend to have mould division lines going in all the wrong places. After sanding them smooth I shot some Alclad II base coat on and then a couple of light coats with Alclad Chrome.

Now is the time to tell you about a flaw in the kit, nothing you couldn’t take care of with a minimum of work. But as I had already painted and installed the items it was not that easy. The front pan, the green part between the grill and the front bumper is about 2.5- 3 mm to long and thus making the car look like it has sore lip sticking out. In the back I also encountered problems with the bumper as the side panels of the interior interfered with the side windows making it to sit too shallow. Therefore I have a gap between the tailgate and the bumper that’s not supposed to be there. Maybe I’ll fix both of them but for the time being I’m to pleased to actually have this model finished that I simply put in the display case together with the other siblings.
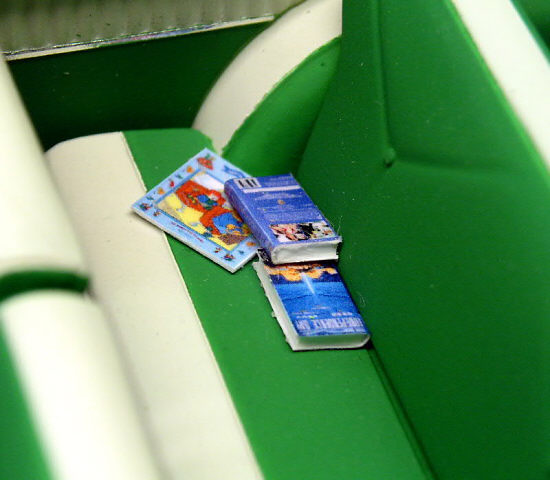
What about the gadgets?
What about the gadgets, you forgot about the gadgets! Well, ok. Here it goes. There really isn’t much to it, a digital camera and some photo editing software (in my case Pagemaker) can do the trick.
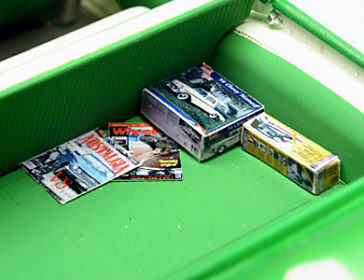
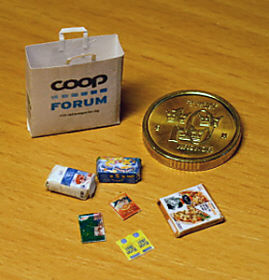
What I do is that I disassemble the box or bag I want to replicate and lay it flat on the floor in a well illuminated spot without shadows. I get up on a chair and try to take as square picture as I can. Back at the computer, crop the picture as narrow as I can in the editing software and then save it. Then you measure the original box, one side will do as Pagemaker will do the rest. Import the picture, scale down the measure and put in that figure in the appropriate axis box. Now I get a percentage of the measure and that is put in the other axis and voilá…. a tiny model box in scale, ready to be printed on whatever paper is needed for the right finish and feeling. Copy it a few times and then on to the next item to create a sheet full with different goodies.
The only drawback is that it’s hard to make really small items as the paper itself is, very scale-thick compared with the original, thus making it hard to fold and glue together. For instance I made some COOP Pizza-boxes but they are so thin that it’s almost impossible to get them to stay together. I have to come up with a solution to that as I really wanted some groceries spread around the luggage compartment. Maybe next time, this one got an empty folded paper bag in the back and that had to do.
Hope you had fun reading this, I sure did have a blast finishing this one after many years in the pile. The car, not me!

This article was originally published in IPMS Stockholm Magazine in October 2006