Building the IAI F-21 Lion
by Mattias Linde
Blending in
With the ulterior motive of denying the opponent in air-to-air 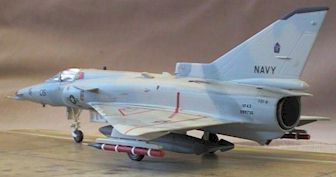 combat the ability to see him, low-visibility color schemes were developed and can now be found on almost any military jet aircraft. Particularly the ones displaying irregular bands of multiple colours with soft edges have a special appeal to me. The 1/72 Italeri F-21A Lion was the perfect choice because of its relative simplicity and because I had not previously built an aircraft kit except when I was a kid. I found the subtly blended bands of Navy bluish-grey colors inspiring.
The real McCoy started its life in 1975 as one of 27 Israeli 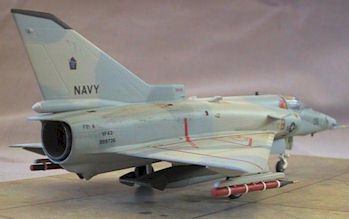 Aircraft Industries C1 Kfir (Lion Cub) of the Israeli Air Force. It was based on the design of the French Dassault Mirage III-5. After the production had been transferred to the C2 standard, with a sharply swept fixed foreplane above the wing-root leading edge, dogtooth extensions to the outer wings and small fences on each side of the nose, all the old C1s were taken out of operational service. 25 of these were then modified to near-C2 standard and delivered to the U.S. to be used in their Aggressor training program (12 leased in 1985-88 by the U.S. Navy and 13 leased in 1987-89 by the U.S. Marine Corps). My model represents a plane based with the VF 43 at the U.S. Navy
n.A.S. OCEANA in 1986.
Construction
Building the model was quite easy with its simple design, 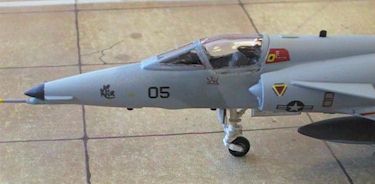 and only a modest amount of filler was needed for the gaps between the different parts. In the middle of the construction, I accidentally dropped the model on the floor and broke off the nose pitot rod, thus having to glue it back in place with superglue. But it was not the last time I had to glue it back on…
Paint and decals
With the construction of the model complete – sans a few 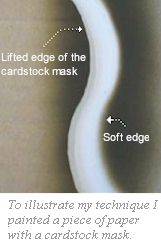 items left off until later – I could start the painting process. I had chosen to try painting with a method called loose masks. When the edge is lifted off the surface just a fraction of an inch, the result is a feathered color boundary.
You can use either cardstock or plain paper for the mask. I used the card stock, however I found it a bit too hard to bend and difficult to get it around all the curvatures of the aircraft. The masks tended to lift away from the surface, so on my next model I will probably use plain paper.
To attach the masks, I used rolled masking tape with the sticky side out to lift the edge of the cardstock. Before I started cutting out the masks, I drew up the camouflage pattern on the unpainted model with a pencil and used it as a guide when cutting. Since the color scheme consists of three shades of paint, I only had to make two sets of masks, one for the palest colour and one for the mid-tone.
Now the aircraft was ready to be painted. First I 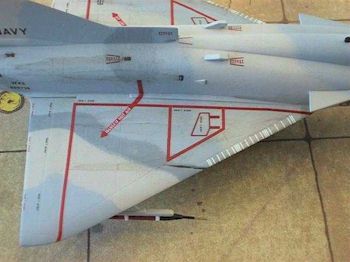 airbrushed the entire model with Gull Grey FS 36440, the palest of the three colors. I used Humbrol enamels thinned with White Spirit. When the paint was completely dry the job came of mounting the first set of cardstock masks over the areas that should remain gull grey. Mounting the masks with rolled tape at the soft edges, the most crucial part of it is to get the right distance to the surface all along the mask, even though it is bent sharply at places to follow the contours of the plane. With the masks in place, I airbrushed the middle colour, Compass Grey FS 36320. Then I repeated the process with the second set of masks and the darkest colour, Medium Grey FS 35237.
Before applying the decals, I airbrushed the entire model with clear gloss varnish. I used Model Master Acrylic mixed with water to get a smooth surface as foundation for the decals. The decals themselves were applied with the help of Microscale Micro Set and Micro Sol decal setting solution. Finally a layer of clear flat varnish was airbrushed over the entire model.
The only thing remaining was to give the model a slight weathering of streaking oil patches for an in-service and slightly worn look.
Conclusions
Painting with loose masks is not that difficult for an average modeler if you only take your time and do not rush. I’m quite happy with my result considering it was my first try to build an aircraft kit, but I feel that I would need a couple of more tries to master the technique.
Considering the pros and cons of this technique it would maybe be easier using paper masks instead of cardstock as I did. On the other hand, the smooth edges produced by it all make up for the difficulties of applying the masks.
This article was originally published in IPMS Stockholm Magazine in August 2000.

