By Andrew Dextras
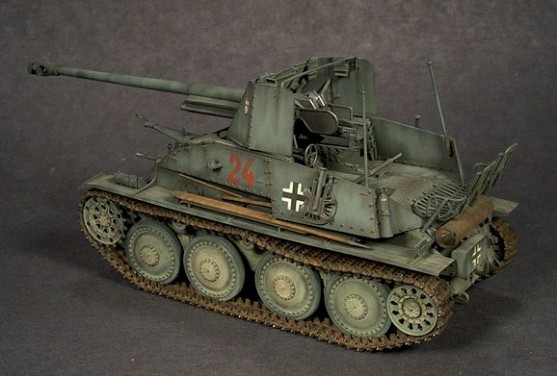
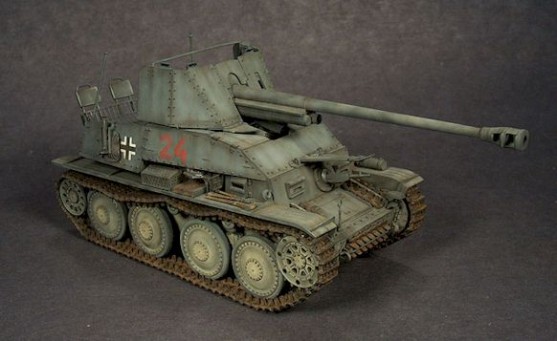
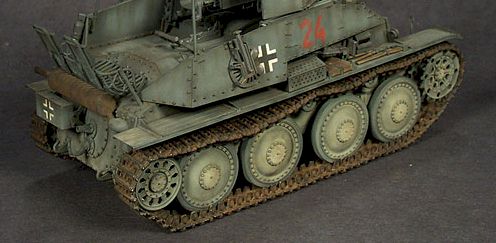
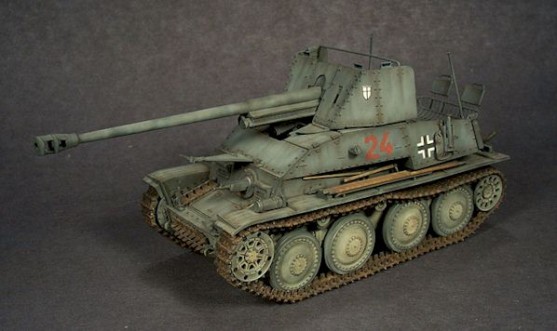
This is my 1/35 Tamiya Marder III with Friul tracks and Jordi Rubio barrel, plus the scratchbuilt fighting compartment cover supports.
Germany’s Waffenamt started development of the Marder series of self-propelled anti-tank guns in late 1941 to increase the mobility of anti-tank weapons by mounting them on a variety of available non-standard and war-weary tank chassis. With the unexpected threat posed by the heavily armoured Soviet T-34 tanks, the Marder was simply another ”interim solution”, called for until more effective and perfected designs could be developed.
The resulting series of vehicles was a real patchwork of technologies, guided by the principle ”use whatever is available”. Marders were based on proven chassis of obsolete tanks, as well as on those of captured French tanks. They were armed not only with the familiar PaK 40 anti-tank guns, but also captured Soviet 76.2mm field guns.
All Marder series vehicles suffered from a rather high profile making them vulnerable in the field. Vehicles were open at the top, and the thin armour could not protect the crew against anything but small-arms fire. But despite these disadvantages, the Marders successfully provided Panzer, Panzergrenadier and Infantry Divisions with mobile and powerful anti-tank weapons.
Despite the makeshift character, a high production number was reached. 2,812 Marders were manufactured from April 1942 to May 1944.
The Tamiya Marder
The Tamiya Marder III (and my model) depicts a Sd.Kfz.139 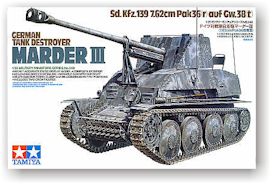
Panzerjäger 38(t) für 7.62cm PaK36(r). This version was based
on the Czech PzKpfw 38(t) tank with its turret removed. 363
vehicles of this variant were produced by BMM between April 1942 and February 1943.
Once in awhile a kit is released that appears to be on everyone’s ”most wanted” list. Released in 2001, Tamiya Marder counts in this category.
Examining the kit, everything that I expected about the quality of the new-mould from Tamiya was there. The five sprues contain some of the finest plastic mouldings and detail your money can buy. The lower hull was a multi-part assembly so that all the rivets could be rendered correctly. The roadwheels are especially nicely detailed and include bolt detail on the rear faces. The kit includes a movable gun and two crew figures. Also included on the sprues are some detail parts like multi-part crew seats and spare ammunition rounds.
The assembly went very quickly and I didn’t 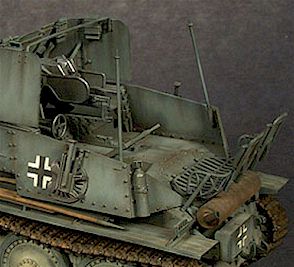 encounter any problems, count on that! However, even the best injection armour kit can still benefit from a replacement gun barrel and tracks. This is what I did, picking the new individual link tracks from Friul Model and the turned metal gun barrel from Jordi Rubio.
The gun compartment was sufficiently detailed in the kit, containing things like the main gun plate, gun supports, ammunition racks, but I also added scratch-built supports for the tarpaulin cover for that final touch.
Painting
For paining of my models I rely on airbrushing. I find that you cannot beat the sprayability, quick drying time and easy cleanup of acrylic model paint. For my Marder I used Tamiya acrylics, which in my opinion are one of the more hassle-free, occasionally I also use Gunze Sangyo. However, I prefer Humbrol enamels for brush-painting of details such as tools and handles.
For airbrush work I generally thin my paints to a ratio of 60% thinner to 40% paint.
Painting began with a pre-shade coat of black. The pre-shade coat does not need to be very thick, just enough to cover the model.
The next step was to apply the base coat of dark grey for the model. I let the paint build up in very light coats and let a bit of the black pre-shade coat show through to give the depth to the finish.
As a matter of principle, I try to not use decals on my models so I airbrushed the markings using Eduard’s Express masks.
I keep changing my finishing techniques quite a bit and am constantly looking for ways to improve my weathering. I have gotten away from the standard dry-brushed look in my last few models, including this one, and I am trying to fool around with more metallic shades to show wear. For my Marder I opted for a post-shading technique using Tamiya acrylics. Some pastel dust was also used for streaks.
I have never used a clear coat on any of my models. It may give you some added protection in some cases, but dull coat ”flattens” the appearance of the model, is a tricky thing to apply and has been known to ruin a few models so I don’t take the chance if I don’t have to. Having painted the markings or using dry transfers, you shouldn’t have to dull coat the model.
Conclusion
This project was one of those which were both quick and very very enjoyable. This kit is one of those where you just need to add glue and shake the box, and while some modellers may argue that the child’s play construction takes the fun out of modelling, I do not quite agree. This kit allows you to put all the more effort where your skills are needed most – in painting and the realistic finish. Keep them coming, Tamiya.
This article was originally published in IPMS Stockholm Magazine in August 2002.
