Tech Tips
by Magnus Fridsell
As your aircraft modelling skills improve, you will probably sooner or later feel the urge to produce your own cockpit canopies. Those included in the kits are usually injection-moulded and in a state-of-the art modern kit it often means good enough. However, once you start to add your own detailing work inside the cockpit or want an open canopy, you may soon notice that the thickness of the injection-moulding make the canopy look out of scale, and distorts the view of what’s inside. This is especially true if you are building an older or a short-run kit with injected canopy. And there might be other reasons as well, sometimes the canopy doesn’t fit or is of wrong shape!
Canopies moulded from sheet plastic have advantages: they can be made perfectly clear and do not create a notable distortion so typical of their injection-moulded counterparts. They can also be made a lot thinner making it easier to depict a sliding canopy like that of a Hurricane or a P-40.
I have recently made a canopy mould for the J 22 fighter in 1/72. To aid those attempting a home made canopy for the first time, here is a step by step illustrated guide to the simple vacuum forming method I use. It might look complicated and time consuming but it actually isn’t that bad. And considering the alternatives, it might be time well spent!
Looking for a suitable material
During my career as a modeller I have heard many ”fantastic” tips about using household items like salad container lids, packaging blisters for windscreen wipers and so on. Those should supposedly be perfect for moulding canopies. I mean, they have even been made using vac-forming in the first instance, right? My first advice is – forget about these. These items are made of PVC plastic, which is suitable for industrial moulding machines, but not household use. The problem with these plastics are usually that they have a very small temperature span where they can be heat formed, below that span they are too stiff, above that span they get burned and brownish or simply liquid. When you heat them nothing happens, then in a split of a second you suddenly have a rapidly growing hole in the middle!
Clear polystyrene sheet like Evergreen is even less suitable for moulding – I have never succeeded in producing anything out of it. This is strange since any WHITE plastic stock works excellent, albeit not for canopies!
I realized that there is a difference when I tried to heat an excess piece of plastic from a set of Falcon vac-formed canopies. Unlike in my earlier attempts, this clear plastic sheet remained elastic for a long time after being removed from the heat source.
Use PET-G
Having checked in my local Yellow Pages (category Plastics), I made a telephone call to a company which specialized in vacuum forming. A nice guy I spoke to recommended a plastic called PET-G – the same type used for plastic drink bottles. Not only that, but he also promised to give me an excess piece of material to try! When I arrived at the place it turned out that they had no waste pieces available, but I could purchase a new sheet. It cost me 20 SEK (2 Euro) and measured 150×30 cm, enough for a lifetime supply of canopies!
This particular brand of plastic is called Veralite 200 and is 0,7 mm thick. Ideally I think that about 0,5 mm would be ideal, but as Veralite is crystal clear I don’t think it matters that much. Later on I have also used a brand called Vivak with similarly good results.
The plastic can be moulded between 120ºC and 190ºC so that you don’t have to rush at the most critical moment. And these temperatures are easily achieved with an average kitchen toaster!
Making the plug
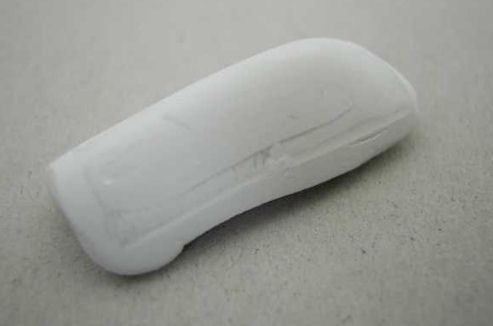
This is the original Marivox kit canopy, filled with Milliput and sanded down so as to make it slightly smaller than the original. No polishing needed at this stage!
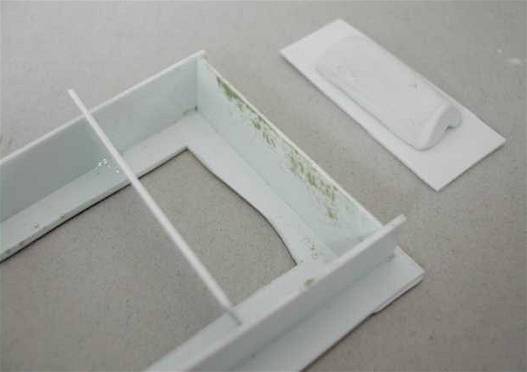
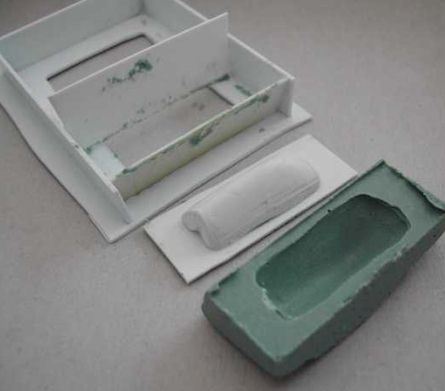
This is the canopy seen in the previous photo, glued to a plasticard base. The thing to the left is a casting frame that fits the plasticard base.
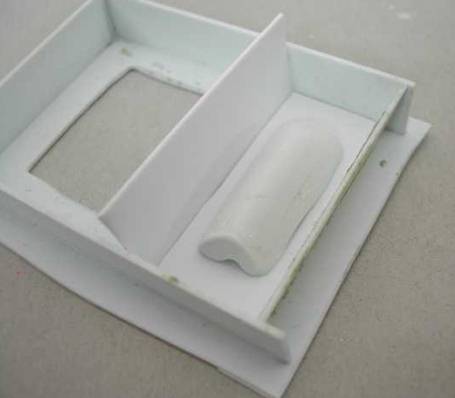
Ready for casting some Plastic Padding! I have brushed on some Vaseline that serves as a mould release agent.
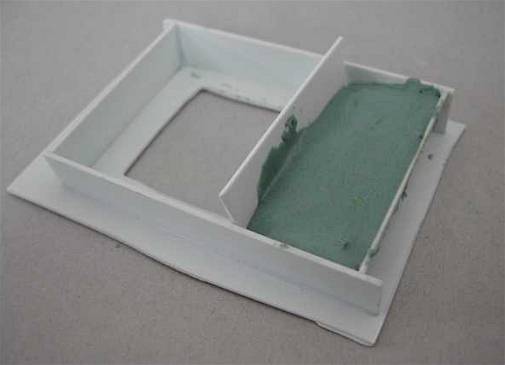
The Plastic Padding during hardening. Wait until the PP has started to set but still is reasonable flexible, this will take less than half an hour, then pry the part loose from the mould parts.
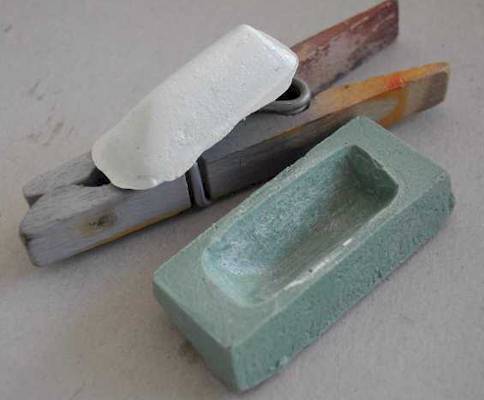
The Plastic Padding mould which then is used to cast another Milliput plug. This will then be sanded and polished to a high-gloss finish so that a new canopy can be vac-formed over it.
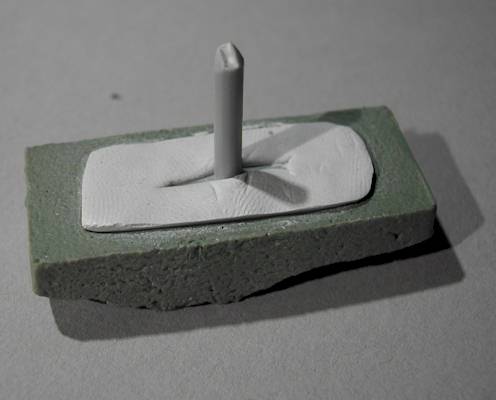
Casting the Milliput plug. The piece of sprue will serve both as a handle and as a mean of locating the plug in the vacuum tool.
The Milliput plug fresh from the mould. It will be sanded and covered in a thin layer of CA glue and then polished
The forming tool
The forming tool is extremely simple, I made mine (I actually have two, one small and one even smaller…) in less than twenty minutes! Here is what is needed:
- Some Evergreen or other brand of square or rectangular rod
- Some reasonably thick plastic card
- Aluminium netting, like the kind of which you can buy at an automobile supply store. It is used for reinforcing body putty.
Glue a square box of rod on your card base. This should be one centimetre longer and one centimetre wider than your ”average canopy plug”. The main concern is that it doesn’t end up too small since the plastic sheet needs some free space around the plug.
Cut the the netting to size using a strong pair of scissors and glue it on top of the box using CA glue or epoxy so that the glue seals the gaps. Glue a second box on top of the netting and then cut out a hole for the vacuum connection from the base.
If you have followed the above instructions, you should end up with something looking like this!
Making the canopy
You will need the following:
- A vacuum cleaner
- A toaster (I borrowed one from the lovely miss Ulrika, it ended up with me having to buy her a new one when it ended up burned and charred…)
- The forming tool
- The plug
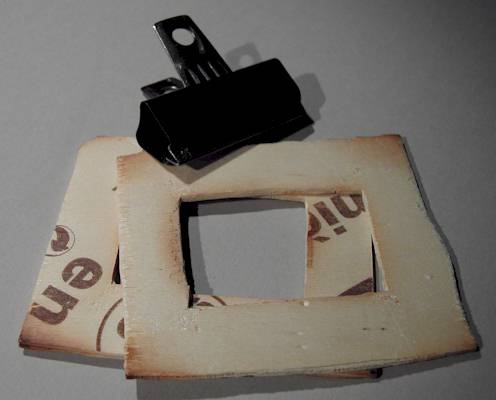
- Two holder frames made from thin plywood. Ask your local cheese dealer for plywood from French brie cheese. Why not buy some of the cheese as well, it is very tasty!
- Bulldog clips to lock the clear stock between the frames.
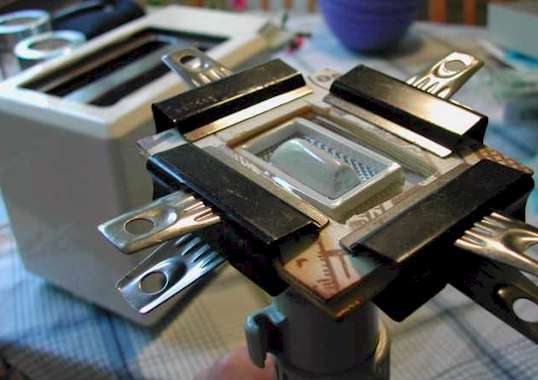
Bulldog clips and frames from the best French cheese plywood!
Tape the tool to the vacuum cleaner’s nozzle and place the plug in the middle of it. To keep the plug from moving around, punch a hole in the middle of the netting and use the sprue handle to keep it there.
Heat the plastic over the toaster. It will soon start to sag but keep it over the toaster, moving it slowly to heat it evenly. After some time, you will see it change once more and now it is time to start the vacuum cleaner and move it over the tool. Pull it down over the frame and the vacuum will suck it down snugly around the plug. Keep the vaccum on for half a minute so that the plastic gets some time to cool.
A new canopy, which turned out to be less than excellent. More polishing of the plug needed!
Troubleshooting
Here are some common problems with remedies:
- Remove the covering from the plastic as late as possible. If it collects dust due to static electricity, washing with soap and careful drying with a clean cloth helps.
- If the plastic doesn’t form well around the plug, it is probably not warm enough. It needs more time over the heat source.
- If the plastic doesn’t form all the way down the sides of the plug, end more exposure to heat does not seem to help, try to raise the plug a few millimetres above the net.
- If your knuckles get sore and red and smell like barbecue, use a pair of gloves!
Some dos and dont’s
- Don’t use the original canopy as a mould. I have tried it a few times but the heat from the plastic sheet will produce small cracks in it, cracks that can be seen in the new canopy!
- Sand down the original canopy quite a lot. I always end up with slightly too large canopies!
- Cut out and trim the vacformed canopy carefully, the plastic is tricky to sand after it has been attached to the model.
- If there is a Falcon (or similar) vacuum formed replacement canopy available for your aircraft, buy it! Use the above method for Hawker Hunters, Swedish J 22 Fighters, Snort Hemptons or the Scruggs Wonderplane (OK John from Aeroclub, I know that’s your plane!) but not for your average Spitfire or Phantom II!
This article was originally published in IPMS Stockholm Magazine in August 2002.
