A forgiving, easy method of accentuating panel lines
by Charles Metz
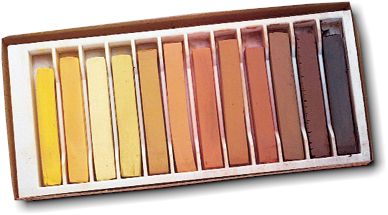
In my opinion, by far the easiest (and safest) way to accentuate panel lines and, more generally, to ”weather” aircraft is to use chalk-based Artists’ Pastels and a paper ”blending stick.”
Artists’ pastels and paper blending sticks can be purchased at any good artists’ supply shop. Sets of chalk-based artists’ pastels in various shades of grey and earth-tone colors, the two color groups you’ll use most in modeling, can be obtained fairly easily, and are also available by mail-order from MicroMark.
The great advantages of using artists’ pastels are that (i) they’re very easy to control and (ii) you can remove what you’ve applied and start over if you screw up.
Important note
Do not — repeat, NOT — use oil-based artists’ pastels for shading purposes. Oil pastels will permanently stain the surface of your model and can’t be ”feathered” properly. Chalk-based pastels are common, so be careful to get the right kind.
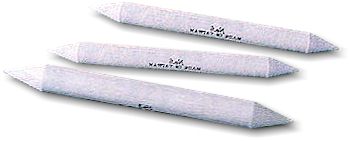
Artists use blending sticks (also known as ”blending stopms” or ”smudge tools”) for shading pencil and pastel drawings. The commercially available blanding sticks are actually made from tightly spiral-wound, soft grey paper, and come in various sizes. I recommend the smallest, which is 2 or 3 inches long and tapers to a rather sharp point, but larger blending sticks can be useful in some situations (e.g., for applying exhaust stains). Some artists use a piece of paper rolled tightly with a point at the end, it should do the job almost as well as the purchased pieces.
Applying pastels with blendning sticks
The basic idea is to rub the tip of the paper blending stick lightly along a pastel stick of appropriate color and then run it lightly along a panel line or across a smooth area you want to weather. In the former situation, this will put pastel dust into the panel line (if it’s engraved) and will smear some on each side of the panel line; you can then run a Q-Tip (”cotton bud” in the UK) along the panel line to lightly wipe most of the pastel dust off of the surface of your model while leaving much of it in the recess of the panel line.
You should be striving for a subtle effect here, so start lightly, finish going over the entire model, look at the results with a fresh eye a few hours or a few days later, and only then decide whether you want to darken the shading. You’ll be able to remove most or all of the pastels you’ve applied by rubbing and/or washing with water if you don’t like the affect you’ve achieved, but try hard not to apply too much in the first place.
After you’re sure you’ve obtained the effect you want, you can apply a clear coat to ”fix” the pastel dust to your model if you wish to do so. However, this isn’t really necessary unless the model will be handled where the pastels have been applied, because pastel dust clings to some degree by itself.
Other applications
Artists’ pastels also work well for exhaust stains and for ”oil blow-back” stains. To simulate oil blow-back stains that emerge from between engine-cowling panels, use low-tack masking tape to mask the forward panel at a panel line; use a fine paper blending stick and black or dark-gray pastel dust to run a fine line rearward from the tape, starting your line on the tape; and then remove the masking.
Although I rarely bother to do so, you can mix pastel colors if you wish by scraping a bit of dust from each of two or more pastel sticks with a knife blade, mixing thoroughly, and then applying with your paper blending stick.
As with any new technique, you should practice before using this method on an important model. However, pastels are very easy to apply and very forgiving so you’ll probably need only a little practice before you develop a clear sense of control. Just remember: keep it subtle.
Copyright © Charles Metz 2004. Used with permission
This article was originally published in IPMS Stockholm Magazine in May 2004.

