Mark’s Model Plane Miscellany
(Celebrating My 100th Model)
by Mark Davies

The SB2U Vindicator was the US Navy’s first monoplane aircraft, coming into service late in 1937. Typical of many mid-thirties designs, it looked modern in form and outline, but as a transitional design it retained some constructional features of its biplane predecessors.
SB2U Vindicators served from their introduction to service until 1942 on four carriers, and for a period in a training role into 1943. They are perhaps best remembered in American service when used heroically by the US Marine Corps at the Battle of Midway.
A somewhat different export version for the French, the V-156-F also saw service with the Aeronavale. It featured wing mounted finger-like air-brakes, different tail surfaces and bomb release gear, plus various other instrument and control changes to suit French practice. It took part in brave but futile actions against German advances in the Battle of France, and briefly against the Italians after they opportunistically joined the fray when German victory seemed assured.
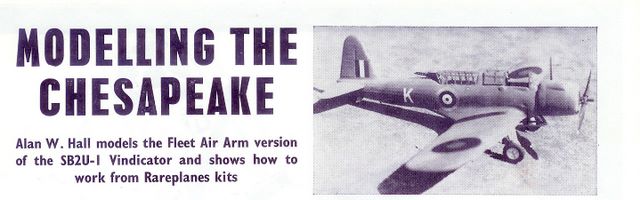
Following the fall of France Britain was desperate for all the aircraft it could obtain, and so took over a French order with Vought, which following some changes back and more inline with American versions became the Chesapeake in British service. By the time the British evaluated them their obsolescence was overwhelmingly apparent, and were too underpowered to lift a useful war-load from the small escort carriers the Royal Navy planned to use them on.
The Vindicator’s Appeal to Me
The Vought SB2U Vindicator has occupied a special place in my modelling affections for many years. I was completely unaware of the SB2U as an 11 year old modeller and aviation fan. Growing up in England in the sixties meant that I was far more aware of Battle of Britain classics from the RAF and Luftwaffe – much of my aviation education coming from building a new Airfix, Revell or Frog kit each week. My knowledge began to widen after I began subscribing to Airfix Magazine in November 1970 (I still have this and subsequent issues!)
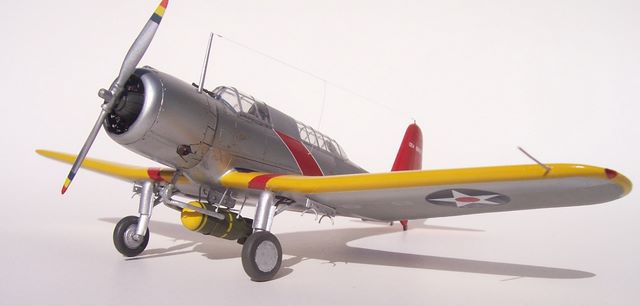
However I was fascinated by an article in Airfix Magazine of July 1971 featuring a build of the Rareplanes vac-form SB2U Vindicator as a British Chesapeake. The article also had one picture of the same kit finished as a USN machine and, despite the black & white photography; I could tell that the finished model looked great with its yellow wings, colourful stripes and metal finish using Bare Metal foil. Suffice to say that article made me want to build a yellow-winged Vindicator, and started fondness 1930’s pre-war designs.
Source: Airfix Magazine, July 1971
So 36 years later, having lived in New Zealand for 35 of these, I was confronted with deciding what I should build for my 100th completed model since resuming modelling nine years earlier. I had to choose from 1,100 unbuilt kits in my collection and could think of no better choice than Special Hobby’s SB2U kit.
1/72 SB2U Kits
I’m aware of a number of 1:72 scale Vindicator kits from Rareplanes, Pegasus, Merlin, Meikraft, and Esoteric. I have seen photos of some of these; the Pegasus and Merlin kits seem rather crude limited run kits, and Rareplanes is a vac-from (I’m unsure of the others). I suspect all are now out of production. Pavla also released a more modern, but still limited run kit, providing options for the major variants in one box around the same time as MPM.
Special Hobby and the MPM Group of kit brands in general are among the leaders in what I feel is a modelling renaissance. They excel at both introducing up-to-date and superior kits of old Airfix and Frog subjects long out of date and hard to find, plus they kit subjects never before offered by mainstream manufactures. Their SB2U kit falls into this second category.
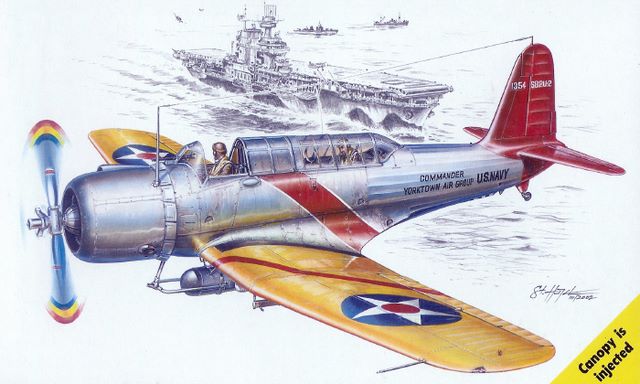
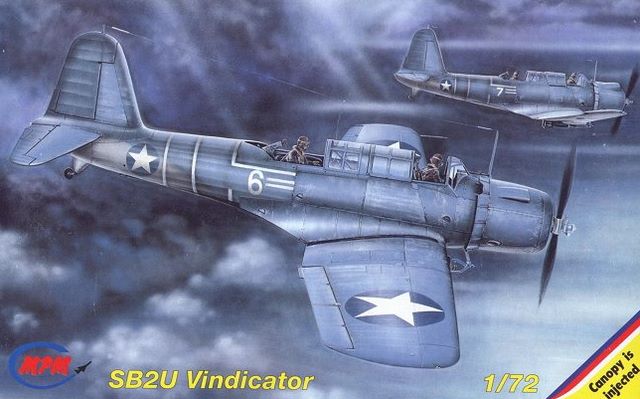

Box art of Special Hobby, MPM and Azur Vindicator kits
Fortunately for 1/72 modellers the MPM group has produced three boxings under its own MPM and Special Hobby brands, and also on behalf of Azur who they manufacture for. The Azur kit is of the French V-156-F version, with different wing panels and air-brakes, tail surfaces, bombs etc for the French version.
The Special Hobby Kit
The Special Hobby kit comes in their standard end-opening box with very attractive artwork. It is crisply moulded with finely represented recessed panels lines, convincing fabric covered areas and generally adequate levels of detail for the scale. Resin parts include a very nice engine, centre bomb-rack with sway-braces, 250lb bombs, tail-hook, control columns, rear gun, gun-sight and bomb-crutch arm. The canopy is injection moulded styrene, unlike the acetate vac-from canopy that comes with the Azur V-156-F kit. Decal options for two colourful pre-war machines are precisely printed. Instructions are well laid out and easy to follow.

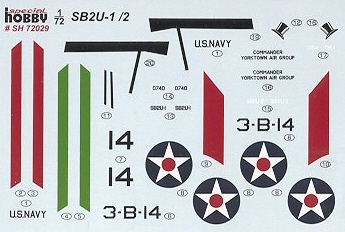
Kit parts and decals
The Build
The cockpit interior features enough detail in my opinion for a model in this scale with the canopy closed. The only additions I made were some PE seat-belts, and a scratch-built DF loop. The fuselage halves fit well with no problems, and I seem to recall the same applied to the engine cowling. I did open up and thin the cowling’s oil-cooler/carburettor scoop for better scale effect, and deepened the inside of the exhaust pipes.

Refined carburettor/oil-cooler air intake and exhausts
Wings and tail surfaces again were very straightforward, although I thinned the trailing edges of the wings as is the norm with most two-part wings. I’m not 100% sure if it’s correct or not, but I closed in the wheel wells with 5 thou plasticard for a better appearance. I also made the wing-tip navigation lights from coloured plastic.
I decided to Dremel and file out the insides of the small undercarriage doors as these were a bit thick. All was going well until I dropped and stood upon one after it was thinned out! All I could salvage was the upper curved portion. So after some thought I decided to make the doors out of brass shim. After a few attempts I found I could shape the brass round some steel rod and for the edges in a modelling vice. The resulting piece was simply super-glued the plastic top-part to the door. This gave me quite thin doors and remedied the lost part. I therefore chose to make the lower doors from brass shim also in order to match the upper doors.
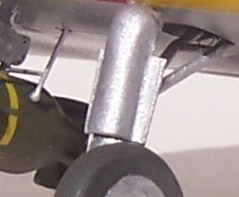
Scratch-built brass undercarriage doors
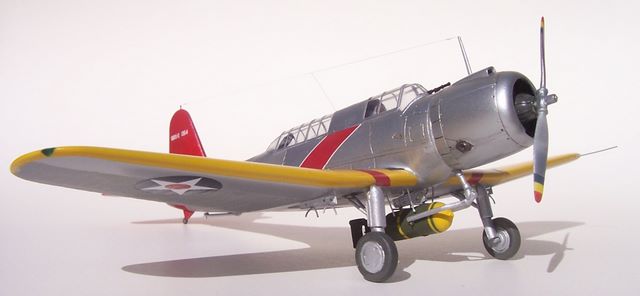
I noticed that the sway-braces on resin centre bomb-rack were rather square in section, whereas all the photos I had seen showed these to be circular rods. I chose to replace them with styrene rod. The centre bomb crutch is a combination of a resin strut that fixes just behind the cowling’s cooling gills on the fuselage centreline and a styrene “U”-shaped arm. I found it best to tack the bomb in place and adjust the fit of these items to suit. I also scratch-built my own wing bomb-racks to more closely follow those I had seen in photos.
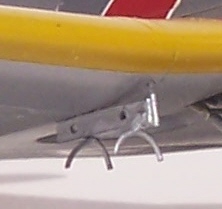
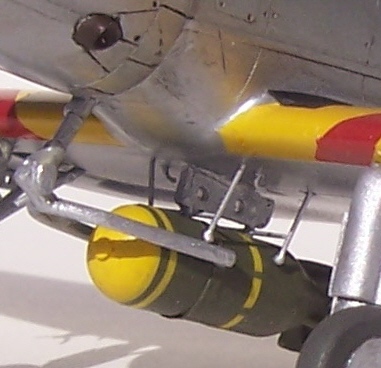
Centreline bomb-crutch Scratch-built wing bomb-mounts
The most challenging part of the build (aside form the undercarriage doors, which were my own fault) involved the canopy. First it is necessary to drill a hole to accept the pilot’s telescopic sight, and this was a bit trickier than I thought it would be. The other small challenge involving the canopy is the need to trim the fuselage in the area just behind the windscreen to get a good fit, plus I need some filler at the rear. I should put things in true perspective here, and say that these were the greatest challenge simply because the rest of the kit was so easy to build.
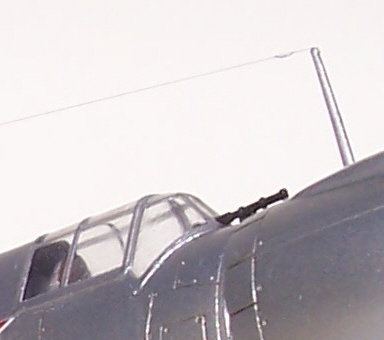
A hole needs to be drilled in the windscreen for the telescopic gun-sight
Painting & Decaling
Painting was very straightforward, with Alclad II White Aluminium serving to do the bare metal and fabric areas. In the case of the fabric areas I applied a matt varnish to change the tone from the metal areas and so simulate the aluminium-doped fabric. I often use painted decal strip for canopies, but in this case I simply masked all horizontal frames first, then all the vertical ones. I then masked the canopy off whilst painting continued. Humbrol provided the gloss red and Testors the Chrome Yellow.
The Special Hobby decals went on superbly, needing no setting or solvent solutions and leaving no silvering. Before spraying the gloss painted areas with a semi-gloss finish for scale effect I found that I needed to do a small touch-up to the red by the tail. I was a bit hasty in my masking and damaged the “Commander Yorktown” decal. I emailed MPM and asked if they could help me out. Jan Hajicek of MPM came to the rescue and mailed me a replacement set, great service, especially when you consider it was my error in the first place! Things were simply finished off with a stretched sprue antenna wire.
Conclusion
This was a very straightforward and enjoyable build, and I look forward to building the French V-156-F version boxed by Azur. So from becoming aware of the SB2U Vindicator to building one only took me 36 years! However I’m pleased to report that it was worth the wait thanks to the MPM/Special Hobby kit.
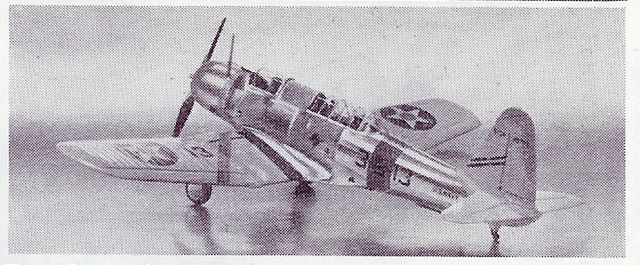
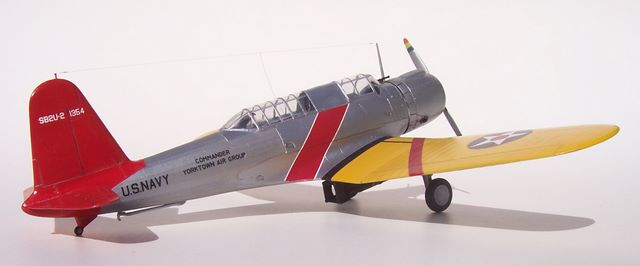
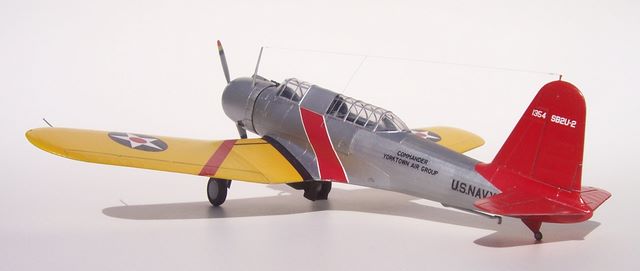
The picture that started me off and the result 36 years later
Additional images, click to enlarge

This article was originally published in IPMS Stockholms Magazine in September 2007