Building Eduard’s New Sopwith Camel Kit
by Tomasz Gronczewski
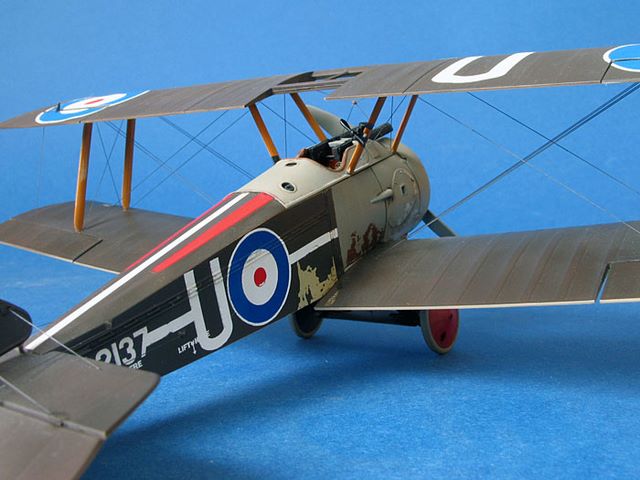
I had known for a long time that if there ever would be a good quarter-scale kit of the Sopwith Camel, I’d build mine in the markings of Donald MacLaren, the most prolific Camel ace. Very few details are known about his aircraft. A few years ago I came across a photo including a bit of the fuselage of Camel F.2137. To my great surprise, Eduard has included decals for just this aircraft in their new 1/48 Sopwith Camel kit. As it turned out the Eduard interpretation of MacLaren’s markings may be done a bit too well – more about it later.
Donald Roderick MacLaren was a Canadian and approved an excellent shoot already as a teenager. He joined the Royal Flying Corps in 1917 in France. Flying with No. 46 Squadron RFC he scored his first victory on 6 March 1918, a two-seat Hannover. His 54 victories made him the highest scoring ace to fly a Sopwith Camel. MacLaren’s last victory occurred on October 9, 1918. His combat career came to an unusual end the next day when he broke his leg while wrestling with a friend. He was the 3rd highest scoring Canadian pilot after William Bishop and Raymond Collishaw.

Eduard’s Sopwith Camel
In my opinion, Eduard’s Sopwith Camel has been the most valuable addition to the World War II modelling scene in years. The first rumours about the forthcoming kit appeared already in the last century (that is, 1990’s). When it finally appeared it got many enthusiastic reviews. Admittedly, the fabric structure on the wings is perhaps a bit too emphasized, but for a PC10 or PC12-pinted aircraft it doesn’t really matter.
Curiously, some of the reviewers who actually built the kit described severe construction problems, while others praised it for the ease of assembly. Unfortunately I’m of the former kind. To my consolation I’m not the only one; acclaimed modeller Bucky Sheftall reportedly got so frustrated with this kit that he threw his unfinished model against a wall! I suspect that the source of all evil is the assembly instruction; Eduard seemed to have swapped the order of interplane struts. Once you put the wrong struts in the wrong place the entire geometry and rigidity of construction is set off balance and this makes it extremely difficult to align and rig the model.
But let’s start from the beginning.
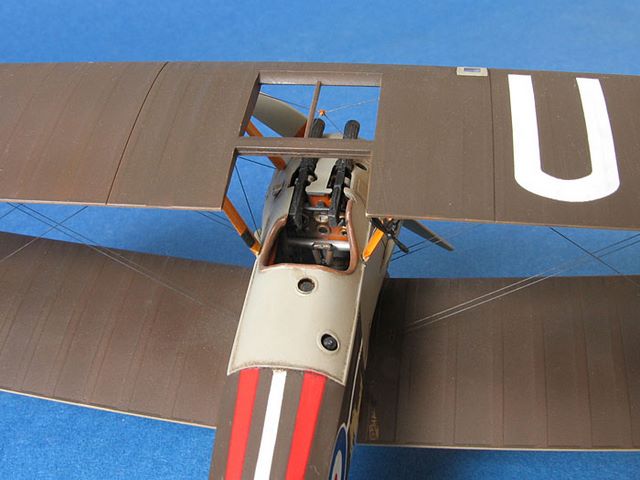
The interior parts were very nice but somewhat ill-fitting. I found it best to join the fuselage halves before inserting the cockpit floor from below. The seat included in the kit (and my model was a standard edition without photoetched elements) is moulded in solid plastic, so I replaced it with an excellent photoetched seat from Part. It was painted with a mixture of Tamiya XF-59 Desert Yellow with a few drops of Tamiya XF-52 Flat Earth. When dry, I dry-brushed it with Tamiya Buff, followed artist’s by oil wash of Sienne Naturelle from Pebeo. The leather rim was added from Tamiya masking tape painted with Tamiya XF-64 Red Brown.
All wooden elements inside the cockpit were base-painted with Gunze Sail Color. Then the wood grain was drawn on using a red-brown pencil followed by gentle smudges of Tamiya XF-64 Red Brown. Lastly, the surface was sprayed with Tamiya X-26 Clear Orange.
The different copper and metal fittings were painted with Alclad II. Before attaching the upper fuselage panel I made a few farewell photos to the completed interior 🙂


Painting
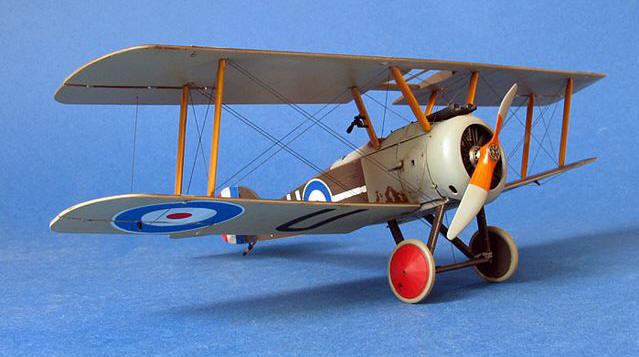
As in all my biplane builds, the major painting was completed before attaching the upper wing. An interesting detail which could be clearly seen on the photo of MacLaren’s Camel were large areas of flaking paint. To replicate this on the model I first painted the fuselage with the colours of doped fabric and plywood. Metal engine covers were sprayed with Alclad White Aluminium.
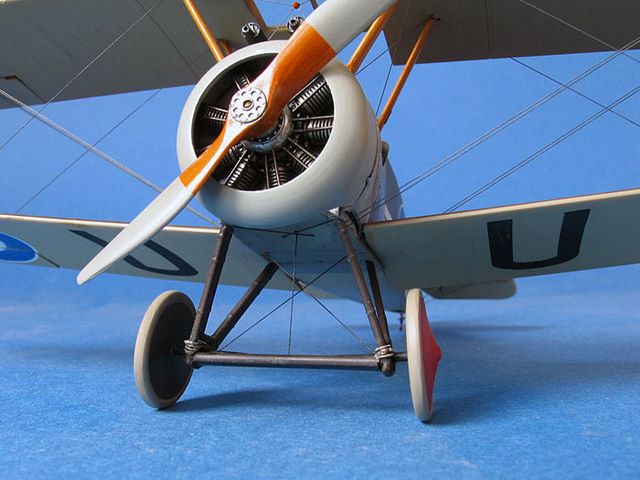
When these base coats were thoroughly dry, I have covered suitable areas of missing paint with Humbrol Maskol. Now the painting continued as usual with Tamiya XF-19 used as Battleship Grey, Model Master II Raw Umber for PC10-covered fabric surfaces and Model Master II Burnt Umber for the undercarriage struts.
The removal of Maskol revealed a decent effect of chipping, but this could be made still better by ripping off smaller chips of paint with a bit of self-adhesive tape.

Decals were applied at this stage. The fuselage decals show the markings in ”new” shape, so I printed mine which incorporated the wear and tear. Secondly, Eduard’s upper wing roundels had the cutouts for the inspection panels in the wrong places. Lastly, other Camels of No. 46 Squadron are known to have had individual letters repeated in black at the wings’ lower surfaces. It is reasonable to suggest that MacLArens’ aircraft was also marked this way. Unfortunately these letters are not included on Eduard’s sheet.
The Wing Problem
With the assembly 80% completed I commenced the attachment of the upper wing. It is here that I ran into previously mentioned problems. My model had a few near-death situations during my desperate attempts to save the geometry until a realization came that the forward and rear wing struts should be swapped, and – voilá: straight wing and tensioned rigging that wouldn’t cause the struts to collapse, what a relief!

The rigging was made with the Invisible Thread painted in gun metal for the right ”look”.
Lesson Learned
The conclusions from this project are simple. The Eduard Camel is a very good kit but one that requires much care during assembly. To succeed, you need to be aware of the problem with forward and rear wing struts as shown in the instructions. In case Eduard corrects the error in later revisions of this kit, don’t take this advice for granted but make sure to dry-fit the entire wing assembly before committing to glue.


This article was originally published in IPMS Stockholms Magazine in May 2007