Superdetailing the 1/48 Eduard Profipack Kit
by Lars Qvarfordt
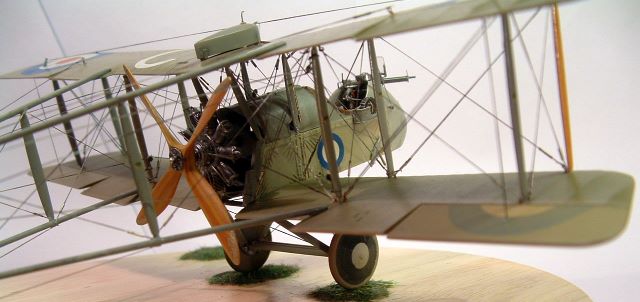
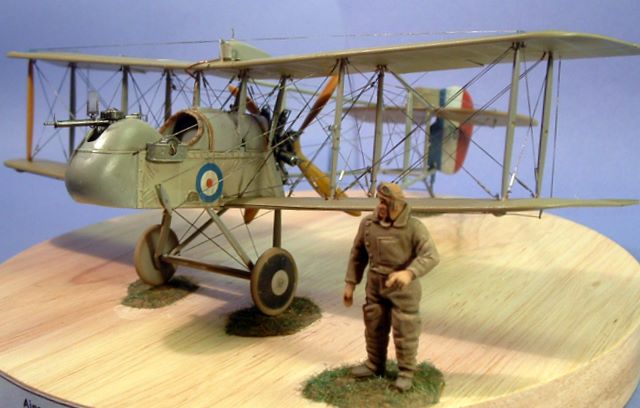
When Eduard gave us modellers a really nice kit of Airco DH-2 in the 1/48 scale, I couldn’t resist it. I have always had a weak spot for this pusher. There is always a challenge for me trying to get out the most of every kit. Building out of box is not my game!
Fuselage and cockpit
The DH-2 has a really open cockpit so I didn’t want to rush this one over. The fabric-covered side panels at the fuselage were just to plain and flat in my eyes, so for a started doing some wrinkles with Milliput. After some shaping and sanding they started to look good to me. The problem which only manifested itself later was that they easily chipped away, keeping me supergluing the wrinkles back. So whatever you may think about how the result looks like, I still need to work on the technique before I can recommend it.
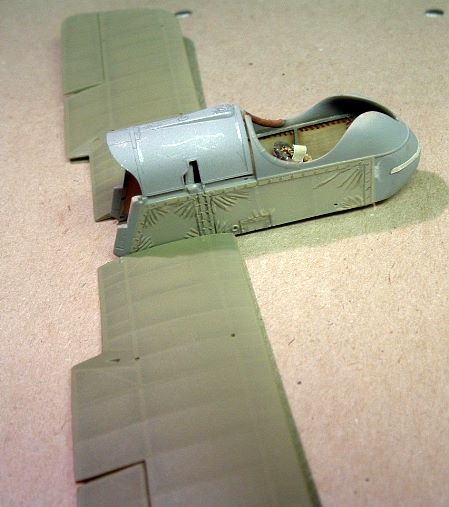

The inside of the panel was given a new framework of plasticard and some WWI-style stitching from Part photoetch. Bracing wires were made of stretched sprue, using black-coloured plastic to get the right colour. Next was the instrument panel. One shelf for ammo drum was cut open and tiny shelve glued inside. Here is the first caution if you are building this model: double-check that you get the right panel for your plane. Eduard gives you three options here, you can build an early, mid- or late production version so check your references.
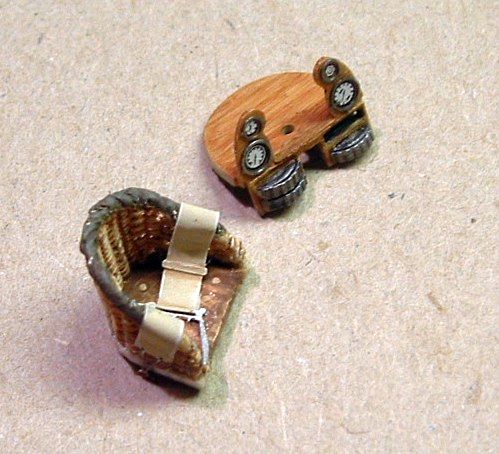
Eduard gives you two choices of seats, one in plastic and one photoetched. However, none of them was up to my satisfaction. Why not try to build a wicker seat in 48-scale? As it turned out, this sub-project took me almost three weeks to complete. The seat was made of plasticard, brass wire and nylon fishing line. The seat padding was made of Milliput.
With Windsock Datafile 48 close on the bench, the rest of the gear inside the cockpit was added: the pressure pump, fuel lines and so on.
Engine
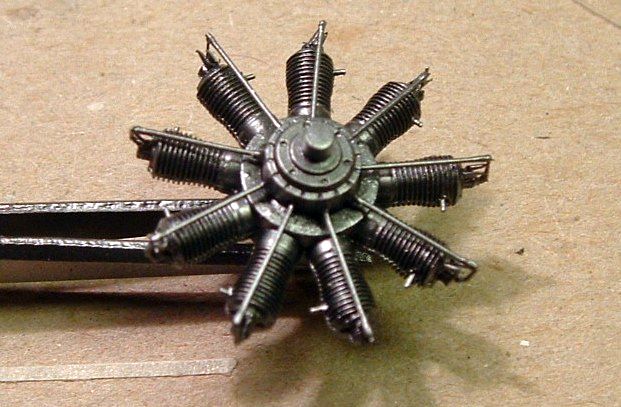
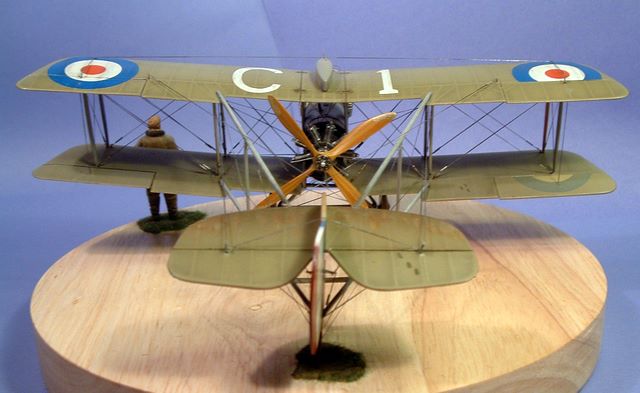
The next project was the wonderful engine and propeller. The spark plugs were made of short pieces of stretched sprue. The overscale pushrods were replaced with steel wire of 0.15mm diameter. The engine was then painted Humbrol gloss black and Alclad Aluminium, followed by a quick wash with Burnt Umber oil paint and Humbrol flat black which was used to bring some depth in the aluminium. The last items added were the ignition wires, for which I used hair strands and superglue.
The propeller was a simple affair, just sanded clean from moulding seams and base-coated in a light brown shade. The laminated wood effect was then done in oil paint. The brass tips of the prop were painted with Dekorima gold powder mixed with Humbrol silver.
Painting
I just have this thing for preshading my models, so I won’t discuss the pros and cons of this technique.
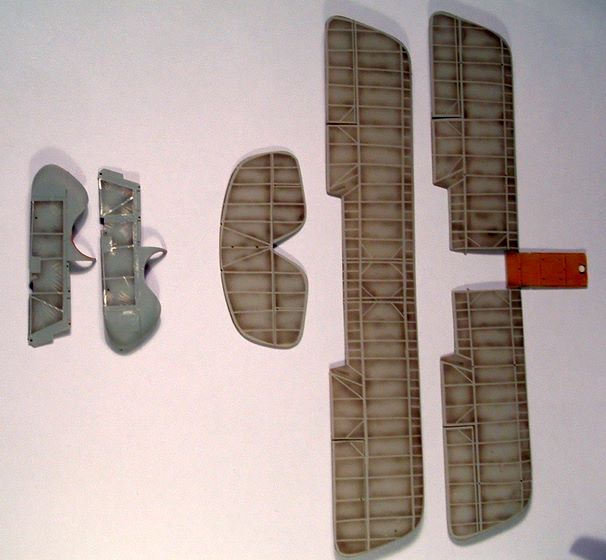
Preparing for the paint job started with giving all the surfaces a primer of Humbrol grey. As Eduard did not replicate the rib tapes on the wing, showing them called for some serious masking session. All ribs were masked with thin strips of tape. With the airbrush I sprayed thin lines over the tapes with a mix of Humbrol black and brown. The underside of the wings received the same treatment, except that the base colour was the brownish black. This is to get a reversed look on the underside.
Pigmented cellulose number 12
The green colour on the plane should be PC12. Polly Scale is the only company that sells it pre-mixed. But it is acrylics and me and my airbrush don’t like acrylics… Some home mixing experiments followed and I settled on Humbrol Matt Ochre 83, Matt Light Olive 86 and Gloss Clear 35. The purpose of the clear varnish in the mix was to give the paint a semi-gloss finish, instead of the flat look of other paints in the mixture. When painting, I always thin out the paint just a little ”too much” to get the right see-through effect.
I mixed my doped linen colour from Humbrol 71 Satin Oak, Black 33, Leather 62 and Gloss Clear 35.
The fuel tank and engine cover was painted first in a mix of silver and black. The ”Battleship Grey” shade is Humbrol 147 mixed with a little black and brown just to knock out the brightness of the paint. The paint was rubbed with a toothpick before it was complete dry to simulate wear and tear on the surface. I didn’t use the etched belts, just lifted the end of each belt with a knife.
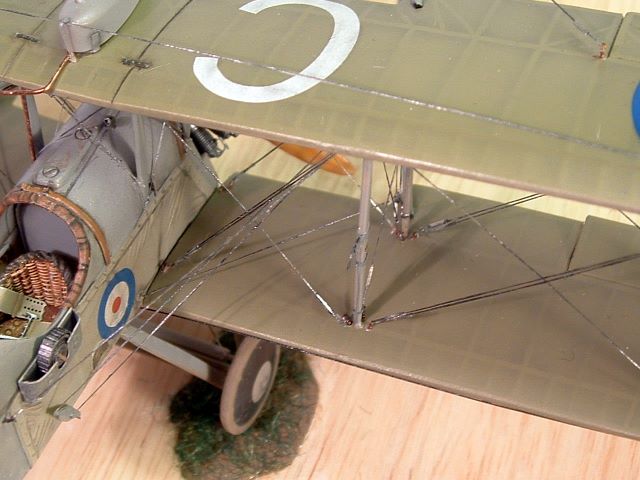
Beams
The biggest construction problem with this kit were the beams, parts C17 and C18. They are not strong enough given the amount and tension of the rigging to be applied. I did make a jig and replaced each boom, one at a time. The material used was 1mm carbon fibre rods.

Decals and final assembly
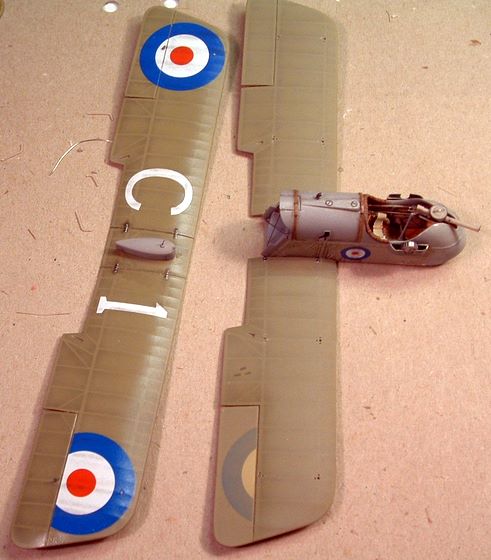
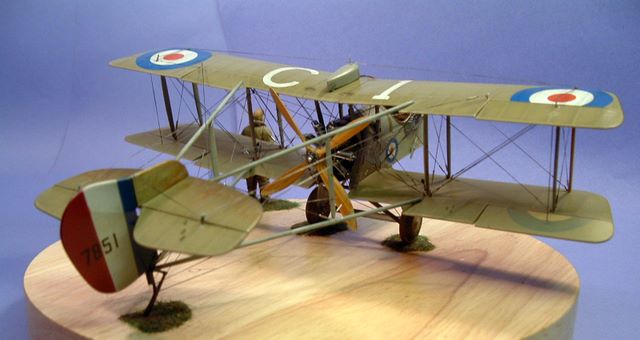
I used Eduard’s decals throughout on this model. The only variation I did to give the machine some extra personality was cutting off the roundel on the top aileron and relocating it to the topside of the lower aileron. The real wings on DH-2 were interchangeable so this peculiarity can be seen in some photos of field-repaired machines.
Rigging
There are as many different ways of rigging as there are modellers and each way has its advantages and flaws. I prefer the following method using a flexible rubber thread called Gold-Zack, copper wire and plastic Q-tips.
At this stage I had already pre-drilled the holes for the copper buckle eyes in the fuselage and wings. The buckle eyes were made of the copper wire knotted around a 1,5 mm drill bit. The results was a little loop that I glued in a pre-drilled hole. The Q-tips were then heated over a candle and stretched a fine-diameter tube. A piece of Gold-Zack thread was then put through the tube to create a nice turnbuckle. This piece of thread was the tied to the loops. A thin drop of superglue locked the thread.
That’s the description of one thread end, now everything left to do was the rest of the plane! Yes, The DH-2 is really full of rigging and I could really appreciate it: the rigging took me full two weeks to complete. I also couldn’t avoid breaking a couple of threads and so had to replace them. When all the rigging was in place I painted all the lines in steel colour, protecting the wings with bits of Post-it paper.
Final stages
The final assembly posed few problems. I did make a cardboard jig for assembly of the top wing and it all went straight and easy. New fuel lines and drain pipes were made of brass and copper wire to replace the kit pieces.
To take down the colour brightness of the decals I gave the whole model a light overspray with a brown and black mixed in the semi-gloss varnish. Some weathering was made with airbrush and pastels. The pilot figure came from Eduard’s RFC personnel kit.
This model took almost three months to complete, but it was a real fun. I’m always in for the challenge to improve my building skills, and this project set the standards for me in building these early birds. For this time, thanks for reading this.
This article was originally published in IPMS Stockholm Magazine in December 2006