Gillar skarpt!
Skickligt gjort att såga rörstumparna i exakt vinkel och sedan på ihop dem så snyggt.
Hur många misslyckade försök blev det, innan du fick till det?
Uffe
Truck 'Loading Bay' Diorama WIP
Re: Truck 'Loading Bay' Diorama WIP
Fantastiskt! Hur har du gjort betongytorna på väggar och lastkaj? Ser otroligt bra ut.
Re: Truck 'Loading Bay' Diorama WIP
Tack Uffe. Det tog två försök. Sen var det bara såga resten med hjälp av de första som var sågat.Ulf Lundberg skrev:Gillar skarpt!
Skickligt gjort att såga rörstumparna i exakt vinkel och sedan på ihop dem så snyggt.
Hur många misslyckade försök blev det, innan du fick till det?
Uffe
Re: Truck 'Loading Bay' Diorama WIP
...man halshuggen och styckad i lagerlokal....
Enastående realism i bygget av lastkajen.
Jag saknar lite ikörningsskador när det blir så trångt mot väggen.
Z
Enastående realism i bygget av lastkajen.
Jag saknar lite ikörningsskador när det blir så trångt mot väggen.
Z
Re: Truck 'Loading Bay' Diorama WIP
Ja,jag instämmer helt med föregående.
/M
/M
Re: Truck 'Loading Bay' Diorama WIP
Kan alltud lägga till sånna om det kommer synas.jonaszett skrev:...man halshuggen och styckad i lagerlokal....
Enastående realism i bygget av lastkajen.
Jag saknar lite ikörningsskador när det blir så trångt mot väggen.
Z
Re: Truck 'Loading Bay' Diorama WIP
Oj! Det gäller att veta vad som är föregående inlägg när man publicerar. Jag ville bara säga att det är ett fantastiskt fint genomfört bygge – med eller utan ikörningsskador.
/M
/M
Re: Truck 'Loading Bay' Diorama WIP
Det lugnt. Jag misstänkte det.MartinN skrev:Oj! Det gäller att veta vad som är föregående inlägg när man publicerar. Jag ville bara säga att det är ett fantastiskt fint genomfört bygge – med eller utan ikörningsskador.
/M
Re: Truck 'Loading Bay' Diorama WIP
Forklift WIP:
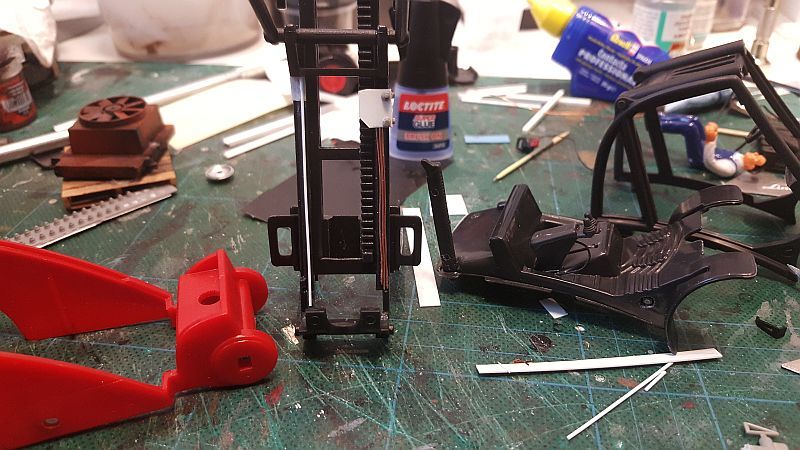
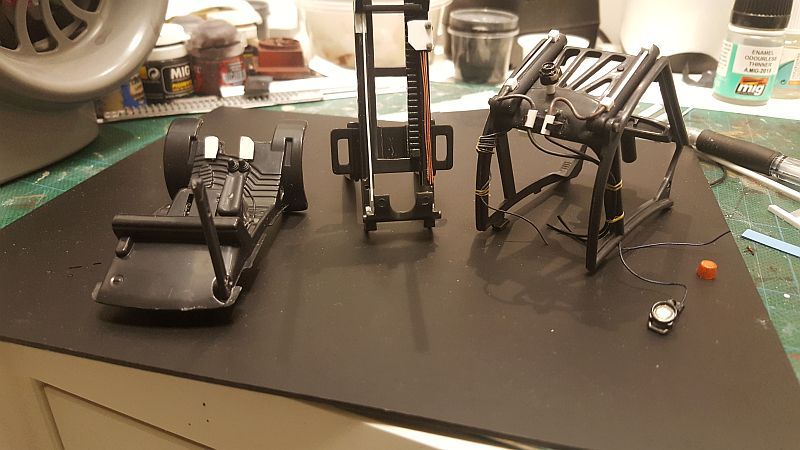
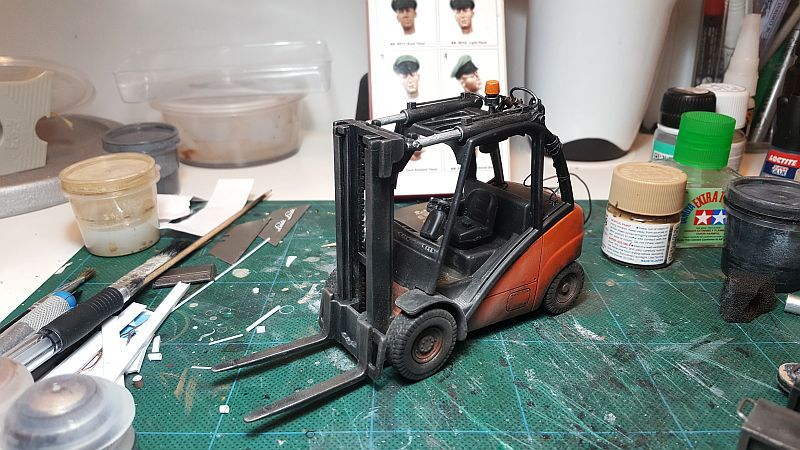
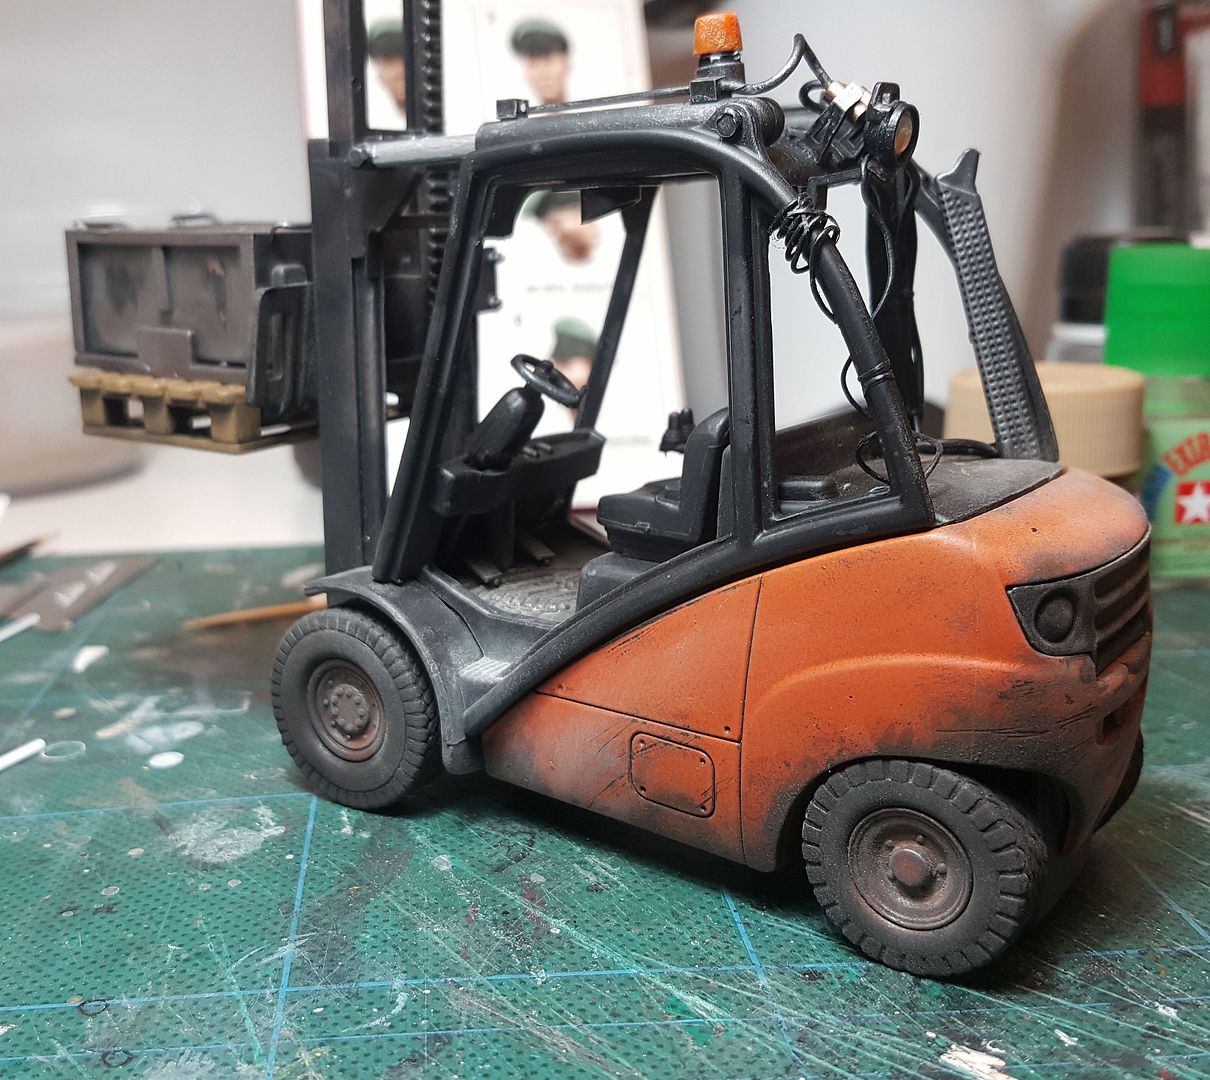
Did some detail work on the forklift to give it some character. This is a Dinky toy model I bought at my local grocery store. The price was 'ok' and on top of it, it is 1/24 scale. To my surprise this model is pretty close to the real thing in accuracy. So I did not have to do too much extra work to get it to look descent. I added the hydraulics, strobe, extra lighting and cabling bind to the framework of the forklift.

----------------------------
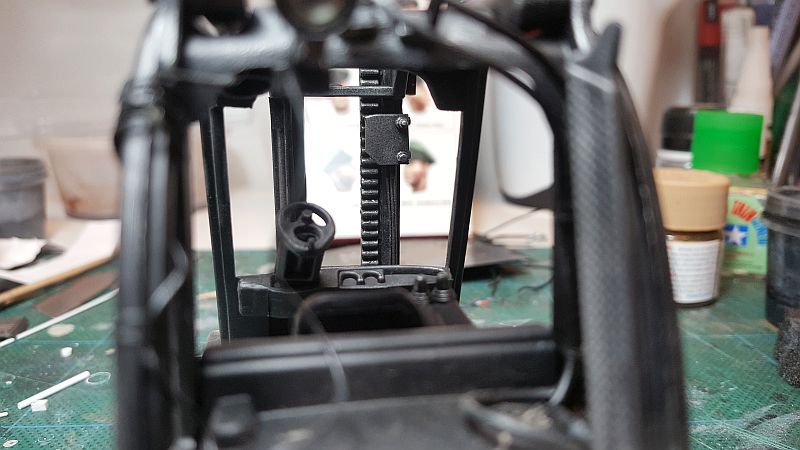
Made a lock for one of the opening, which I'not too sure what it is used for; but according to my prototype pic, it has a gas-tank lock on the right side of the chassis. So I made it to look like the one in my pic.
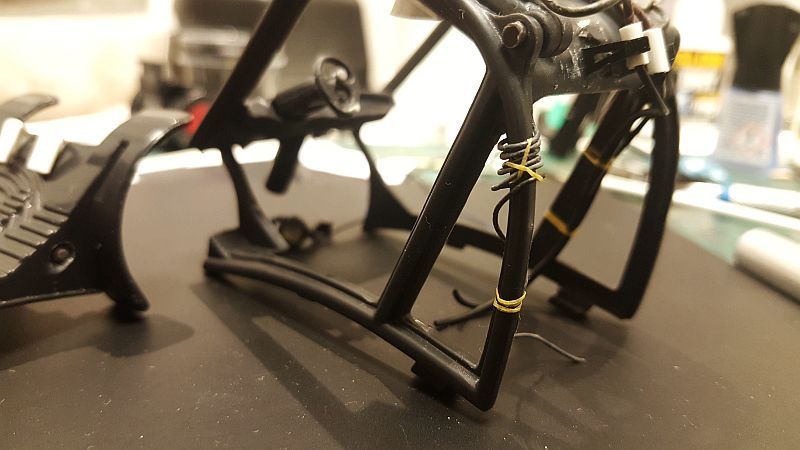
---------------------------------
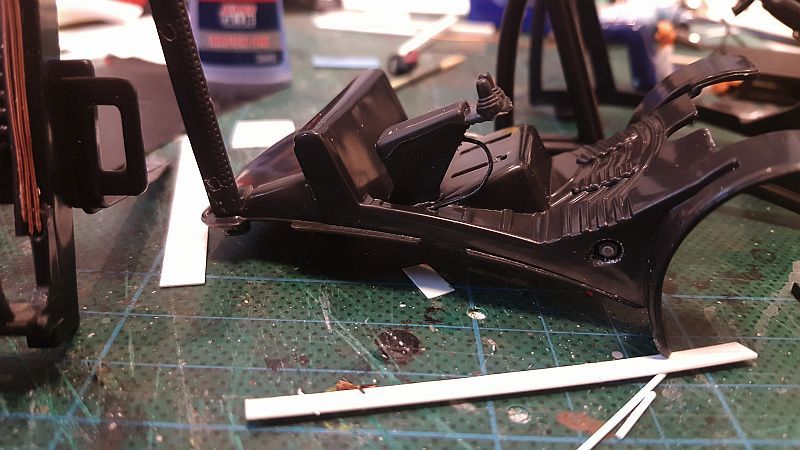
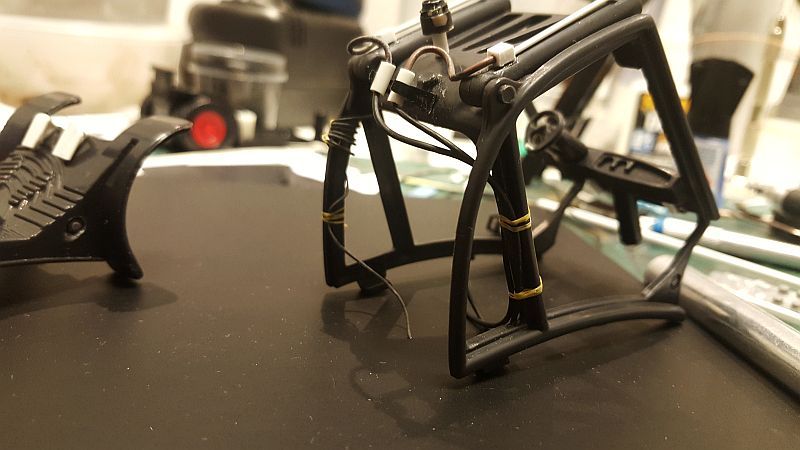
Added some small details to the steering wheel:
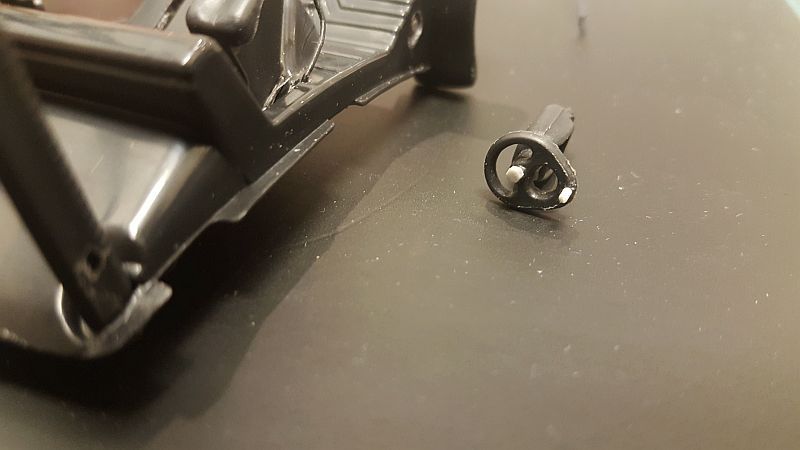
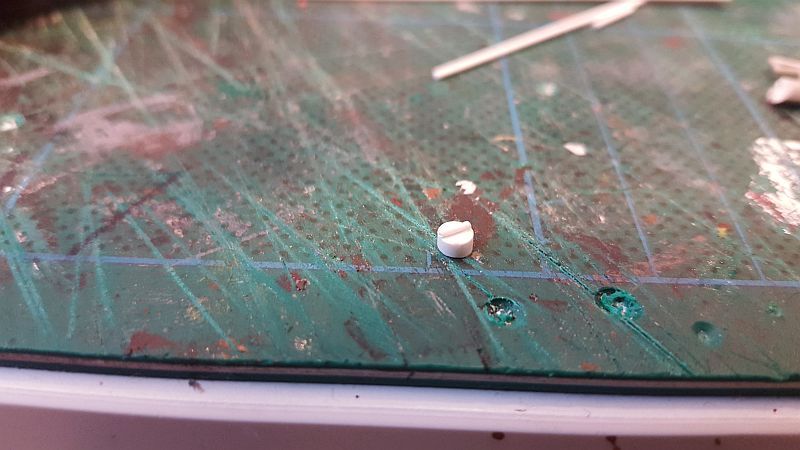
Scraped away the extra stud that was on the forks:
-------------------------------------
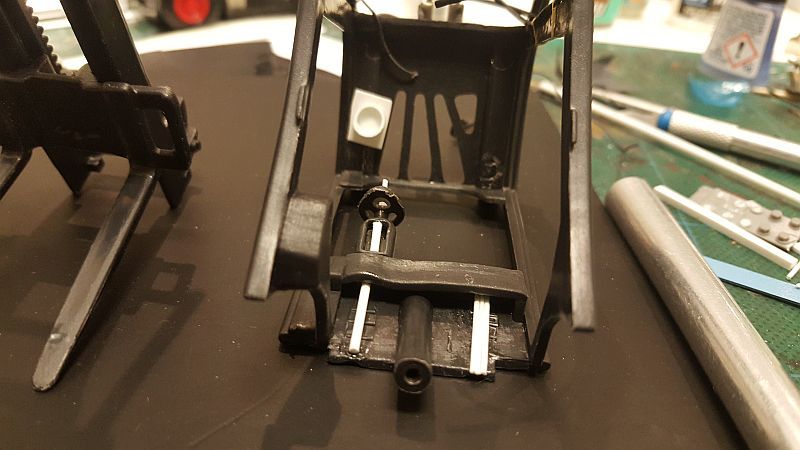
Added an extra link from the steering wheel to the base of the forklift floor:
--------------------------------------
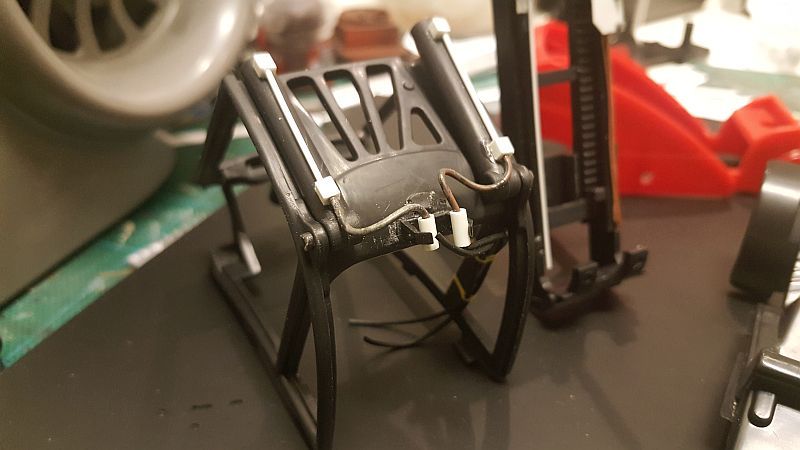
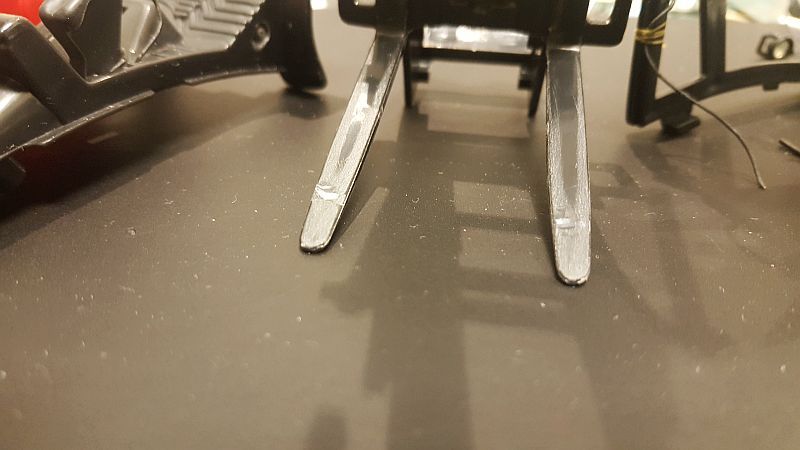
Since this forklift was missing peddles, I scratch built a pair:
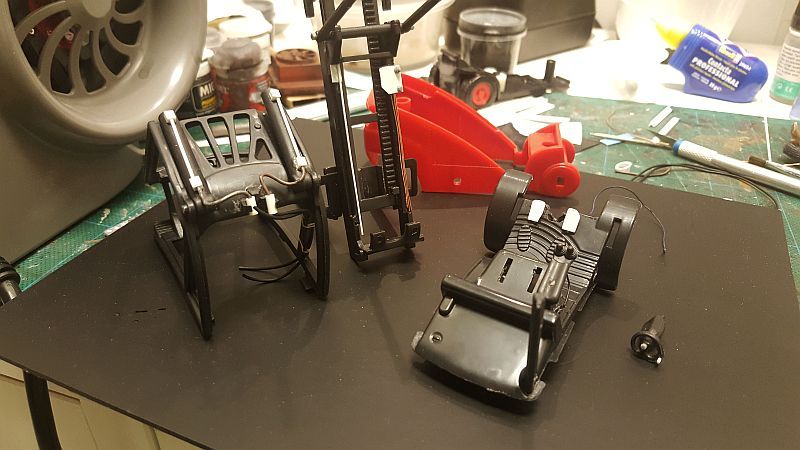
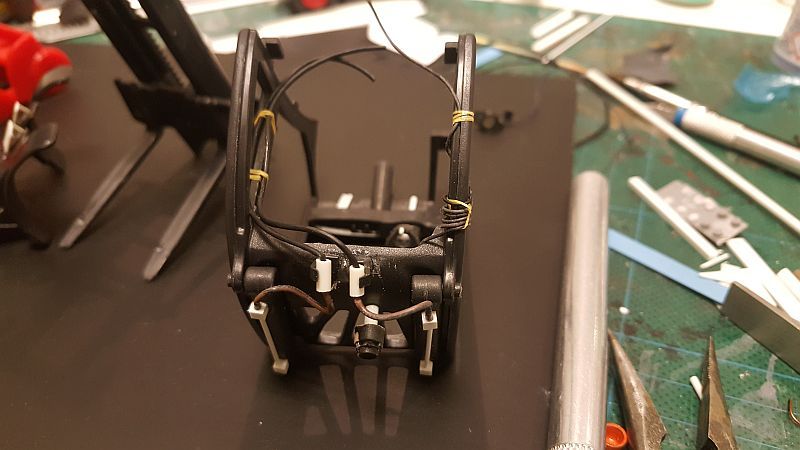
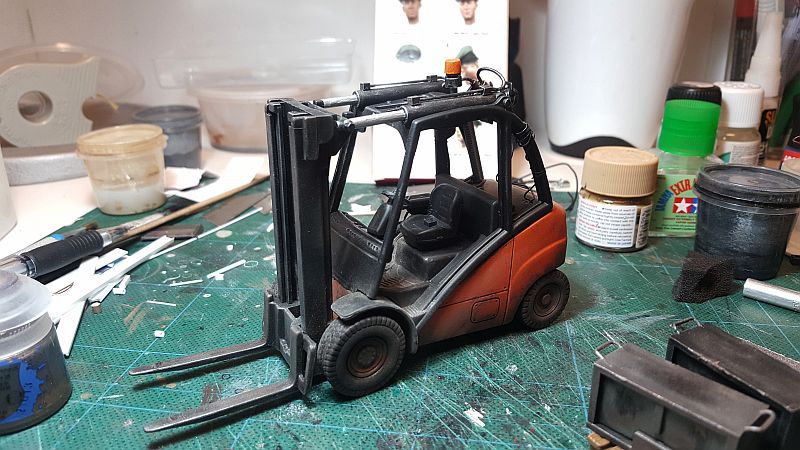
An over view of the forklift ready to paint:
----------------------------------------
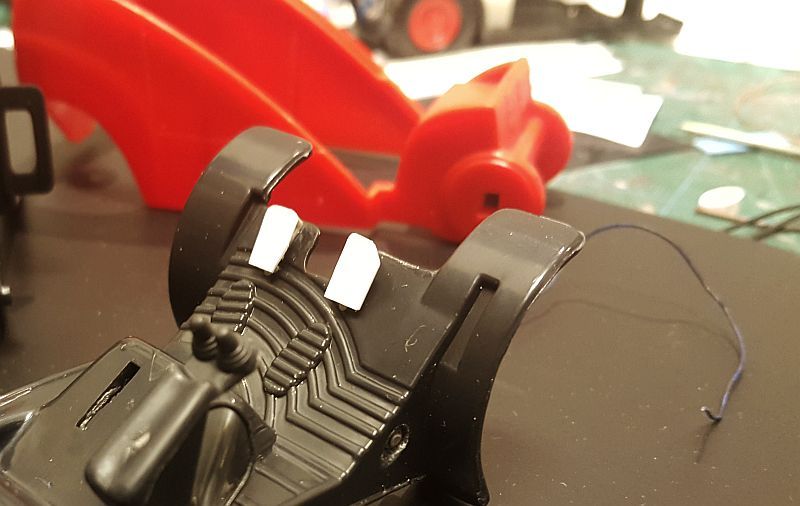
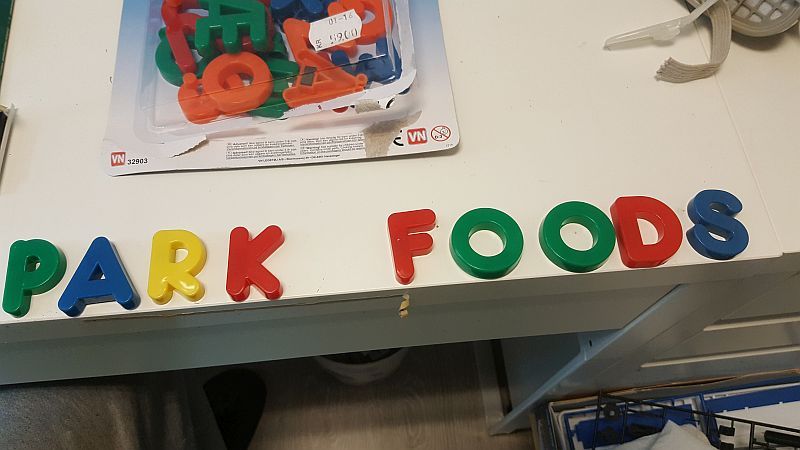
I decided I will be making a sign for this building. I saw this children's alphabet with magnets on the
back to be placed on a refrigerator. I chose the letters I wanted and removed the magnets from the
back.

-----------------------------------------
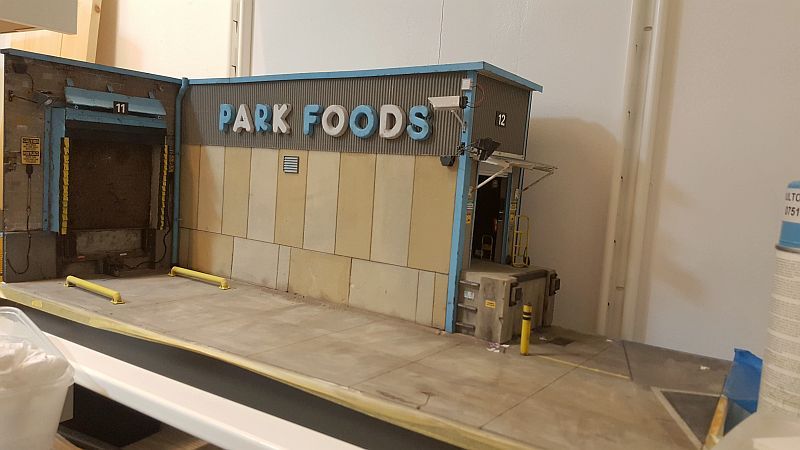
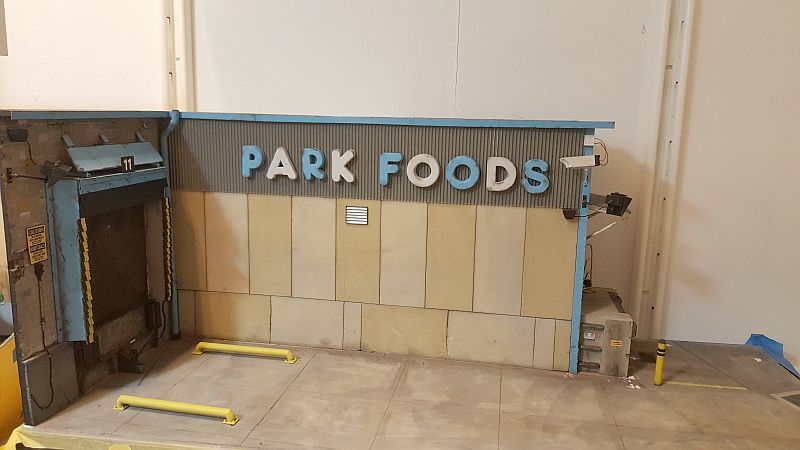
Letters painted, weathered and mounted. I am still contemplating if I should have done it any other way:
--------------------------
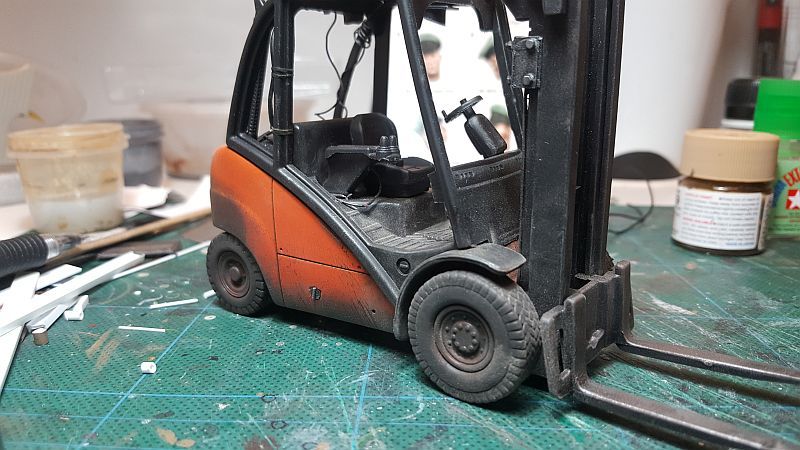
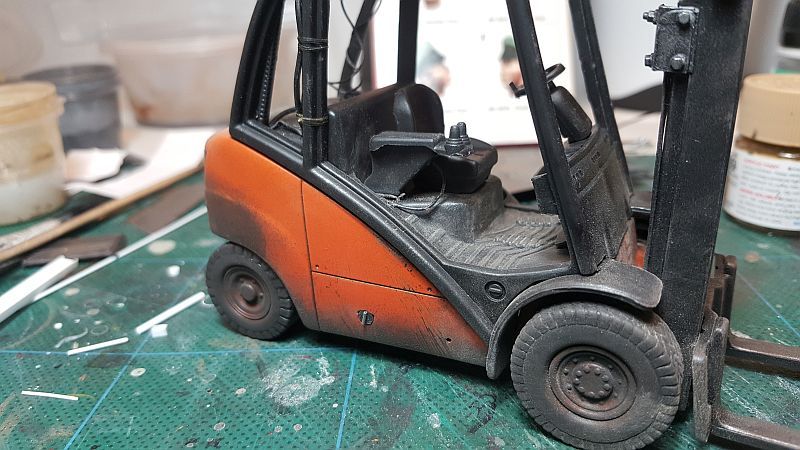
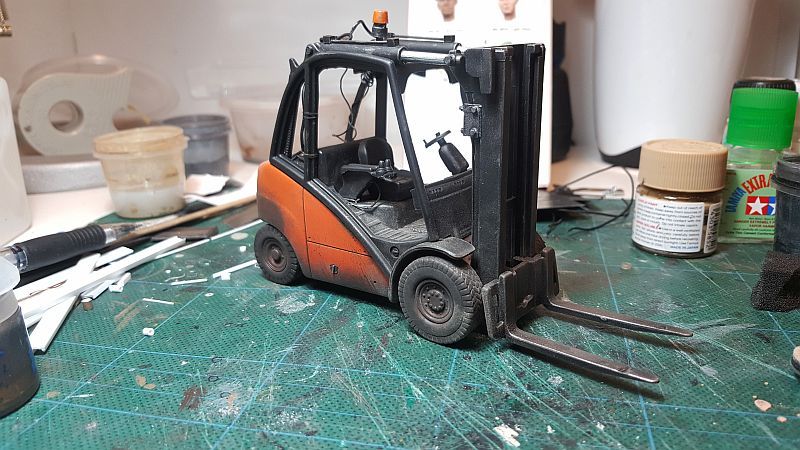
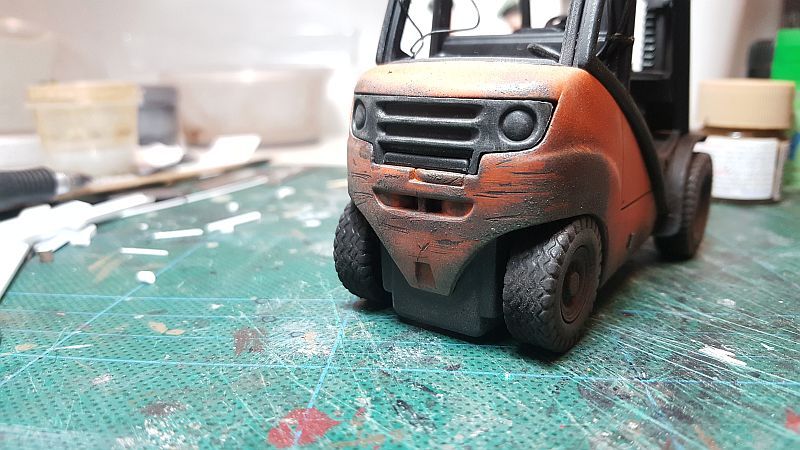
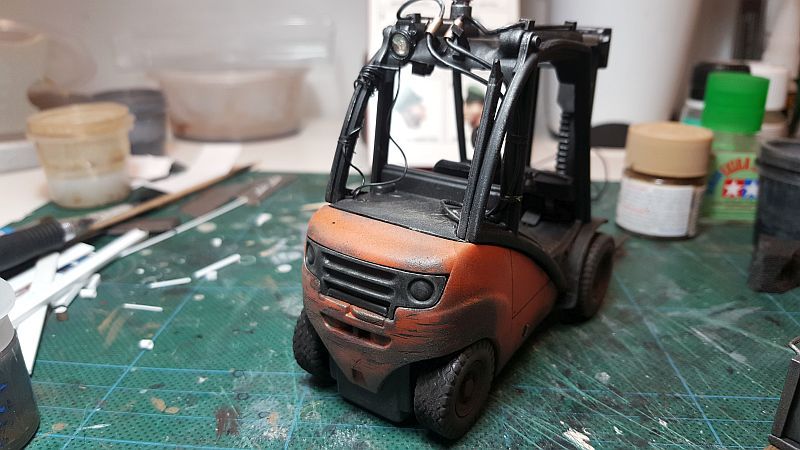
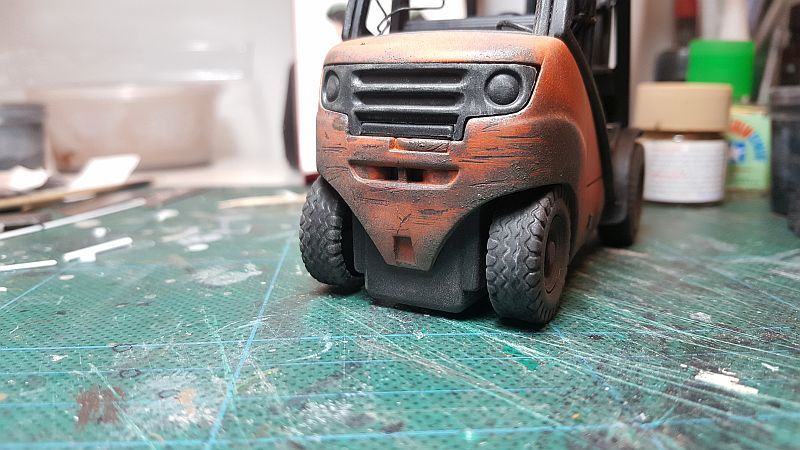
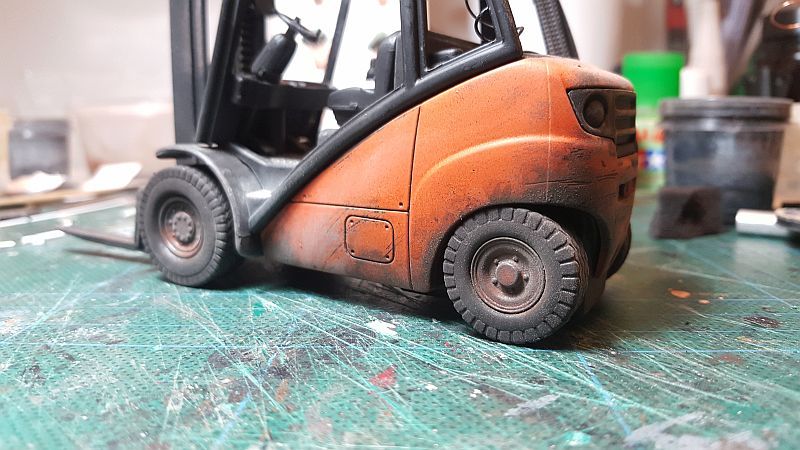
The forklift painted and weathered. Looks much better than in its original state. I see I forgot to add the logo before weathering(Darn it!!!) See if I can still add it.

--------------------------------
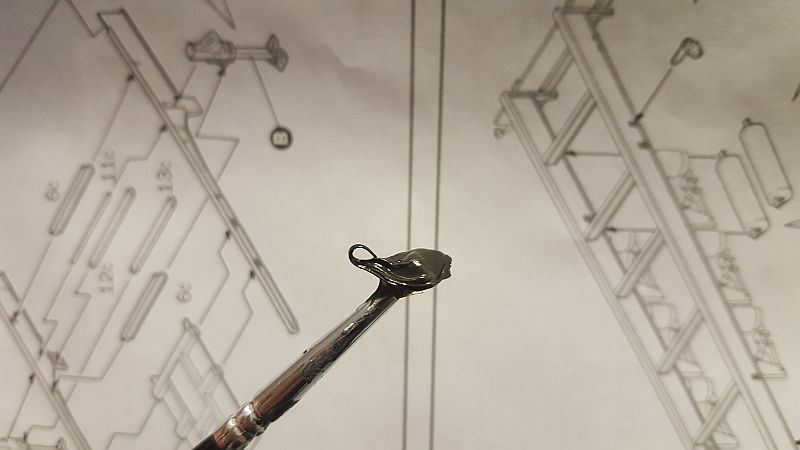
I used some kind of grease( don't know what kind) Otherwise, I usually use machine grease, mixed with black paint. Then I just apply it on the areas that has it on the real model. Like on the rack below:
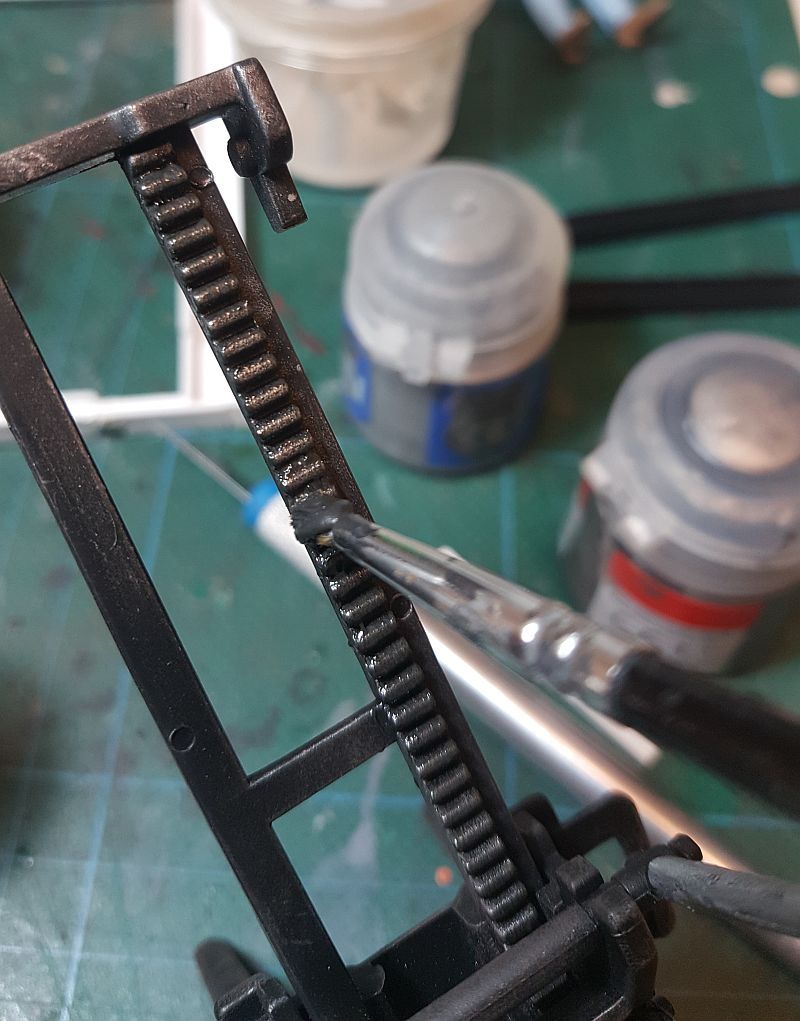
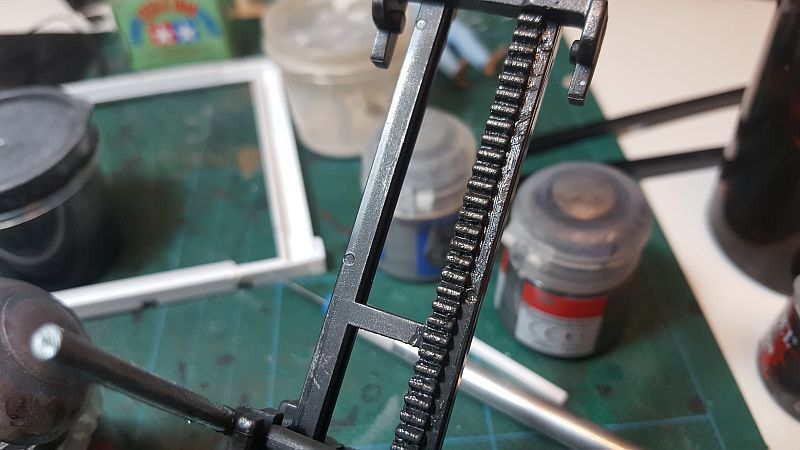
Did some detail work on the forklift to give it some character. This is a Dinky toy model I bought at my local grocery store. The price was 'ok' and on top of it, it is 1/24 scale. To my surprise this model is pretty close to the real thing in accuracy. So I did not have to do too much extra work to get it to look descent. I added the hydraulics, strobe, extra lighting and cabling bind to the framework of the forklift.
----------------------------
Made a lock for one of the opening, which I'not too sure what it is used for; but according to my prototype pic, it has a gas-tank lock on the right side of the chassis. So I made it to look like the one in my pic.
---------------------------------
Added some small details to the steering wheel:
Scraped away the extra stud that was on the forks:
-------------------------------------
Added an extra link from the steering wheel to the base of the forklift floor:
--------------------------------------
Since this forklift was missing peddles, I scratch built a pair:
An over view of the forklift ready to paint:
----------------------------------------
I decided I will be making a sign for this building. I saw this children's alphabet with magnets on the
back to be placed on a refrigerator. I chose the letters I wanted and removed the magnets from the
back.
-----------------------------------------
Letters painted, weathered and mounted. I am still contemplating if I should have done it any other way:
--------------------------
The forklift painted and weathered. Looks much better than in its original state. I see I forgot to add the logo before weathering(Darn it!!!) See if I can still add it.
--------------------------------
I used some kind of grease( don't know what kind) Otherwise, I usually use machine grease, mixed with black paint. Then I just apply it on the areas that has it on the real model. Like on the rack below:
-
Ulf Lundberg
- Inlägg: 2141
- Blev medlem: 25 jan 2012, 20:57
Re: Truck 'Loading Bay' Diorama WIP
Genial lösning med bokstäverna! Att tänka utanför lådan...
Snyggt vädrad gaffeltruck.
Uffe
Snyggt vädrad gaffeltruck.
Uffe