by Charles Metz
Are you dissatisfied with your current way of filling seams? Try microballoons! I learned about these little wonders only a few years ago, but I now use them often. Here is how.
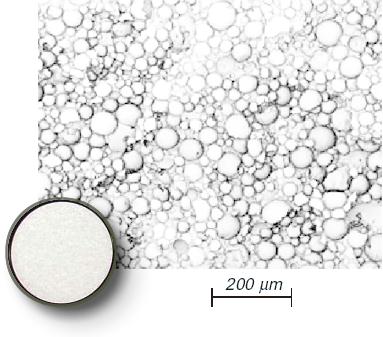
Basically, microballoons are tiny hollow spheres made of glass or phenolic resin that are so small they appear to be a fine powder. Those that I’ve used are sold by hobby shops (often in the RC-aircraft department) in a cylindrical polyethylene bottle with a screw-on pointed dispenser top, essentially like the ketchup or mustard dispensers one finds (at least in the US) in diners or neighborhood restaurants. I have heard that microballoons were first used with superglue (or 5-minute epoxy) as gap filler by RC airplane modelers, because the fact that they are hollow makes the resulting filler light in weight. In any case, they work wonderfully for plastic and resin models as well. A roughly 2″x6″ bottle of microballoons costs only US$2-3 and lasts a long time.
Safety warning
This material is very lightweight and very easily suspended in the air. Care must be taken when working with microballoons not to inhale the glass particles. You should always wear a particle mask when working with microballoons. Safety glasses are also recommended.
Using microballoons for filling
The advantages of using microballoons in combination with superglue (i.e., cyanoacrylate glue, or ”CA”) as a gap filler for small-scale models are that they:
- prevent the CA from shrinking;
- make the CA much easier to sand, because much of the resulting combination is air; and
- cause CA to dry instantly when they contact it, because the zillions of balloons’ total surface area is so great.
The basic technique is to apply a reasonably thin layer of CA to the model and then ”squirt” a layer of microballoons onto the surface of the glue. If the glue layer is thin enough (less than about 1/32″ or 1 mm, say), it will dry instantly, so you can sand the filler or add another CA/microballoon layer immediately.
Deep gaps usually should be built up from multiple layers, because applying microballoons to the surface of a deep ”puddle” of CA will cause only the surface to dry, leaving the CA liquid underneath. However, many layers can be built up very quickly, because each one dries instantly. The resulting filler is very sturdy but easy to sand, and although the microballoons are hollow, they’re so small that a sanded surface is very smooth, requiring little or no priming.
There is more…
Aside from its pleasant sanding properties and speed of use, the combination of CA and microballoons accomplishes very easily some tasks that are downright unpleasant if done any other way. Suppose, for example, that you’ve broken a small bit of the square corner off of a thin styrene or resin part, such as the corner of a trim tab that extends from the trailing edge of an airplane’s wing or — I’m guessing here, because I’m not an armor modeler — the corner of a tank’s sheet-metal fender. In ”the old days,” the only sturdy way to repair such a damaged corner would be to carve a bit more of it away, leaving a squared-off indentation; glue an oversized rectangle of sheet styrene of appropriate thickness into the resulting gap; and then sand the styrene patch down to size after the glue is thoroughly dry. With CA and microballoons, however, you can simply apply a small drop of CA to the corner, squirt on microballoons, repeat until an oversized corner has been built up, and then sand it to shape immediately. Successive CA/microballoon layers of this kind also can be used very easily to ”pad out” the contours of an airplane’s cowling, for example.
Try ’em; you’ll like ’em!
Copyright © Charles Metz 2004. Used with permission
This article was originally published in IPMS Stockholm Magazine in February 2004.
