by Christopher Holland
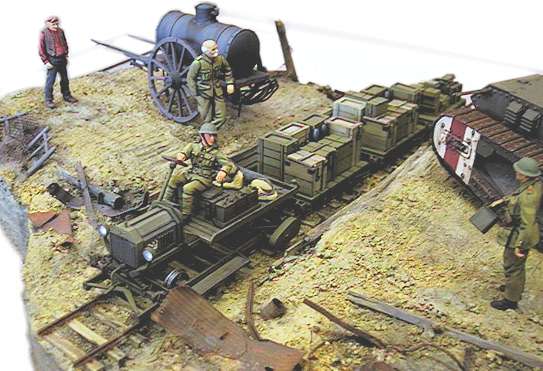
Convincing groundwork is a necessary ingredient of any diorama. This article is a small guide to the for those who are new to the diorama making. I will concentrate on the techniques, not the artistics.
Like many others, I have learnt a lot from Shepherd Paine’s book How to Build Dioramas and I would recommend anyone getting into dioramas to read it. The techniques that I use are a mixture of Shepherd Paine’s, a lot of other people and my own experiences.
The described methods are applicable to all scales, but of course you will generally need finer grade of groundwork materials for the smaller ones.
What you will need
Collecting following materials and tools should ensure that you get a flying start into the art of diorama building:
- Piece of wood or other material for the base
- Felt cloth (optional)
- White glue / PVA.
- Celluclay (a mixture of finely shredded paper an dry glue that you mix with water and get a papier maché).
- Water (good to keep handy in a jug or cup unless you’re working by the sink).
- ’Architect paper’ – sheets of styrofoam sandwiched between cardboard paper.
- Sand and gravel of different sizes.
- Static grass.
- Flock.
- Sharp hobby knife.
- Old paintbrushes.
- Cups or old plastic food containers for mixing stuff in.
Step one – The base
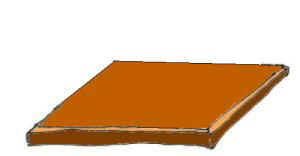
The first step is to prepare the base plate. The base plate may be a piece of wood or glass. Anything that is flat, won’t bend easily and has nice-looking edges will do, the rest is pretty much up to your taste. Make sure he edges are looking fine and pleasing – it’s the edges that will remain seen when you’re ready. Wooden bases of various shapes and sizes are available from craft stores. In addition, sections of wood can be purchased from a lumber store, with the edges routed into a variety of different patterns. Trophy boards and picture frames make easy ready-made bases.
The size of the base should be carefully matched to your planned setting. A common novice error is starting with a base that is too large for the concept and then trying to add things to it to make it look ”busy” after your original scene is complete.
Be aware that wooden bases sometimes can become warped after the diorama has been finished. The reason for this is that if you use water during construction of your diorama scene, the moisture can get into the wood causing it to expand. Warpage is bad for many reasons, but not least because it may cause your groundwork to crack.
So, when using wooden materials such as plywood, marine-grade plywood, masonite tiles or a particle board, it is best to thoroughly seal the surface prior to construction. This is done by painting it with a few coats of clear, waterproof varnish. The key is to seal all sides, both the top and bottom of the base.
You may want to glue some sort of matte board down onto the top of your base, to form a foundation that your scene will be built upon. This accomplishes two things. The first is that it gives you a better looking diorama, since your scene won’t be built directly upon a bare piece of wood.
If you want to make sure that your diorama won’t scratch the underlying surface on which it will be standing, glue pieces of felt cloth in the four corners of the bottom side of the plate. I have never bothered with this but I have glass shelves in my display cabinet (I can recommend the well-known IKEA’s Billy bookshelf with glass door, which is cheap and easy to assemble).
Step two – Building the basic shape
The next step is to build up the topography of the diorama. This requires some planning. The most fundamental thing to do when working on a diorama is to follow a theme or idea. Even if you think you have got the concept, try to develop it as much as possible, working out the details of the scene.
Then, let your idea to ”drive your diorama” and not vice versa. For example, if you decided on a small, compact scene, stick with a compact but characteristic piece of terrain.
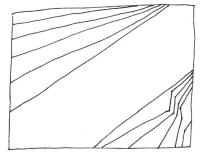
It’s good to make a sketch of what you intend to do (it usually changes a bit a you go, but this way you’ve something to follow). Plan the shape and layout of the ground. Looking into nature should give you plenty of ideas for making your setting look natural.
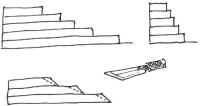
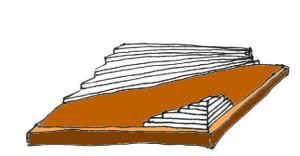
Now, by using layers of architect paper you can build up the terrain and make soft or steep slopes and since it’s an easy material to shape you can form it most any way you like. I usually cut the edges off with a sharp hobby knife.
Now you build up the different layers using the architect paper, starting with the bottom sheet that you glue down with white glue. Let the glue dry a bit before putting on the next layer to keep them from sliding apart.
When you’ve built up the terrain shapes they way you want you give the whole base, wood and architect paper, one or two layers with varnish to seal it from moisture. I personally prefer an acrylic, water based varnish that dries very fast and you can obtain it cheaply at most paint and hardware stores.
If your scene will have a larger height to it, it may be better to use a piece of Styrofoam that has been cut to size and shape to form larger blocks of the foundation.
Step 3 – Forming the terrain
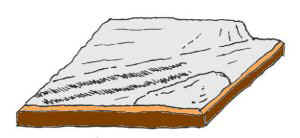
After the varnish is tohroughly dry it is time to give the base a more natural shape.
For this I use Celluclay, but there are many other putties that are suitable for the purpose. I know about people using plaster of paris, spackling compound, wood putty, water putty and so on. It would seem that you can use any ordinary household putty that you are comfortable with.
Mix the Celluclay with water and a glob of white glue and kneed it until you have a clay like lump. If it is too wet you will have problems with the drying, the edges tend to curl up an it might even start to mold if the drying takes to long.
Spread the Celluclay by applying a small amount at a time, and working it out flat. I usually start by spreading all of the Celluclay over the base with out caring about the look of it, and the flatten it more with a wet teaspoon.
If you want your base to show tread marks or wheel marks make them at this stage. While the groundwork it’s still a bit soft, get a couple of wheels from the spares box, fix them to either end of a toothpick or something similar about the width of the subjects axles. Roll them over the surface of the soft groundwork creating ruts or furrows, don’t be too tidy, roll them back and forwards a few times, checking that the vehicle will sit in the ruts.
Also, prepare the place for each of your vehicle models by firmly pressing them down into the Celluclay. This helps give an impression of weight to the model rather than it being placed on the surface of the diorama, it also helps when you come to fix the vehicle in place by giving a positive location for it.
Step 4 – Adding sand and gravel
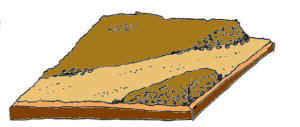
Before the Celluclay has dried (it takes about 24 hours, but I do this straight after applying the Celluclay) you apply sand and gravel. I apply it where there wont be any grass or vegetation. Fine sand for the road and coarser gravel for steep banks where the grass wont grow. Try to press the sand and gravel a little into the Celluclay. Now let everything dry. The next day I go over and secure the sand and gravel using a paintbrush and diluted white glue. Now let it dry for two days.
Step 5 – Painting the terrain
Now I wait for the CelluClay to dry completely.
Since Celluclay sucks up a lot of paint I usually give it a quick cote of varnish to seal it. After this has dried it’s time to paint the base in the shades of dirt and sand you want. The base coats need only to be ”generic” earth colors like brown, walnut, or sand.
If you have any tread marks or wheels marks you may want to give these a darker tone.
Step 6 – Applying vegetation and the finishing touches
For the vegetation and finer ground details, there’s a ton of stuff that exists. For example, Woodland Scenics produces a lot of materials that can be used, and these can be found in a well-stocked model railroad shop. In general, though, it is best to locate and use regular organic items. They will look better, since they are more realistic.
Some of the items that Woodland Scenics makes are static grass, dirt, sand, rocks bushes, and trees. They also produce a strong liquid glue that can be sprayed onto a scene, gluing everything in place.
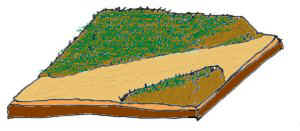
After the paint has dried it is time for the vegetation (unless you’re making a desert diorama, but even then some brown shrubs can be used).
Static grass is nice, but in my favourite scale of 1/72 it will looks more like a well tended lawn . Instead I use a flock from Games Workshop that I mix with a little static grass white glue and water until I get a wet-mud consistency. Add also a few drops of sand or buff color to take away the gloss of the static grass. This I apply using a teaspoon and then a paintbrush (use an old one) for spreading into irregular patches and lumps of grass. If you’re planning to put vehicles and figures on the grass covered areas this is a good time to put them in place.
After the grass has dried I drybrush the sand and gravel in a lighter tone to enhance them and give them a dusty look.
Step 7
Enjoy looking at your diorama… and start planning for the next one!
This article was originally published in IPMS Stockholm Magazine in June 2002.
