A scene from the Battle of Britain, 1940
by Anders Isaksson
In the history of the past century, 1940 was an eventful year, even if the news were mostly bad. By the middle of June the German army had forced all British forces to withdraw from Belgium and France in a humiliating defeat. Soon, France would fall completely to the German onslaught and the United Kingdom remained the sole country in Europe opposing the Nazi Germany. The time was June 1940.
In order for the German forces to advance across the English Channel the Luftwaffe had to gain control of the skies over southern England. This would be achieved by destroying the RAF’s fighter force. By early July the Fighter Command had managed to patch up its strength to 640 fighters against the 2600 bombers and fighters of the Luftwaffe. The stage was set for the next battle – The Battle Of Britain. The World held its breath.
The heroic defence of Britain by ”the few” was really a joint effort of pilots and ground crews. Ground crews were working day and night to keep the aircraft in flying condition, with maintenance schedules and spares supply dangerously stretched. The crews kept the fighters as combat-ready as possible, winning the Battle on the ground as the pilots were in the air.
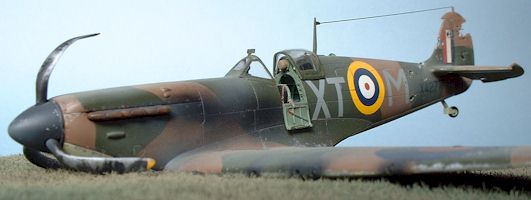
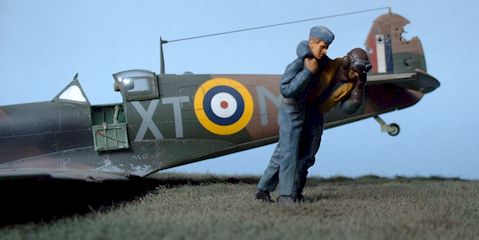
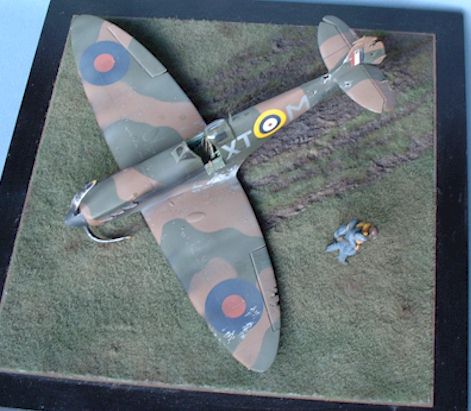
This diorama is my attempt to capture the drama of these summer weeks of 1940. The scene depicts a British fighter pilot having returned with his damaged Spitfire from a scramble mission. Being unable to retract the aircraft’s landing gear he was forced to make a belly landing, and is being assisted from the crash site by a ground serviceman
The kit
Not much has to be said on Tamiya’s 1/48th scale model of the Spitfire Mk I. Released in 1994, the kit makes an excellent model straight from the box and there are no obvious errors or omissions that need to be dealt with.
Construction
I made quick work of assembling and painting the cockpit, only adding an old set of photoetched seat belts from Eduard to the seat.
Since the aircraft would have made a forced landing I really wanted to make it look like the pilot had wrestled with the controls. So the next step was to cut out the rudder, ailerons and elevators. I was going to add damage to the rudder so this was left as separate piece until later. The ailerons were simply reattached in different positions, while the elevators needed a little extra work to look good.
The elevators were mostly seen in the ”down” position on parked Spitfires, and this is the position i chose for my aircraft. Once cut away, each elevator recieved a small strip of styrene on the forward part – the part of the elevator that joins the stabilizer. These strips were sanded round in order to make them conform to the stabilizers and notches were cut out to simulate the hinges. The left elevator also had a minor surgery as I removed and re-attached the trim tab at an odd angle. However, I did not bother to add the actuator rod jointin the tab with the elevator. Finally the elevators were glued back on the stabilizers and left to dry thoroughly.
With the ’boring’ stage of putting together the major sub-assemblies out of the way I could concentrate on the fun part; replicating the battle damage! I first planned the layout of the damage, marking the areas where the shrapnel and bullet holes would have penetrated the airframe and making sure that the pattern seemed somewhat logical.
The next step was to thin the plastic of the fuselage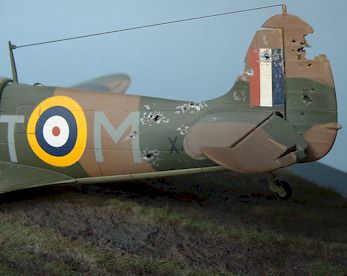 and left wing from the inside using a motor tool with a burr, making the plastic as thin as possible. Finally the tip of a modelling knife was used to carve holes in the thin plastic. I made sure the holes were carved from the outside and in where the bullets would have entered the airframe and were carved from the inside and out where the bullets would exit the airframe. In areas such as the rudder where large pieces of the fabric would be missing I inserted short sections of styrene strip to simulate the internal structure of the rudder.
After finishing the battle damage it was time to close the fuselage and make exterior damage in the form of a few dents on the underside of the airframe. This was done by using a candle to (carefully) heat the plastic and then gently making dents in the plastic using a soft eraser. I concentrated on the underside of the nose and the wing leading edges towards the centre of the aircraft. I noticed only later that the damaged areas are not too easy to see once the aircraft was attached to the groundwork.
Paint and markings
The model was painted in the ordinary 1940 RAF colors of Dark Green and Dark Earth using Tamiya acrylics. The underside was painted in the usual Sky. I also painted a few small squares of slightly different browns and greens using Humbrol colors and a small brush to simulate the patchwork effect from previously repaired skin. When all colors had dried I applied a coat of Tamiya Clear.
Markings come from an Aeromaster sheet on 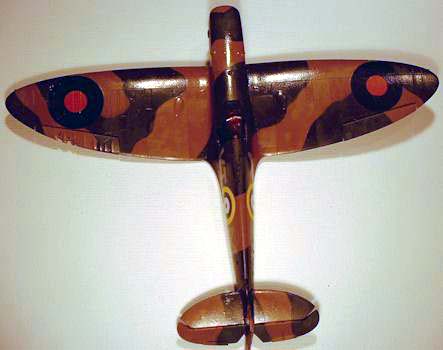 the Spitfire Mk I from the Battle Of Britain era. I do not remember exactly, but I believe a few decals from the kit were used as well. Anyway, the resulting model sure looks like a typical Battle Of Britain Spitfire – so far, so good!
I concluded the painting phase by applying a wash of heavily diluted black oil color to accentuate surface detail.
Weathering
I started the weathering by painting small scratches where the paint would be worn off using Humbrol Aluminium. When completely dry I applied a second wash of diluted black oil color to restore the panel lines in the metallic areas.
As the next step I applied an overall coat of Polly Scale Dust acrylic color. I made sure that this coat was uneven and did not follow any specific pattern on the model. Although I first was a bit sceptic about the results, I found that the paint produced a nice dusty finish on the model once completely dry.
The final step was to apply some stains behind the exhausts and the gun ports. I used a mix of diluted Tamiya black and gray colors applied with my airbrush as well as the powder from a soft pencil, applied using a small brush. I also applied a little extra shading around each rivet near the exhaust area to achieve variation of the overall finish.
Final details
The exhausts, propeller and spinner were painted separately using Tamiya colors. After the propeller blades had been painted they were carefully bent backwards to simulate a spinning propeller that has hit the ground. Each blade then recieved a dry-brush of Humbrol Aluminium where the paint would have come off after the propeller hit the ground.
After adding the antenna wire from stretched sprue, the hood and pilot door were attached to the fuselage and I declared the Spitfire complete.
The figures 
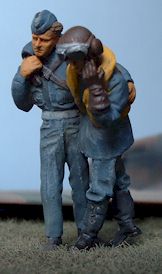
The wounded pilot and crewman are produced in white metal by Dartmoor Models and comes molded in one piece. All that was needed was a little cleanup using a small needle file and fine sand paper followed by careful painting. For the flesh areas I used a base coat of Humbrol Sand followed by a few washes of Raw Umber and Burnt Sienna oil paint to add shadows. Everything else was painted using appropriate Humbrol colors. Giving the cloth parts a few overall washes of Raw Umber oil paint produced subtle shadows.
The diorama assembled
British fighter airfields of the period – so battered by constant attacks from the Luftwaffe – were simple affairs compared to concrete runways of today. Spitfires and Hurricanes usually operated from simple grass fields.
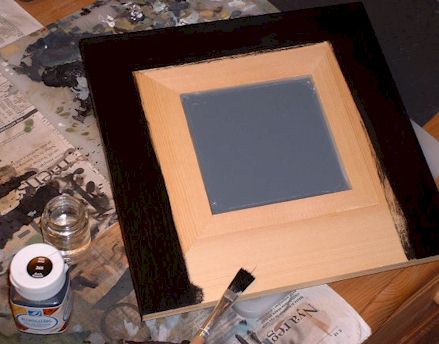
After working out the size needed for the aircraft and figures I selected a suitable frame to use as a base, fitted a backing made from matt board and brush painted the frame with a black acrylic hobby color. When the paint was dry I carefully masked off the section around the base that was going to be the frame around the grundwork.
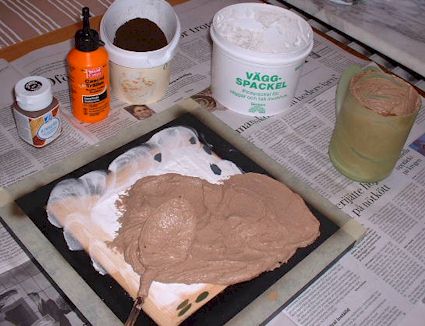
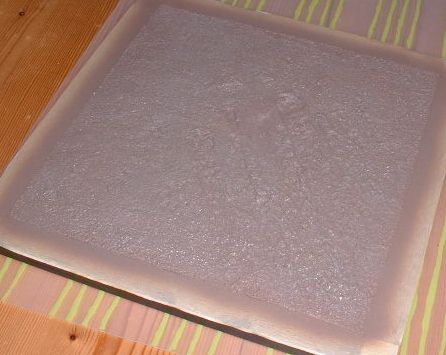
The groundwork itself was a mixture made from household filler, a generous amount of white glue, coffe grounds and a bottle of dark brown acrylic hobby color. This mix was spread out on the matt board and allowed to dry.
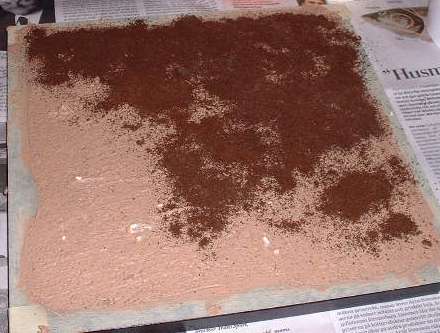
While the ground work was still a little wet I applied more coffee grounds on top.
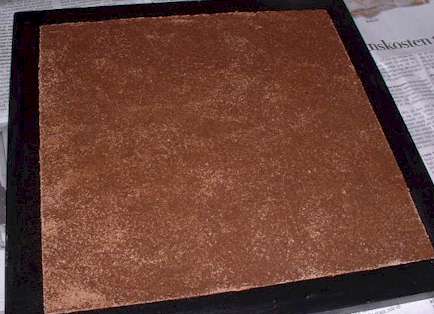
I carefully pressed my fingers on top to make sure the entire surface was covered by the coffee grounds before I turned the plate upside down to get rid of the surplus material.
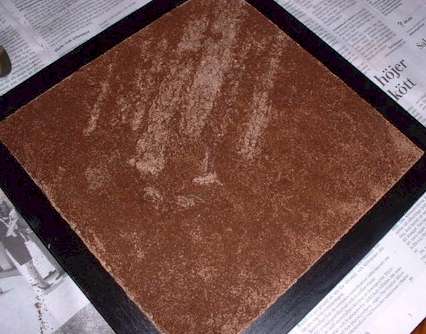
When the ground work is almost dry it is time to make the depressions from the aircraft. Using the model’s underwing features (radiator and oil cooler) as a guide I used the handle of a paintbrush to make streaks behind the aircraft. The model was also firmly pressed in place in order to establish its final position on the ground. It was then removed and the groundwork set aside to dry thoroughly.
Once the groundwork is completely dry it was airbrushed using a mix of different brown Tamiya and Model Master colors.
For some reason I forgot to take pictures while making grasswork. Static Grass was applied by first painting the groundwork with diluted white glue and then spreading a fair amount of grass on the entire surface. I made sure to avoid getting glue in the areas that are supposed to be earth. After the white glue had dryed I vacuumed the surplus grass powder.
Finally I airbrushed the grass areas using different shades of Tamiya and Model Master green colors. I needed a few trial-and-errors to get the grass colors reasonably right. I concluded the painting phase by giving the earth areas a wash of very dark Humbrol colors to add depth and simulate recently exposed earth.
The base was now left to dry and the Spitfire was glued in place along with the figures. My simple diorama was complete.
There were a couple of more details that I had planned to make in order to make the scene a bit more complete but, honestly, I did not have the patience. The first detail would consist of a simple fence standing immidiately in front of the aircraft to further implicate an emergency landing. The second detail would be to add a little dirt and groundwork litter on top of the leading edge of each wing to replicate mud that had been thrown up as the aircraft skid along the grass. Well, maybe next time.
This article was originally published in IPMS Stockholm Magazine in January 2002.


