Building Italeri’s kit, part II: Weathering
by Anders Isaksson
Continuing from part I of the article, I will now focus on the weathering techniques used on my Italeri LAV-AT. Weathering always leaves plenty of room for both creativity and artistic license, and as such is one of the most enjoyable parts of modelling!
Weathering
To start weathering a filter was applied to the entire model. Not to be confused with a traditional wash, the technique of applying filters has been pioneered by Miguel ”Mig” Jimenez and is explained in his article on the Missing Links web site (look in the Rarities section), so I will not explain it once again here.
I used a large round brush to apply a single filter
to the entire model. This filter consisted of a heavily
thinned mix of Burnt Sienna and Titanium White oil colour.
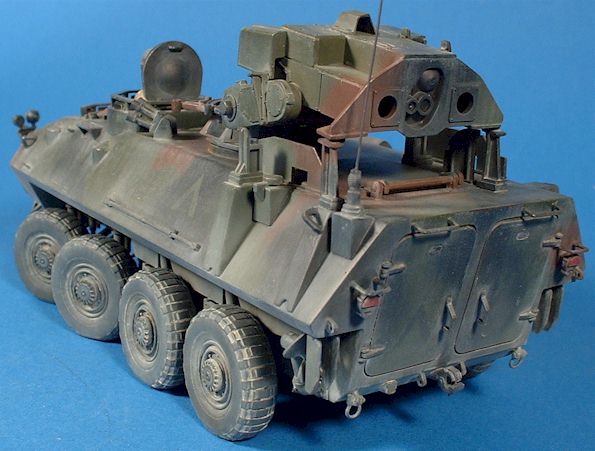
After everything was thoroughly dry I was pleased to see that the surface of the model had taken on more life and variation than before.

To simulate scratches and scuff marks I used a selection 
of Derwent coloured pencils.
The colours used ranged from light gray to a few greens and a brown.
Using the pencils I went over the entire model, drawing and scratching. At this stage the effect of the pencils will look a bit harsch, but they will blend in nicely once the weathering continues.

For heavier scratches resulting
in worn and chipped paint I used a mix of Vallejo Acrylic
colours applied with a small pointed brush.
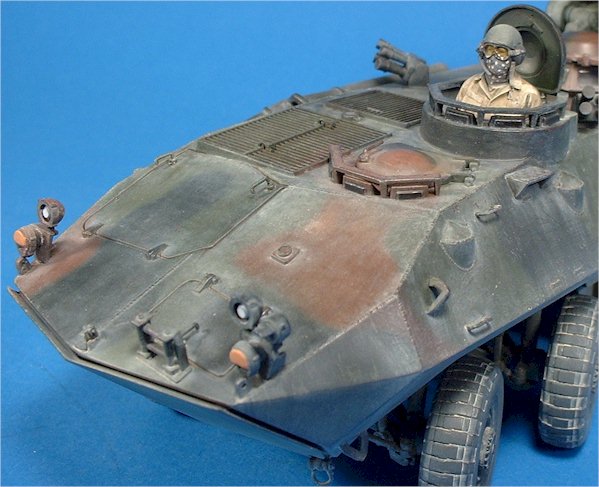
The colours used was a mix of 039 Hull Red and 057 Black and the chips were concentrated around hatches, foot steps and handles as well as other protruding details that would be subjet to heavier wear and tear.

Time for some dust – the final effect that will blend everything together. To simulate dust I used a mix of Yellow Ochre and Titanium White pigment powder with Humbrol Thinner as the medium.


The powder is mixes with the thinner and applied with a brush. The final effect of the pigment can not be observed until the thinner has evaporated. Sometimes another layer of powder is needed to achiece the desired effect.
After the mix is completely dry on the surface the powder can be rubbed off using a finger to create desired patterns such as the streaks of dust seen along the sides of the vehicle.

Now on to the wheels:
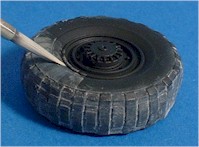
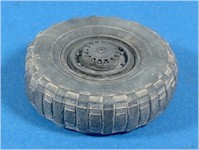
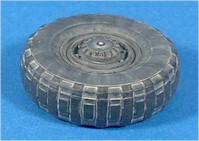
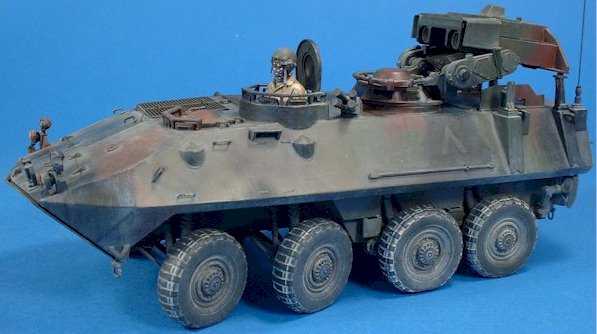
The pigment powder is mixed with Humbrol Thinner and applied to the entire wheel. The wheel is totally covered in the pigment powder and set aside to dry. Finally the pigment powder is rubbed off from tread pattern and side walls.
Final details consisted of applying a wash to the air intake grills and varioius door and hatch hinge lines followed by metalizing highly worn areas and details.
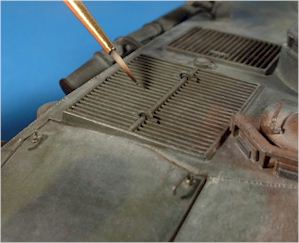
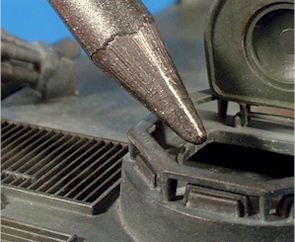
A wash of black oil colour was applied to the air intake grills as well as the various door and hatch hinge lines to emphasize their pattern. To simulate exposed metal the most worn areas were treated with a soft lead pencil.
Finally the weathering is concluded with a very, very light dusting from the airbrush to the lower parts of the hull and wheels using a heavily thinned coat of Tamiya XF-57 Buff.
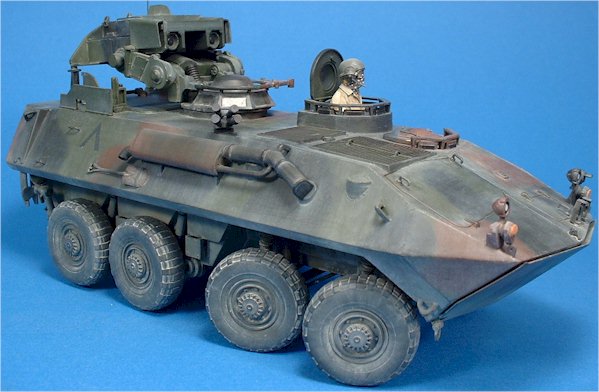
All components can now be assembled into the model. The final detail was to add the human element so I searched through my spares box and came up with an old Verlinden U.S. modern tank crew figure. Being a half figure I just about managed to squeeze him in the commanders hatch.
This was the second project where I used this approach to painting and weathering. While it is not perfect I am still very pleased with the finished model, especially when considering the result in relation to time and effort spent on this project.
This article was originally published in IPMS Stockholm Magazine in January 2003.