by Anders Isaksson
The Right Element
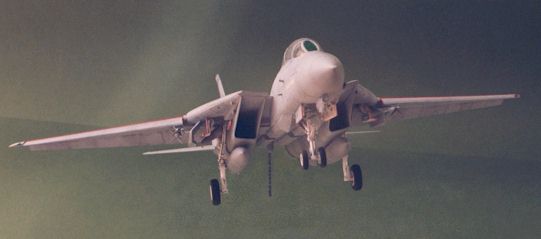
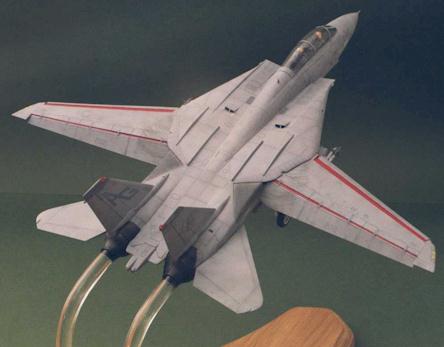
While the low-visibility color schemes of modern jet aircraft can look rather dull, I really think the faded and well-weathered look of the U.S. Navy aircraft can be both interesting and attractive. I have modelled a number of F-14 variants earlier, but never tried a truly well-weathered example. This time I also wanted to try to model a Tomcat with a faded and retouched paintwork. A nice photo of a real F-14 gave me the idea of displaying the aircraft ”airborne” with gear, slats, flaps and hook extended, on final approach to the aircraft carrier. I’m pleased with the effect – see for yourself!
Since I already had a Fujimi F-14A among my unbuilt models I decided to use this as the base for my project. Having experienced a number of problems during construction of the Hasegawa F-14, I figured the Fujimi kit would require less effort to put together, letting me concentrate on the paintwork. However, a few details were taken from another Hasegawa F-14 kit.
Construction
Building the model presented no major problems. Overall fit was good and only a little filler was needed in the joint between the forward and main fuselage. A few modifications were done during construction, as described below.
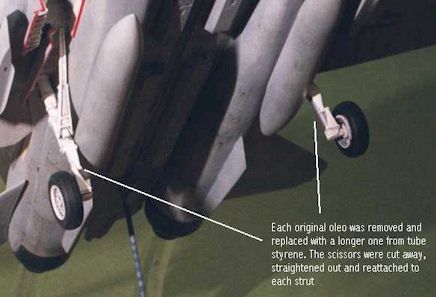
The main landing gear recieved lengthened oleos by cutting each leg apart and inserting a longer oleo from tube styrene. It was a bit tricky to decide the exact length of the oleos, but constant isaksson_f14_02.jpg (23171 bytes)comparing with photos finally got it right. The surgery resulted in each leg consisting of four separate pieces and my main worry was how to get each leg straight again, but using slow drying plastic glue gave me enough time to make necessary adjustments.
The assembled main gear was now a bit fragile, but since it was not going to carry the weight of the model I did not worry about making reinforcements. I could not find any photographic evidence that the front oleo expanded noticably when decompressed, so I took a short cut and added a few pieces of scrap plastic inside the wheel well to make it more shallow, resulting in a slightly longer front gear. Looks good enough for me!
The kit slats recieved new rails from styrene strips, glued at the correct (steeper) angle. This was actually done by first gluing the slats to the wings in the correct position and then adding small strips of styrene on the underside of the slats, between the front edge and the wing. In order to be 100% correct there should have been a slight gap between the wing and the slat, but I choose the simpler way and glued it all together.
The external fuel tank under each air intake were moved slightly outboard. The Fujimi kit has the location points right along the centre line of each intake, which is incorrect.
The pylons under each wing glove were replaced with the ones from in the Hasegawa kit. I simply thought they looked better.
The molded ejection handles were cut away in favour of the photo-etched ones from Hasegawa.
Also, I broke the kit landing hook during painting, and had to replace it with the one from Hasegawa.
Fujimi provides a pair of good pilot figures. 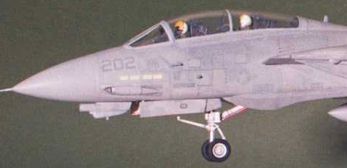 I left the pilot unchanged, looking straight ahead and obviously concentrated on keeping the Tomcat on the correct glide path down to the carrier deck. I modified the RIO (Radar Intercept Officer) in the back seat. Figuring he could be a bit more relaxed I turned his head to the right. I also raised his left arm to make it hold the instrument panel in front of him, as if he was about to get ready for the kind of ”controlled crash” that describes a carrier landing. Unfortunately, since this is 72nd scale these modifications are not too easy to spot unless you look hard into the cockpit.
Painting
After construction of all major subassemblies I began the painting process.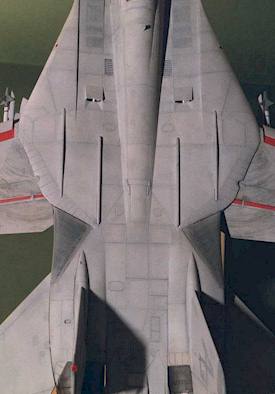 I want to point out that while the description below seems pretty straightforward it took a fair deal of trial-and-error to get things to finally look the way I wanted. The painting was done in the following stages:
As a base coat the model was airbrushed with a mix of different shades of gray, ranging from light gray (FS 26440) to dark blue gray (FS 26320). I used Gunze Sangyo paints thinned with alcohol and water. Since real Tomcats get so weathered I did not bother to find exact matches for the colors needed. The different shades were applied in an irregular pattern over the entire model. I also accented separete panels by masking with Post it-notes along selected panel lines followed by a light coat of paint.
With the base coat completely dry, I dug out a few bottles of Humbrol grays in the same color range as the acrylics. I used these to apply irregular spots of paint, especially around access points and along panel lines. This was a bit tricky, since the paint easily built up and left messy brush marks on the surface. This was usually fixed by lightly sanding the area after the paint had dried.
After completing the handbrushing I thought the surface of the model looked a bit too harsh, but I continued with a light wash of Payne’s Gray artist oil color to accent the panel lines
I simulated dirt and grime on the airframe by applying 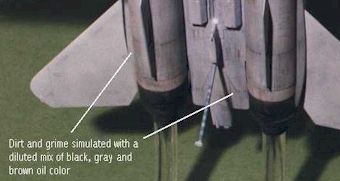 small dots from a black ink pen and streaking the still wet dot of ink in the direction of the air flow using my index finger. I did this around selected panel lines and more heavily around engine access hatches as well as the entire underside. I also used a diluted mix of black, gray and brown oil color around the engine hatches to add more dirt.
Photos of real Tomcats show heavy traces of dirt and grime at the wing hinge where it travels back and forth during flight. I simulated this by holding a brush loaded with slightly diluted black and gray oil color at the edge of the ”wing gloves”, only touching the upper part of the wing, and slowly moving the wing back and forth, thus leaving appropiate traces of dirt and grime.
Next I sealed the surface using a few coats of Johnson’s Klear. The decals were then applied without major problems.
In order to tone down the markings and help them blend with the surface I gave the entire model a light airbrushed coat of matt light gray. This also helped to tone down and blend the previously applied patches of Humbrol gray.
A final airbrushing of Model Master acrylic dull coat finished the painting stage.
All subassemblies were now joined together and the final details like the landing gear, AIM-9 Sidewinder missiles, landing hook, antennas and lights were attached to the model.
Airborne…almost
To suspend the Tomcat in the air, I attached two
clear acrylic rods to the jet nozzles. The rods were bent by submerging them in boiling water for a few seconds. The tricky part was to produce the same curve on both rods, but I seem to have got it fairly right. The diameter of the rods was just about right, requiring only a little thinning on the inside of the each nozzle to make them fit snugly.
And that’s it! I now have a model of a quite ordinary jet aircraft, but displayed in a rather extraordinary way.
This article was originally published in IPMS Stockholm Magazine in January 2000.
