by Christopher Holland
Building houses for braille scale is kind of tricky. Although there are lots of injection-moulded plastic buildings from the world of railway modelling, they tend to be expensive and often a bit to small – the HO railroad scale being 1/87 as compared to 1/72 or 1/76 ”braille” armor scale. The size difference will show especially for smaller ”human-size” structures like residential houses or country cottages.
Additionally, injection-moulded building kits are often difficult to turn into ruins so common in military dioramas. This is mainly because fracturing wall structures will expose the thin plastic the walls are made of.
The solution for these problems is a technique that I found while surfing around websites dedicated to Warhammer games. The method described below allows to easily create bombed and burned out houses. With a little bit of extra effort these can be detailed into architectural structures in undamaged condition, too.
Materials and tools
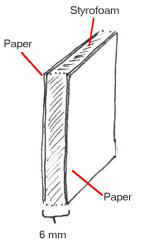
The main material used in construction is architect paper. Architect paper is a sheet of styrofoam sandwiched between cardboard paper. The one I use is approximately 6 mm thick, but I believe that other grades may occur. It is widely used for – you guessed it – architectural models. The material should be obtainable through a well-stocked architect or artists’ supply store.
- Hobby knife
- Hot wire cutter (optional)
- Clothing pins
- White glue/PVA or some other glue that won’t melt the styrofoam
- Some true-to-scale rubble material
- Old paintbrushes
You may also need some extra sheet or strip styrene if you intend to do some extra detailing besides ”bare” ruins.
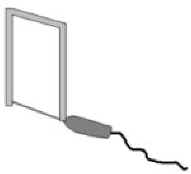
Architect paper is easy to cut with a hobby knife and to make it even easier you can use a hot wire cutter. This tool is a contraption that heats a thin metal wire so that it melts through the styrofoam. Remember that it releases some pretty nasty fumes. Considering it, I get by with a hobby knife and I am quite comfortable with it.
Architectural paper Hot wire cutter
Cutting out the walls
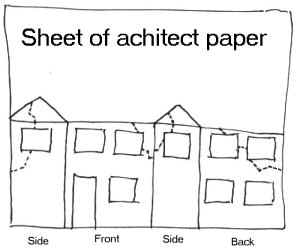
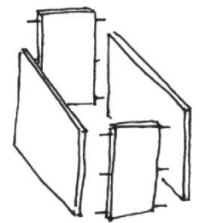
Designing the structure of the building is very easy. Simply draw a 4-view of your intended building on a sheet of architect paper. If you’re planning major damage to the building, like fractured or partially ruined walls, include these areas in your drawing (see dotted lines on my sketch below). You may use actual scale drawings of a real building as a pattern, but if drawing freehand, pay attention to stay in your intended scale. A good tip may be to compare doorways and windows with figures that you plan to use together with the building.
When the drawing is ready, simply cut out all wall sections with a sharp hobby knife or a hot wire cutter.
Additional parts like ceilings or roof segments may be produced the same way.
Before assembling the wall sections together, it is wise to add some ”smaller caliber” damage. Bullet and splitter holes make the wall surface look jagged. This you do by poking and cutting through a wall surface with a hobby knife. Also remember to save all the small cut off pieces, you’ll need the rubble later.
There is no golden rule as to how dense the surface damage should be, so use your own judgement, imagination or references. You can always touch it up later after the building is assembled.
Construction
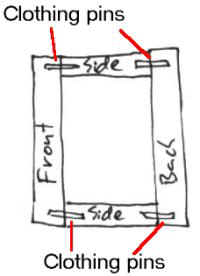
Now it’s time to put the pieces together. For structural strength, I enforce the joint with clothing pins or nails with heads removed.
White glue does not bind styrofoam very well, so I recommend some other kind of hobby or universal glue. Make a test to ensure that the one you choose doesn’t melt the styrofoam. In Sweden there is an all-round glue called Karlssons klister which I found perfect for the purpose.
At this stage you can also add a foundation plate, ceiling and roof structure if you’re doing a multi-storey house.
You will most likely get visible seams between the walls you put together, but one way to eliminate that problem is avoiding to get a seam on the front – or whichever side will be in the eye of the viewer. consider the following sketch.
Getting a surface structure right
Just painting directly on the cardboard surface of the wall leaves it a little to smooth for a natural scale appearance. I use some white glue, mix in some water and some of my daughter’s baby formula. The formula powder melts a little, but the finish is a kind of rough wall.
Painting the building
Paint and drybrush the building with any colour you think appropriate. I usually start by airbrushing a dark colour and lighten it along the way, finishing off with a pretty heavy drybrushing with a light tone of the base colour.
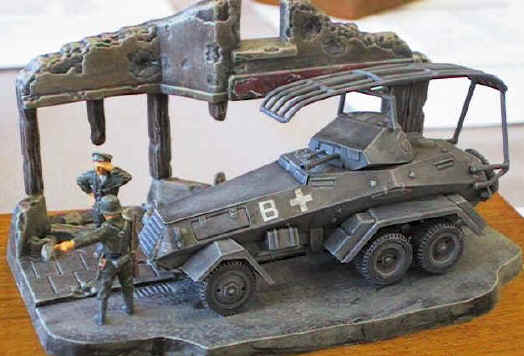
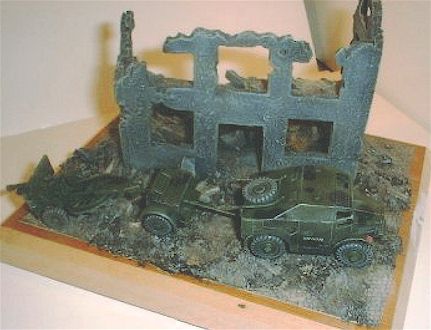
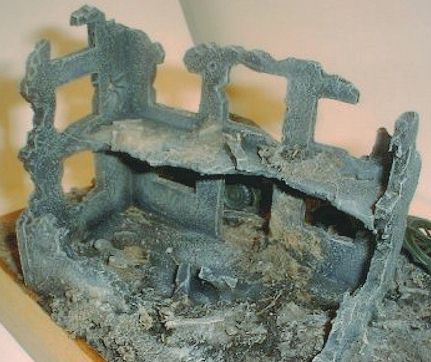
I include the photographs to show the results of my first attempt at this technique. It was a ruin of a simple rectangular building consisting of three walls and portions of a ceiling and the fourth wall.
Putting the building on a base
A ruined building would have a lot of rubble lying around and inside it. If you saved the cut off pieces from earlier stages you should be on the way. You can also use sand and gravel together with more pieces of architect paper cut top desired shapes – great for beams and other structural features. All these bits and pieces should be mixed in white glue diluted with water and dab around the base area.
More detailing
What if you want the building in undamaged, or less damaged state? Sheet and strip styrene is a good material for detailing a building and you can use it for window frames, roof structure etc.
Good luck and don’t forget that Warhammer players may have more good ideas to share.
(For another ideas about the use of styrofoam-enforced carton in modelling, see also the previously published Tech Tips: Brick Walls at a Snap by Frank Spahr -Ed.)
This article was originally published in IPMS Stockholm Magazine in January 2002.
