Shortrun Kits are Getting Easier Than Ever
by Mark Davies

Aircraft modelling has been transformed for me by the Czech and other Eastern European kit manufacturers. There are just so many new 1:72 kits being released of subjects I never fail to find appealing. Azur’s Breda Ba 65 falls firmly in this category, even though it is one of Azur’s earliest kits. As an aside, it’s amazing just how far this manufacturer (and related companies) have come. I have just landed their Potez 63-11, and the quality is superb. So don’t let any comments relating to a few minor difficulties with my Ba 65 put you off buying any Azur, MPM, Special Hobby or Condor products.
In the box
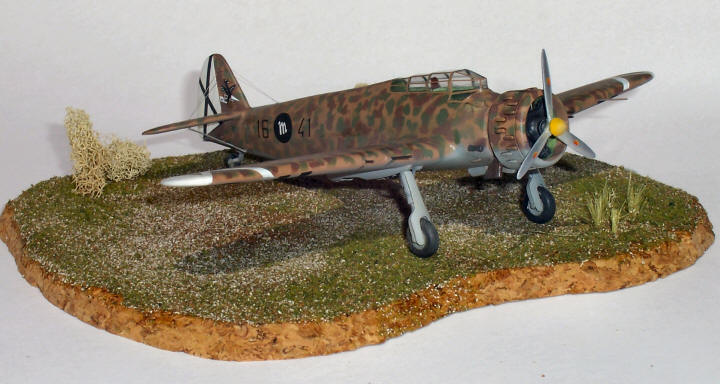
The kit consists of a few injected parts with extremely delicate recessed panel lines, large ejector stubs, and some flash. Items such as the propeller, undercarriage doors and carburettor intake are, however, a little crude. Gun barrels, pitot and tailplane support struts require to scratch-building. There is a choice of canopies, and all clear parts are vac-formed. An etched-metal fret provides cockpit interior detail and the Ba 65’s distinctive undercarriage retraction mechanism. The engine and cowl are a one-piece resin moulding, more about which will be discussed later. The kit can be completed with or without a rear gunner’s station. The option with the rear gun requires a portion of each fuselage half to be removed and replaced with a turtle deck section. Two Italian and one Fascist Spanish Civil War decal options are provided.
I found quite a number of photos on the net, plus what seem to be good plans on the web. The kit actually matched these plans very well (not that this means a great deal), and they are useful in covering the various versions. Note that if you want to build the Chilean version you will need a different cowl and to make some other changes.

The main areas I decided would need attention were the engine and exhausts, undercarriage doors, the carburettor intake, propeller hub, and gun surrounds in the wing leading edge. Before mentioning these items in detail the build required thinning of the wing trailing edges, removal of ejector stubs and flash. Also, the port horizontal stabilizer was a bit thick overall, and this was thinned to better correspond with the starboard one. Overall the main parts went together very well with only Tipex being used to fill a small gap at the wing roots. The tailplane struts were made from stretched contrail strut, and the rigging with invisible mending thread through pre-drilled wholes.

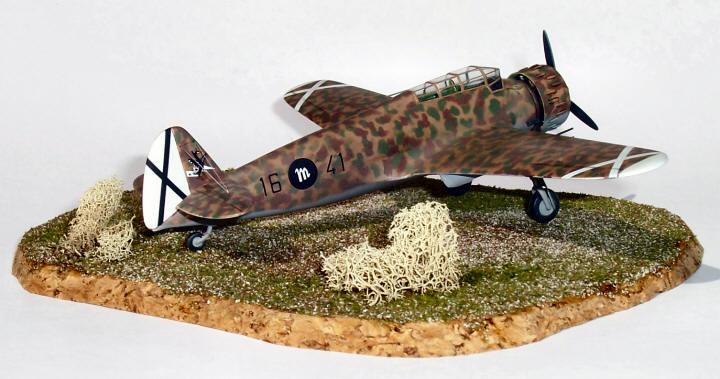
The cockpit interior is adequate, but requires a gun-sight to be added. I also made some pilot’s armour and head-rest. The kit provides two choices of vac-formed canopy. Decide which version is to build and then practice on the canopy you don’t intend to use. The modeller is faced with a bit of a challenge because the Ba 65’s windscreen blends into the rounded part of the fuselage sides, plus each section to the rear of this is slightly stepped. I’ve used a lot of vac-foam canopies, and simply advise lots of test fitting and very cautious cutting with this one.
I chose to model my Ba 65 without the clear panel in the floor as my research indicated that single-seat ground attack version didn’t have it.
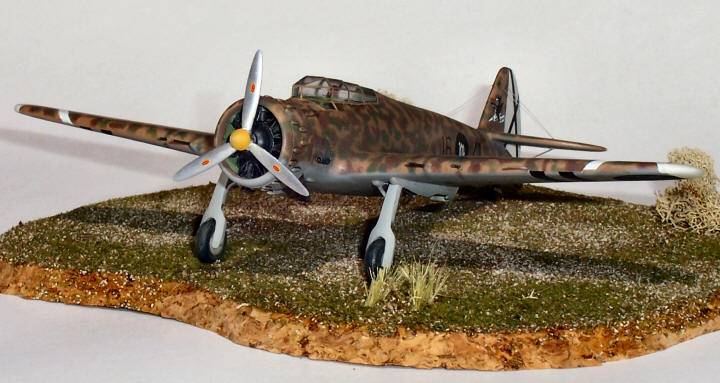
The engine is a one piece casting including the cowl. The cowl captures well the bulges required to clear the rocker gear. The problem is that the engines’ cylinder heads don’t even extend past the cowl’s opening, the effect being to make the engine look undersize and incorrect. Using the engine as intended would not only leave this problem unresolved, but the trailing edge of the cowl would be blunt and solid resin. I chose to Dremel the entire engine out and thin the cowl down to scale appearance. I then used a spare 14-cylinder engine from an Airfix SM 79 with added push rods. This fitted very well, with the heads reaching the cowl as they should to “justify” the rocker bulges.
The kit exhausts seemed to me a bit small and simple compared to photos. I made a new exhaust ring from plastic rod, and the expanded ends were made from tube and 5 thou card with Microstrip cross bars. I don’t feel they I got them quite right, but I think mine are better than the kit items.
The undercarriage doors were Dremeled out to about 10 thou thickness enabling them to curve around the leg as on the original. I opened up the solid carburettor intake for greater realism, and for the same reason I drilled out the two venturi mounted low on the fuselage sides. I scratch built a sinner (using my Dremel as a lathe) and scratch-built a hub from tube stock. Thinned down kit blades were then attached to this to provide a better representation of the distinctive pitch-change mechanism of the hub. Finally I reshaped where the guns emerge from the wing to better tally with photos. The guns were made from hypodermic needles, and I chose to represent ejection ports with black decal rather than cut them out (after all, they won’t be seen in the cabinet!)
Paint Scheme
The scheme I had chosen required brown and olive green over sand. I thought about free-handing this, but felt it would  be time consuming because of the inevitable need to constantly tidy up areas of overspray. Instead I used my Dremel to cut 3 templates from plastic-card and sprayed the blotches randomly through these. This proved to be a very simple and quick way of achieving the camouflage finish I needed. The underside grey was sprayed using torn business card to give a soft demarcation line.
The decals were of excellent quality, with good registration and opacity. They were very thin, and settled quickly with only decal set.
This was an enjoyable and quite straight forward build. Some of the changes I made are not essential by any means, and a nice model would still result from an out of the box build. Without doubt, the trickiest part is the canopy. I feel Azur should have provided two for people to practice on. This said, I should point out that their latest kits have very clear and thin styrene canopies. However, this is the only injected Ba 65 I know of in 1:72, and my example obtained from NKR Models was excellent value for money. I recommend this kit to anyone with some experience of vac-formed acetate canopies.

© Mark J Davies, 2005
This article was originally published in IPMS Stockholms Magazine in June 2005.