About Reversing Decal Silvering
by Rafi Ben-Shahar
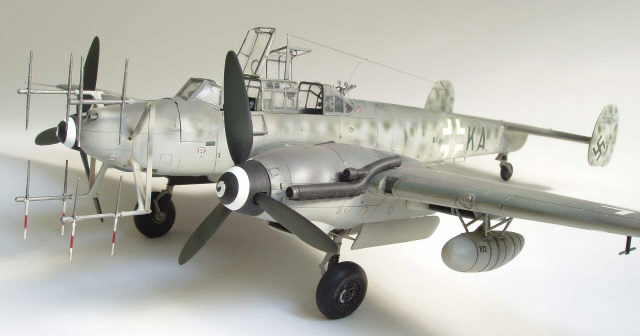
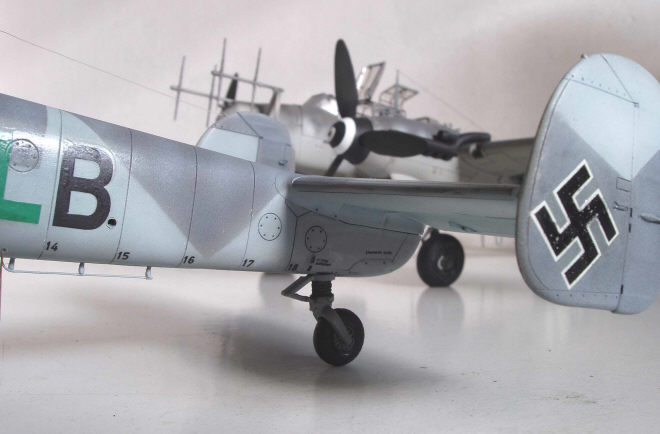
A nice but somewhat old model from my display cabinet…
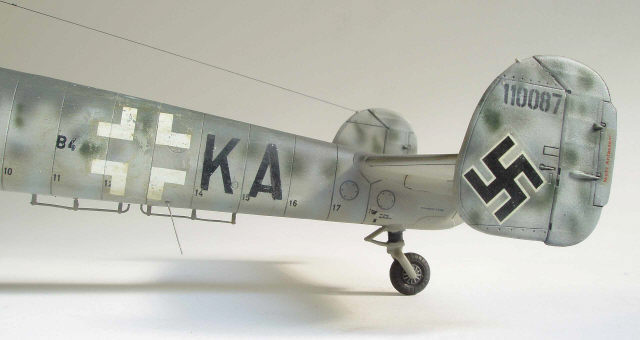
…upon closer inspection sadly displays decal ageing problems. Note the visible decal film around the swastika on the fin. It wasn’t there when the model was new!
A view from slightly different angle reveals just how bad the decals have become. Once again, these decals looked perfect when first applied; all the silvering is a result of ageing. I hate to see this happening to my models!
The majority of modellers have their pride and joy displayed where it can be seen, preferably in a glass case or cabinet. Old models may take a backstage position because building techniques have improved, a new and better kit has been out in the market and most of all, the models age. Aging models show their wear through missing parts, dust, yellowing decals, fading paint and most of all, conspicuous decals. In the course of time, the decals become brittle and the supporting and once transparent film is prominently manifested in what is commonly called the silvering effect. Some decals may peel in places, particularly if they were not well attached to the painted surface from the beginning.
Within the environment of modelling there are several factors that influence how decals on the model will appear in time:
- Decal quality: Some of the best model manufacturers produce low quality decals characterized by a thick or brittle film or low adhesive quality.
- Model surface: A glossy or a smooth surface underneath decals is more likely to eliminate silvering.
- Decal softeners: Again, there is a huge variation in the match between different softeners and various types of decals where some softeners have little or no effect on the decals whereas others may practically dissolve and destroy the decals.
- A final matt coat that represents paint weathering increases the probability that the decals underneath silver and become brittle in the course of time.
- Additional factors that take their toll as the model comfortably ages in the display cabinet are the exposure to sunlight and the changes in ambient temperature and humidity that affect the tension of the decal film.
The Remedy
Recently I discovered a way to revive decals and have them firmly attached both on the newly finished and more importantly, also old models.
It all began with a misunderstanding. For many years I had been conned by hardware store seller, purchasing what I thought was thinner #21 commonly known as nitro thinner but actually getting thinner #18 for enamel paints. After discovering this and obtaining a bottle of genuine nitro thinner, I experimented with it… and came with some surprising results. Upon brush application of nitro thinner on to a finished surface of a model the decals would dissolve regardless of the kind and amount of coating that had been sprayed on top of the decals during the final stages of model building. The dissolved decals would then set in and all silvering effects disappeared leaving a revived and a fine looking model.
| Nitro thinner fact sheet |
| Nitro thinner is a universal thinner and degreasing agent seemingly available under this name mostly in Europe and Israel.Nitro thinner (short for ”nitrocellulose thinner”) is a mixture of organic solvents of the type aromatic hydrocarbons, esters, ketones or other alcohols, in a pre-set proportion used for diluting paints and fillers based on nitrocellulose derivatives – lacquers as well as for nitrocellulose surfacers and primers. Nitro thinner is also commonly used for cleaning of spray guns and paint tools. Actual ingredients and their proportion may vary depending on the manufacturer.In the United Stated, any general solvent for lacquers is usually referred to as lacquer thinner. Look also for ”nitrocellulose thinner” or ”thinner for nitrocellulose lacquers” in shops carrying automotive paints. (Ed.) |
The significance of this ”discovery” is that the effects of the nitro thinner are specific to the decals. Applied in strictly limited amount, the thinner does not visibly affect paint or finishing coats, although a heavier application may damage the paint coat. It is very much like biological warfare where foreign agents are introduced to a native ecological system and attack specific components without affecting the dynamics of the hosting system!
Fortunately, the application of nitro thinner can eliminate the trepidation and helplessness that proceeds decal application. To ensure that you get the best results, I compiled the following procedure for thinner application:
- Be patient. It is better to proceed in many small steps rather than rush and risk ruining the decal.
- Test the application on a model that you do not care much about and verify that you have the right kind of thinner.
- Dip a fine brush in the thinner and wipe the excess off, leaving the brush half-dry. Gently apply the thinner on the surface of the decal.
- The decal will crease and the silvering effect will disappear.
- If there is no reaction, apply more of the nitro thinner repeatedly. Eventually, the decal will yield.
- Do not be tempted to flood the decal with a thinner because it will dissolve.
- If the thinner leaves a powdery coat over the decal, you may re-spray the surface with your preferred coating finish. The dry effect of the thinner will disappear.
- If bubbles appear on the surface of the decal, you can eliminate them with gentle strokes of a half-wet brush and finger pressure just before the thinner dries completely.
- If the decals are very thick, the thinner will scar the decals, but you can still restore the configuration of the decal with a few touch-ups of paint. Perhaps it sounds scary, but even the worst result will look much better than the silvering decal that you started with.
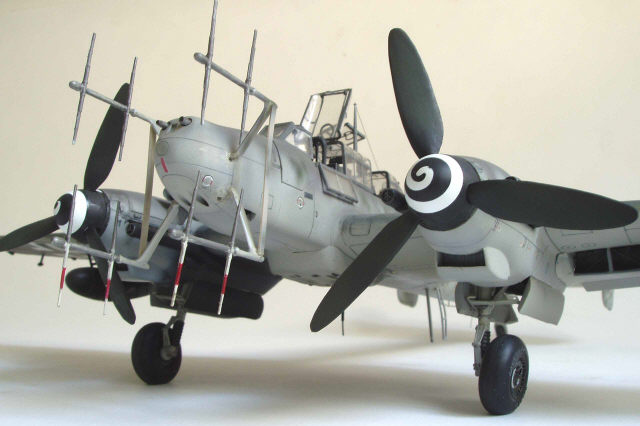
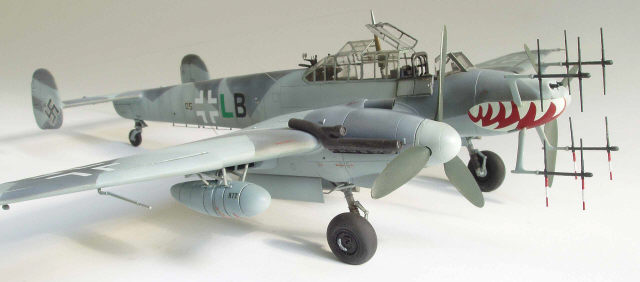
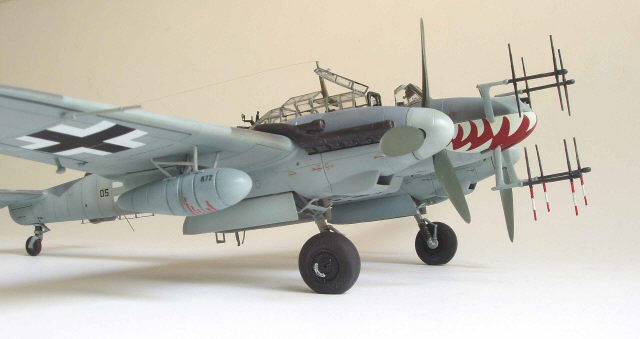
In all, the results will depend much on the amount of patience that you muster. The photos in this article show two examples of the ProModeler’s excellent Bf 110G-4. I completed these models 5 and 10 years ago. The decals were particularly thick and brittle and I had to hand-paint the sharkmouth design on the nose of one aircraft to compensate for the lack of decal flexibility.
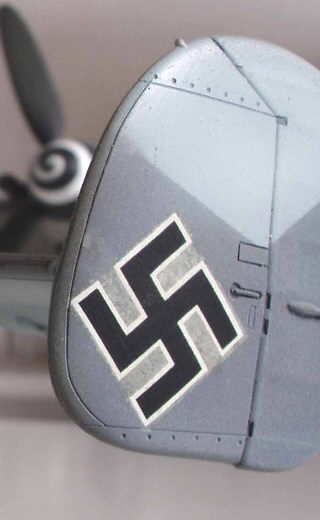
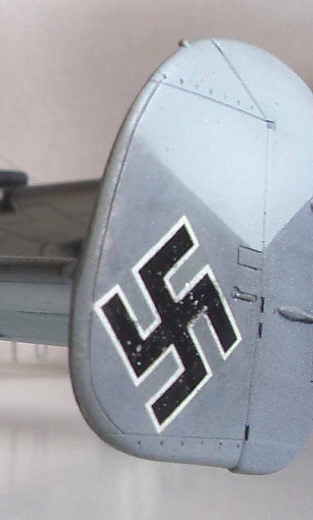
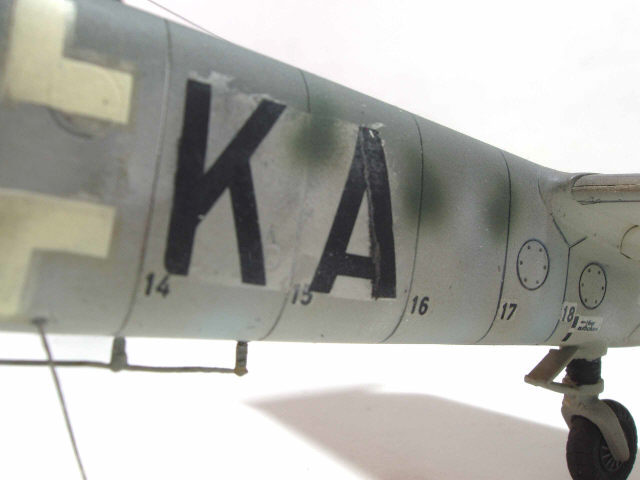
Two views of the same decal before and after the nitro thinner treatment on the decals. Note how the bad silvering completely disappeared !

Nowadays, I would apply a nitro thinner coat also to newly-applied decals, after the decal softeners dried. It would blend the curved outlines to the model surface in no time. Contrary to some decal setting solutions, the nitro thinner will force the new decals to snuggle around impossible curvatures and will reveal all the recessed lines and rivets beneath them.
However, be aware that this medium is brutal and can easily damage the soft decals irreversibly. So, be careful.
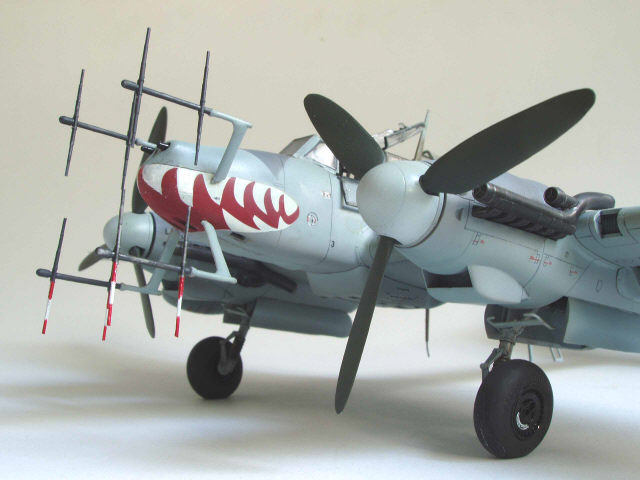
The sharkmouth on this model was hand-painted. At the time I wouldn’t dare to apply decal to such a compound surface, but I wouldn’t hesitate do it now – with the help of the nitro thinner.
If you further examine the photographs at the bottom of this article, you could notice that I took a great effort in the past to attach the decals, such as the application of glossy surfaces, new paint coats, cutting off decal edges. With hindsight, most of these tricks were to no avail. The new treatment resolves these problems in a matter of minutes. I deliberately left out imperfections on the shown models to demonstrate that it you do half a job, it still looks much better. In addition, I made an effort to photograph the models in the least flattering light to show that you would need to twist the model (or walk around it) extensively to find the fine line that separates between the model and its decals.
In all, the application of nitro thinner opens up new ways to model finishing.
This article was originally published in IPMS Stockholm Magazine in October 2006