Classic Airframes’ 1/48 Fairey Battle Trainer
by Sebastién Privat

The plane
Designed as a day bomber carrying a 1,000lb load on 1,000 miles at 200 mph, the Battle first flew in 1936. It was a big single-engined plane, with a span of 17m for a length of 13 m, powered by a Rolls Royce Merlin. The Merlin made wonders powering other single-engined aircraft of that time, like the Spitfire or the Hurricane… But the Spitfire and the Hurricanes were far smaller !
Battle’s overall performance, excellent for a bomber in 1936, left it totally outclassed by 1939 and the Battle bombers were slaughtered over Belgium.
As the plane was easy to fly, it was subsequently converted into a target tug and a trainer. As vision from the rear of the single cockpit was abysmal, a second cockpit was installed in place of the long canopy of the original Battle. I keep wondering if that changed anything, but it gave the bird the look of a basset hound that swallowed a camel.

The model
…it’s Classic Airframes: styrene is thick, no locating pins, very delicate panel lines but small parts are rough. On the other hand, we have some very nice interior parts, exhaust stubs and a prop hub made in resin. The canopies are vacuum formed, and you get two sets of these for the ham-fisted – I am one of those! Some parts have to be scratchbuilt, like the gear retracting system arms you see under the wing.
Dry-fitting tests leave you thinking some heavy work is going to be involved, especially at the wing to fuselage joint. That’s very accurate thinking.
Assembling

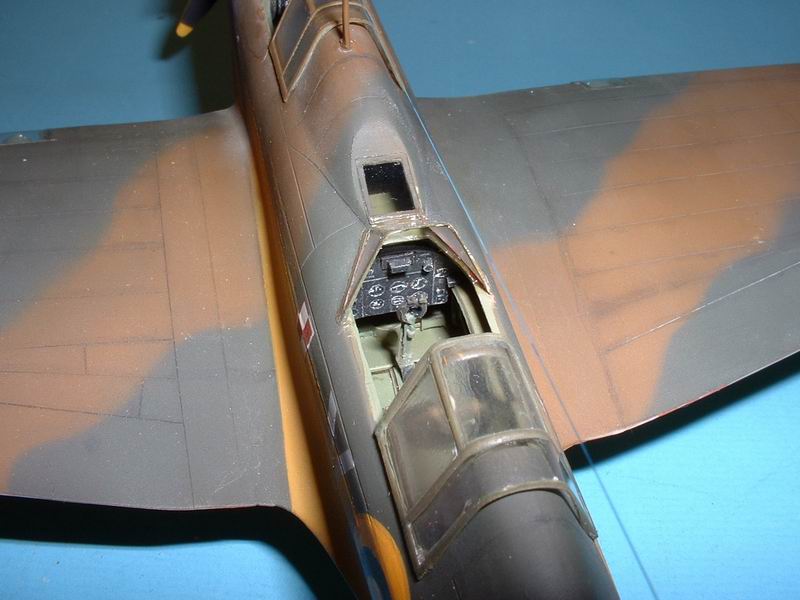
Guess what ? Construction started with the cockpits! Not very original, but it works…. The fuselage halves and the resin parts were painted Aeromaster Acrylics British Interior Green. Everything got a gloss coat, before some wash were applied. A flat coat followed and allowed working with pastel chalk powder. Another flat coat and I had two splendid cockpit tubs.
The seats were painted green, their back leather, the belts buff with silver buckles. The gloss – wash – flat – pastel chalk treatment was given to them too.
The various details were painted black, and highlighted here and there with colour touches. As there’s not much colour reference for Battle cockpits, I let my imagination go with the various details. The instrument panels were painted Gunze Tire Black before a drybrush with some white.
The resin cockpits were glued using cyanoacrylate glue. Then came the plates that cover the tubs, and I realized there that almost nothing can be seen once they were in place. Too bad…
And now the real trouble began : all of this had to fit inside the fuselage. For the front cockpit, some serious thinning down of the fuselage walls was needed. For the rear cockpit, I used modelling equivalent of a fire axe 🙂 The guides for the hump had to go, and a length of sprue was glued across the fuselage behind the rear cockpit for the tub to fit. The resin parts had to be sanded down considerably, too.
The exhaust holes have been blanked off with plastic card, the fuselage halves glued together and the cockpits forced inside the fuselage. Now it was time for installing the rear hump. Its addition immediately changed an already stubby plane into something as sexy as a car crash. And guess what? – keep your putty handy. I needed a good amount of mine to blend all contours together.
 Then there went the wings. The wing lower centre section went under the fuselage without fuss. Dry-fitting the upper wing components proved clearly that the rest would be a tough fitting job. It was. I built the wings. Keeping that putty tube handy, the joints required quite a bit of plastic sheet and putty, both on the leading edge and under the wing.
Then I went by sawing slots in the wing leading edge in order to install the landing lights. As I had already had my two hours of daily lucidity, I succeeded in correctly sawing only one wing, the other being cut in the wrong place. I decided to replace intelligence with tenacity, sawed the involved wing in the right place, glued back the wrongly sawed off bits and puttied the new joint lines. When things are complicated, it is somehow very easy to complicate them even further. I glued the wings to the fuselage.
The horizontal tail surfaces misbehaved, too, but not nearly as much as the wings.
Now, it was time to sand the two buckets of putty, rescribe the lost panel lines, and to shoot a test paint coat for checking the sanding blemishes. Once this cycle has been done a couple of times, things could proceed normally. Now where was that instruction sheet again?
Painting
With the canopies installed, blended in and masked it was time to breathe deeply, and transfer to the paint shop!
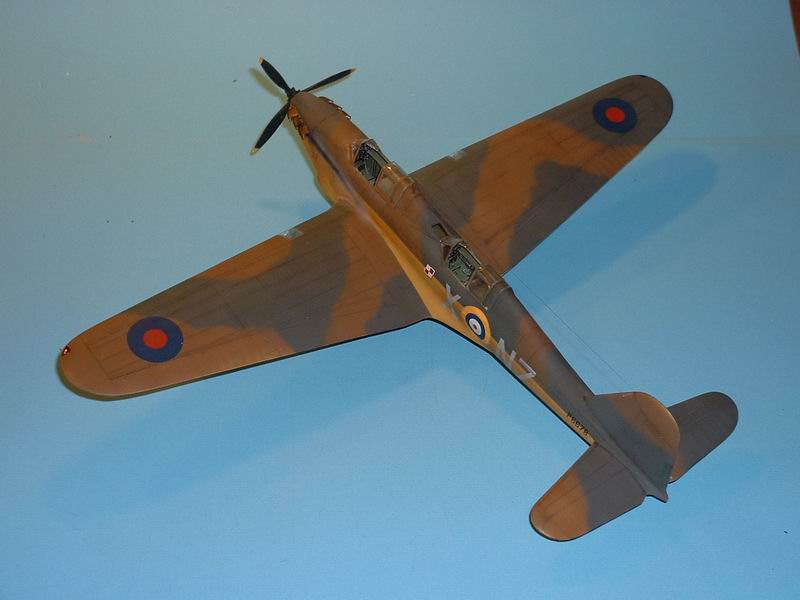
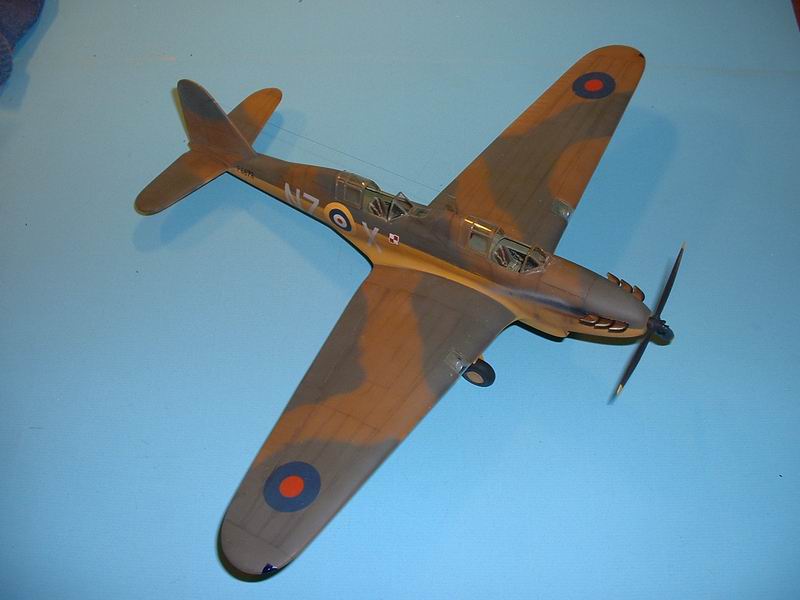
I chose the Polish squadron bird, because I wanted the sides of the beast yellow. A coat of Tamiya flat white was sprayed first. When it was dry, a coat of Testors RAF Trainer Yellow followed. Application of yellow is tricky because of its inferior capability to cover, so be patient and use a multitude of very thin coats rather than one-two thick ones. With patience, things get in order.
The demarcation lines between the lower and upper surfaces were now masked along wing leading edges and fuselage sides.
The upper side of the aircraft was to be painted in the RAF Sand and Spinach scheme that we know so well. I used Testors enamels colours. I shot the Dark Earth first, then scanned the instructions and printed them at the correct size, and cut off masks for the wings, tail planes and fin. I held the masks in place using BluTak, and shot the Dark Green perpendicularly from the surfaces.
The fuselage was painted freehand, and my Evolution airbrush helped a lot in achieving nice demarcation lines.
Finishing off the basic paint scheme, I sprayed a coat of gloss varnish in preparation for the decals. The decals were of commendable quality and reacted very well to softening solutions.
For the weathering, another gloss coat followed, a wash of burnt umber artist oil paint diluted with lighter fluid, then a flat coat, some additional work with pastel chalk powder and a final flat coat.
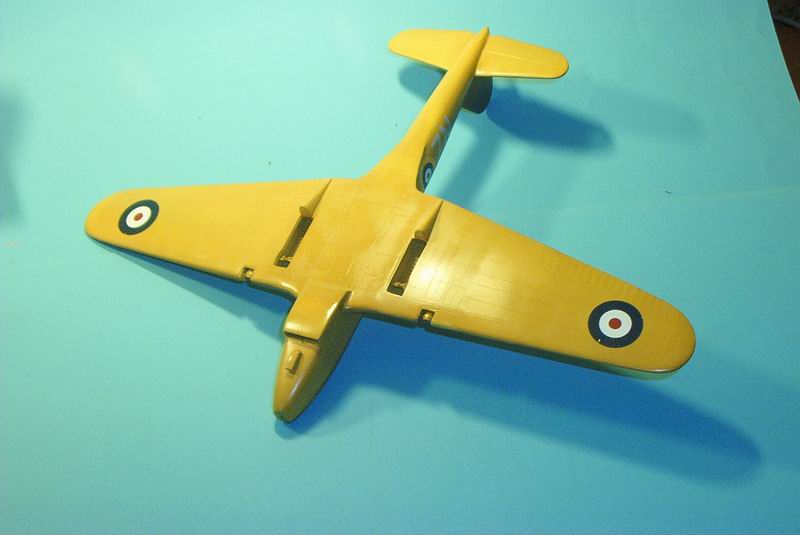
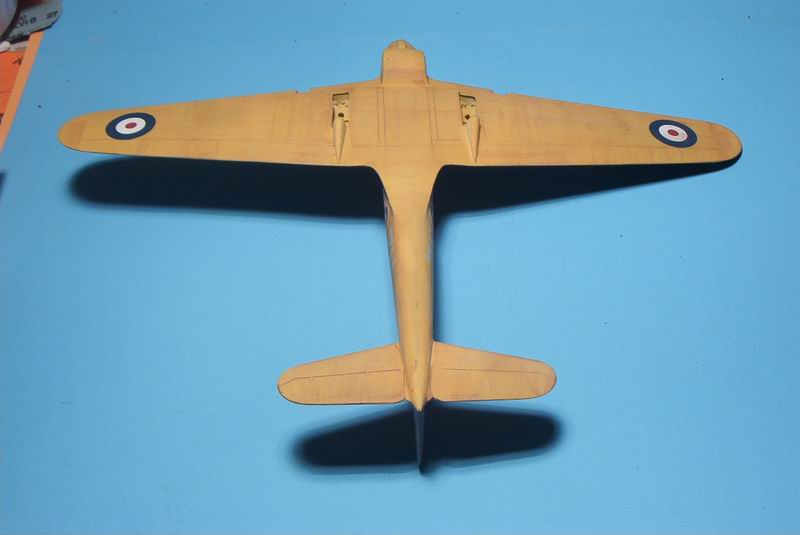
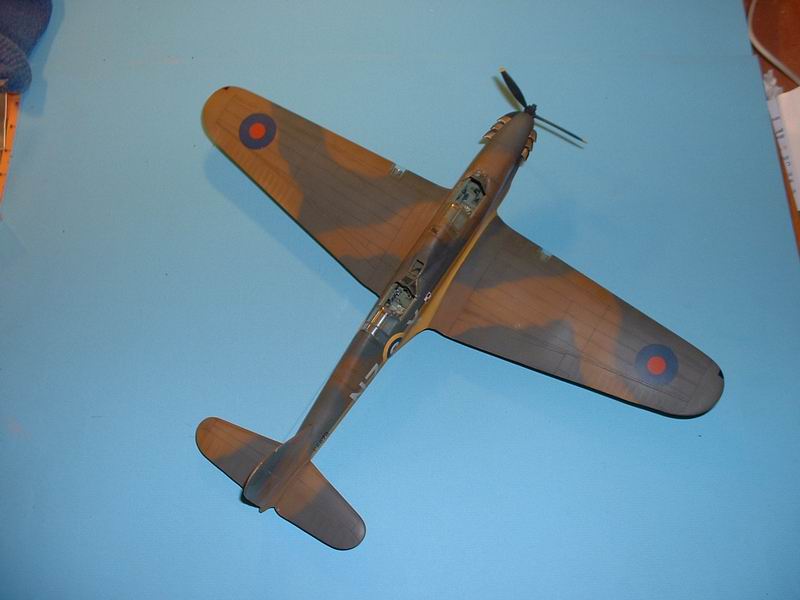
Lower surfaces before and after weathering.
Final bits
As I always do, I kept the bits that are prone to breaking until the very end.
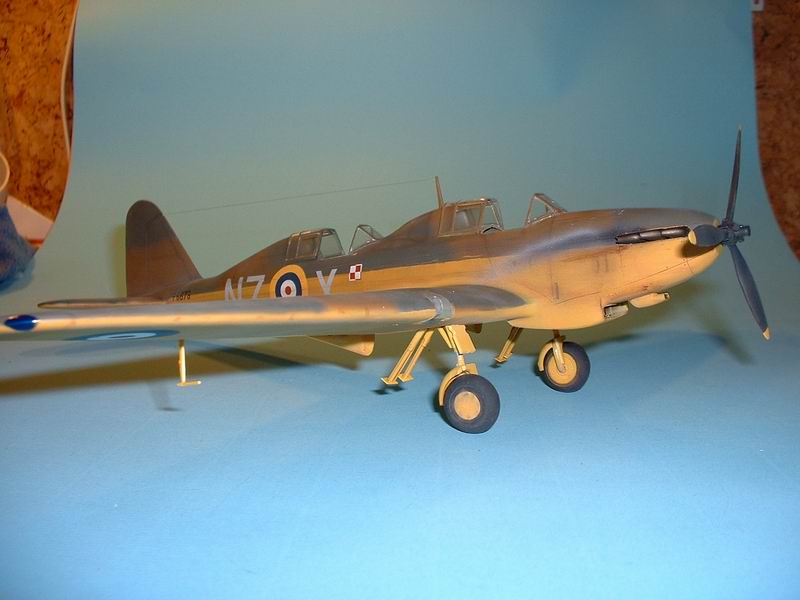
The undercarriage assembly was simple, but the wheels required some putty, and the mudguards needed to be tweaked to match the undercarriage leg parts. The retracting struts were scratch-built according to the instructions and superglued in place.
Some care was needed with the propeller assembly as the hub was resin and things don’t hold that well by themselves.
Then, the antenna mast was attached, the antenna wire made out of stretched sprue tightened with a lit cigarette, and the landing light front glass made with invisible adhesive tape. Voilà!
Conclusion
What can I say ? This model required a lot of work to complete, and the result is kind of ugly… on the other hand, it’s original, and I like it.
This is not a model for the beginner, but it can be done with patience, putty and average modelling skills. If you don’t want to do the yellow hunchback, I’d say most comments in this article should be applicable for the bomber or target tug variants of the Classic Airframes kit.
My thanks go to Mr Jules Bringuier for releasing these kits!
This article was originally published in IPMS Stockholm Magazine in March 2003.