…Almost Out of the Box
by Anders Isaksson

Background
I remember building the Matchbox P-47D ”Razorback” Thunderbolt in 1/72nd scale many years ago. 
The kit itself was rather simple, being moulded in the typical way of Matchbox; two sprues in different colours and with the fuselage having deep recessed lines. Oddly, the wings and stabilisers featured thin raised panel lines.
At the time I was very satisfied with my P-47. Sure, it was a bit crude in the details and my hand-brushed paintjob left something to be desired, but the
finished model certainly look ed like a Razorback.
Nearly 20 years on and Tamiya releases a state-of-the-art Razorback in 1/48th scale. No raised panel lines on this one. I had to build it.
The kit
The release of the P-47 generated numerous discussions on the major internet forums and the kit has of course been reviewed in all major modelling magazines.
The general opinion is that the Tamiya kit has rightfully recieved high praise regarding detail and overall quality. Here are the major points I have picked up (and I hope I have understood them correctly):
- An early review of the kit indicated that the tail wheel strut as designed by Tamiya will sit at an incorrect angle. Further research has shown that Tamiya did indeed mould the strut correct on their kit.
- The Tamiya kit features the more rounded belly area of P-47D-5 and later variants. Early Thunderbolts had a more flat looking belly area because it lacked various equipment associated with the external belly tank. A light sanding of the belly area to obtain a more flat shape will be sufficient to correct this detail.
- The marking alternative B as provided in the kit is not entirely correct for the specific version depicted by Tamiya.
These observations aside the major concern seems to be regarding what colour the cockpit interior and the panels immidiately behind the cockpit (normally covered by the canopy) should be painted. I believe the general opinion (at least on the day I decided to paint this area) is that it should be finished in the same colour as the rest of the fuselage.

As I was building this kit out of the box I otherwise followed the instructions almost to the letter. Construction and painting of selected areas of the kit is described below.
Construction
As per normal the action starts in the cockpit. From the seemingly endless discussions on P-47 cockpit colours I choose to airbrush my cockpit in a suitable dark green I had at hand, which turned out to be Gunze H302 Green (FS 34092).
The instrument panel was hand painted with Vallejo Model Air 56 Black Grey. Being a bit lazy, I did not bother to punch out each dial from the decal sheet but instead choose to paint the cockpit dials followed by applying small drops of Vallejo gloss clear varnish on each dial face. For some reason a few dials turned out slightly cloudy when dry. However, I had no patience for another round so I moved on to the next step.
Detail painting and paint chipping in the cockpit was carried out using various Vallejo colours. The natural metal rear framework of the seat was painted using a shade called Chain Mail from Citadel Colours range. As a step away from the traditional wash-and-drybrush method of finishing I tried to simply outline small details and panels in the interior by carefully painting their edges with a very light green mix of Vallejo colours. No dark wash was used in the cockpit area.
The only addition made to the cockpit was adding a set of pre-coloured seat belts from Eduard. The real merit of these sealt belts are the neat looking stitches reproduced on each belt. However, I found the overall colour of the belts a bit garish. A wash of diluted Vallejo Saddle Brown toned down their colour and improved the overall appearence.

The assembled and painted cockpit. The Eduard pre-coloured seat belts look wonderful but I felt they still need a light wash of dark brown to look even better.
The engine was assembled and the entire unit receved a base coat of Gunze H53 Neutral Gray. The cylinders were rubbed with graphite powder to produce a metallic look and the pistons were hand painted with Vallejo 56 Black. Various bolts were picked out using Citadel Chain Mail metallic colour.
The insides of the nose area were airbrushed in Tamiya XF-4 Yellow Green as well as XF-53 Neutral Gray where appropriate. The cockpit was installed and the basic airframe was closed up.
While this kit is considered flawless regarding engineering and fit of parts I still found myself having to use a little putty here and there. This is not a negative reflection on Tamiya but rather a sure sign of my own inability to join even the simplest pieces together without disaster lurking around the corner. The gaps as well as a few misaligned joints were corrected using Tamiya putty and a bit of sanding and re-scribing. At this stage the basic airframe was ready for painting.

The airframe is taking shape and will soon be ready for painting. The engine cooling flaps will be added next.
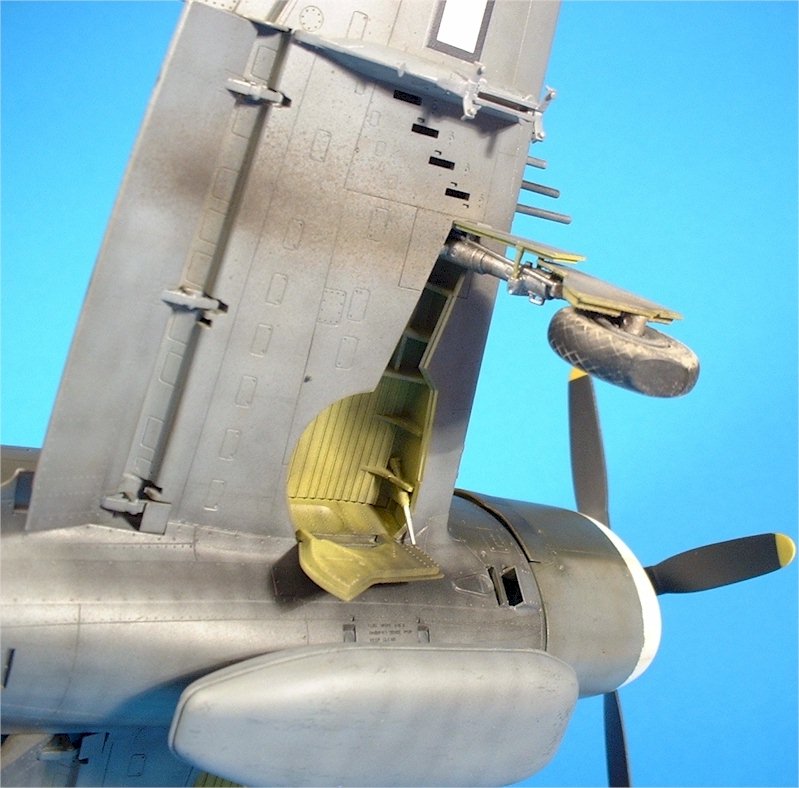
More details were completed as the landing gear wheel wells and insides of the doors were airbrushed zinc chromate yellow using Tamiya XF-4 Yellow Green straight from the jar. Light washes of Vallejo Model Air 56 Black Gray were applied to the insides of the doors to add life and give a general grungy look. Many photos of Thunderbolts showed landing gear struts that seemed to be painted, probably in Olive Drab. However, I stuck to the instructions and hand painted, again using Chain Mail from Zitadel, the struts in natural metal. Various joints and bolts were airbrushed with light coats of diluted Tamiya X-18 Smoke to add depth.
The final modification was to flatten the kit tires by pressing them against an iron set at low heat. Sandwiching a section of aluminium foil between the iron and the plastic tire protects the surface of the iron and ensures that no unwanted effects will appear next time you iron your favourite white shirt.
The tires were base painted using Tamiya XF-69 NATO Black and finished of with a light coat of Vallejo Satin clear varnish on the tread areas as more weathering of the tires would follow later. The wheels were then masked off with the appropriate size circle of a drawing template and airbrushed Tamiya XF-53 Neutral Gray.

The main wheels in progress. Both tires have been painted in Tamiya XF-69 NATO Black while the tread of the tire on the right has been treated with a light coat of Vallejo satin varnish. Note the weighted appearence of the tires.
Painting and markings
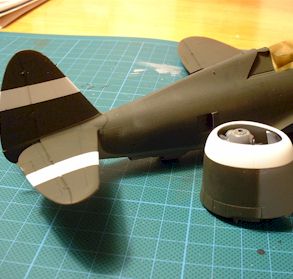
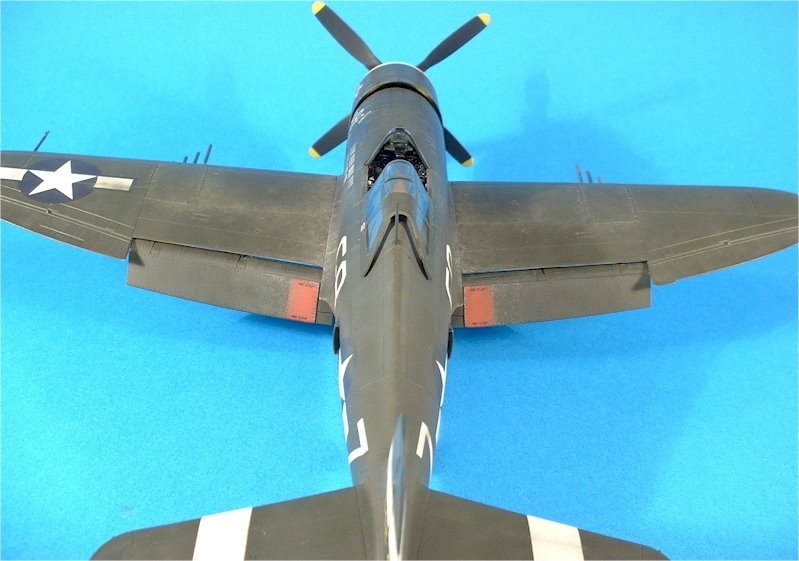
I began with airbrushing the entire underside with Tamiya XF-53 Neutral Gray. Once this was thourougly dry I realized that a re-shading of the upper surfaces might be useful to achieve that patchy paintwork so often seen in photos. To pre-shade I used Gunze H65 Black Green and airbrushed the entire upper surfaces of the model. I made sure not to only cover the panel lines but also tried to suggest the internal framework of the aircraft, by applying the green in parallell lines across entire panels, as well as applying dots along lines of rivets.

Next came the top base coat consisting of Tamiya XF-62 Olive Drab. To obtain a good balance between the pre-shading and the top coat I applied the paint in multiple thin layers and closely monitored the overall appearence after each application. This was the first time I used the pre-shading technique on an aircraft model, and although the patchwork effect does not show up well in the picture below I was positively surprised by the final result.

As the next step I applied the white recognition stripes so typical for the Thunderbolt. As the aircraft I was modelling would have a white nose I painted this area at the same time. I first planned to mix up a slightly off-white colour to keep things more to scale but decided it would be easier to try and weather the white painted areas along with the white areas of the decals.
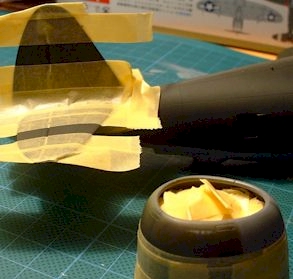
Tamiya masking tape was used for white stripes and the nose.
After basic painting was completed the airframe recieved an overall coat of Gunze H30 Clear Gloss and it was time for the decals.
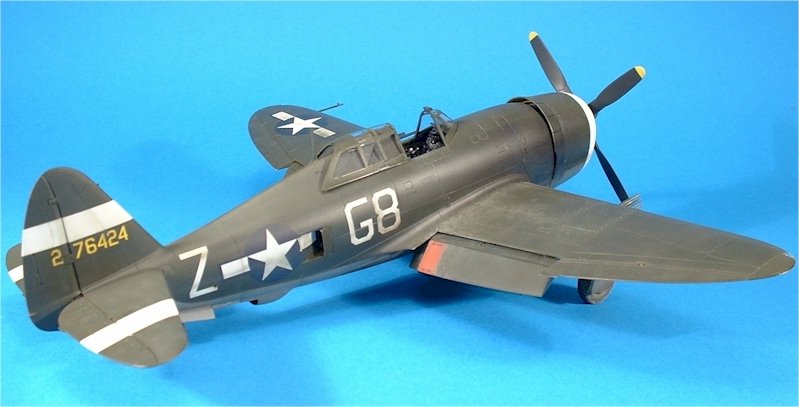
As many have stated before the decals provided by Tamiya are excellent in terms of register and opacity but unfortunately they suffer from being a bit thick. The markings I used comes from a brand new Sky Decals sheet numbered 48-040. The sheet contains no less than 12 marking alternatives for both P-47D razorbacks and bubbletops. Trying to avoid too colourful markings my choice finally was ”My Gal Sal”, a P-47D-20 from 378 FS/362 FG based in England during 1943.
I have never been a fan of the water slide concept for decals since they require a gloss surface for application, and the gloss coat tends to ruin the colour balance achieved by the pre-shading and basic camouflage. To further complicate matters I find it very difficult to conceal the the clear decal film surrounding each marking. No matter how many clear coats being applied on the decals the clear film often tend to show up when looking at the model from certain angles.
The decals went on without major problems using the Micro Set and Sol system. Although the carrier film used by Sky Decals was thinner than the Tamiya decals I still found them a bit thick.
To minimize the use of water slides I choose Verlinden dry transfers for the small stencilling. Having no carrier film, these markings are definately an improvement over the water slides. True, the Verlinden decals are a bit generic and not totally accurate for every aircraft type (I believe no P-47 ever used JP-8 jet fuel) but I decided that good looking small stencilling was my priority.
After the decals had dried I applied an overall clear coat of Vallejo Satin Varnish, killing the gloss but still giving a slight shine to the surface.
Weathering
With the weathering I wanted to concentrate on achieving traces from oil leaks and exhaust from the engine along with the results from operating on muddy airfields. Muddy airfields typically means that mud would be thrown up by the wheels and the propeller wash and the upper wing surfaces would show traces of mud from the ground crew.
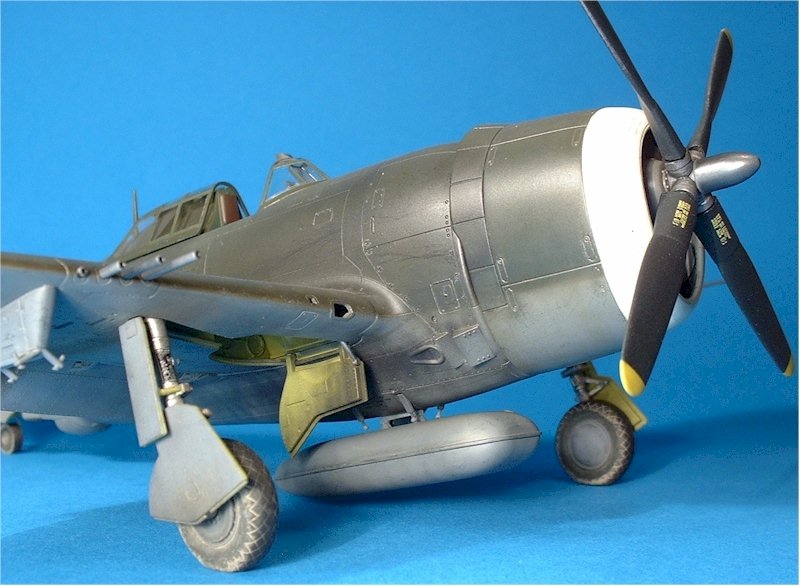
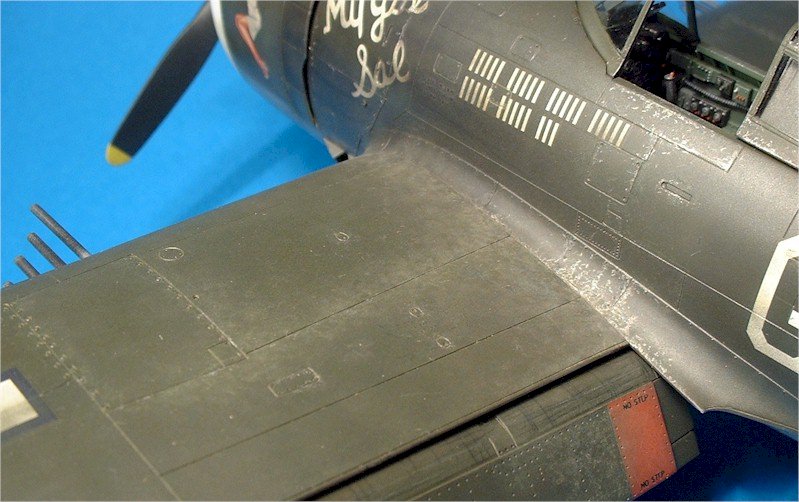
For the exhaust I airbrushed heavily thinned coats of Tamiya XG-69 NATO Black behind the exhaust ports located below, on each side of the belly. To try and suggest traces of exhaust affecting an uneven surface I first made several light passes perpendicualar to the airflow, following the rivet lines. After slowly building up ”shadows” of the rivet lines I connected the perpendicular streaks with a few passes to create the heavy streak from each exhaust gate and backwards. Following pictures of the real P-47 more traces of exhaust were applied to the fuselage sides immediately behind the cooling flaps.
While having the airbrush loaded up with a suitable dark colour I made several passes around various rivets and around panel lines (but not along entire panel lines) as well as across panels in order to achieve some variation and depth to the surfaces. This treatment also served to simulate general grime and effects of oil leakage so I concentrated the mix to areas around the nose, the belly area and the underside of the wings.
Fresh oil leaks coming from various panels around the nose were simulated using my Derwent artist pencils, this time using a black and dark grey colours to draw the leaks in the direction of the air flow
Further examination of photos revealed little or no traces of smoke from the gun tubes so I decided to leave the wing leading edge areas clean from any traces of smoke.

Exhaust streaks were applied using several passes with my airbrush. Also visible is stencilling taken from a Verlinden set of dry transfers.
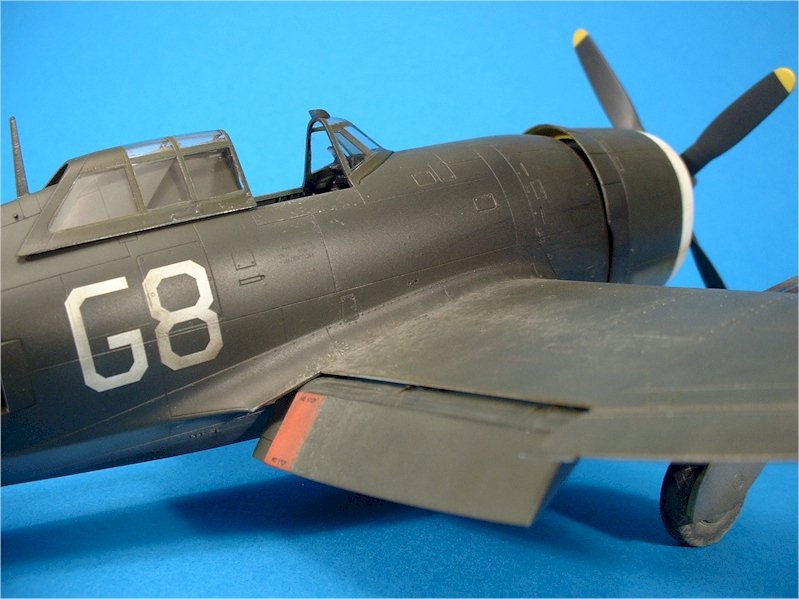
Before the application of mud I used a Derwent silver coloured pencil to simulate bare metal. Naturally this application was concentrated around the cockpit and along the wing walkways as well as around the gun access panels located on top of each wing. Speciai care was taken to slowly build up the patterns of wear using restrined tapping motions against the surface rather than drawing entire lines as these tend to look exactly like that; lines drawn on with a pencil.

Good view of the three main weathering effects; mud along the wing walkways, chipped painf in the area around the cockpit and traces of leaking oil along the fuselage.
For the mud I used pigment powders from Mig productions. The powder was mixed with Humbrol Thinner and applied with an old brush to the landing gear and wheels as well as along the wing walkways.
I tried to follow pictures of real Thunderbolts in order to keep the mud in logical areas. The tread patterns of the wheels were wiped clean of the pigments so as to simulate mud being worn off.
The mud mix was also flicked on with an old wide paintbrush to simulate the effect on mud being thrown up by the wheels and air stream from the propeller. I concentrated these effects to the lower landing gear and the lower wing areas around the landing gear. This was the first time I tried such an effect on an aircraft and while it certainly has room for improvement I still liked the final result.
Final details
With the weathering completed I finished up by attaching details like the belly tank (with traces of fuel leaks simulated using the Derwent pencils and thinned Vallejo colours) along with the pitot tube and canopy.
Conclusion
Needless to say Tamiyas kit is a first rate product and the excellent detailing combined with ease of construction really let me concentrate on the aspect of modelling I think are the most fun; painting and weathering.
This article was originally published in IPMS Stockholm Magazine in March 2004.