by Frank Spahr
Masking – Aaargh!
I read a posting titled as above of these days at this site’s message forum, and it pretty well sums up my feelings to this point. Masking is tricky, tedious, unnerving and often not quite predictable. Any modeller has to face masking problems now and then, so I´d like to sum up what I´ve learned about this issue.
We have either to mask parts that should not be touched by paint at all, or areas of different color on a model. For me, being a World War II air modeller, the former category is concentrated to aircraft canopies. Coincidentally, in the WW2 era the use of blown single-piece plexiglas canopies only began, and most aircraft had greenhouse-like construction often consisting of fifty or more single panes. Naturally the modeller has to spend a lot of time masking canopies.
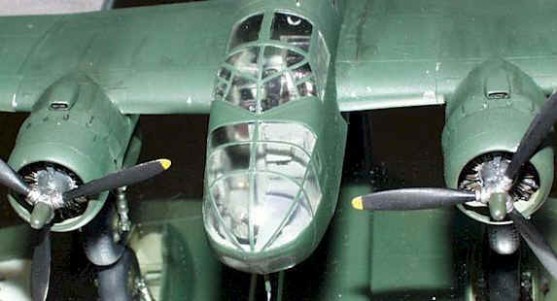
What can be achieved. Don’t be fooled by the fine detail – this ”Beaufreighter” (transport conversion of the Bristol Beaufort torpedo bomber) model is in 1/72 scale! The canopy is crystal-clear (vacuum-formed in this case), perfectly blended into the fuselage contours and features crisp, carefully aligned framing. Model by Victor Krogius.
Demarcation lines between different colors can vary in sharpness. For example, the British wartime camouflage schemes used sharp edges through and through, whereas most German and some American schemes (notably the USN tricolor scheme) were sprayed freehand, resulting in feathered edges. National insignia, D-Day Invasion or Reich Defense stripes, walking area markings and the like had sharp edges. These stripes are frequently added to kits as decals, but… well, I at least haven´t produced a decent Reich Defense band yet by using a decal.
Techniques for masking canopies described below will naturally suite all other applications where a sharp color edge is desired.
To begin with, any means for masking has to fulfil the following requests:
- It has to adhere to the surface closely
- It must be adaptable to curved, recessed or otherwise irregular surfaces
- It has to stick firmly to the surface, yet must be removed without damage to the underlying paint
- It has to provide a sharp demarcation line
- It’s use should not damage surface detail
Brush-painting
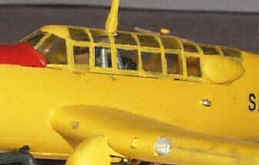
The beginning. Although it is possible to obtain good results solely by hand-brushing, the technique has many pitfalls.
When I built my Airfix kits as a kid, I used Tesa film for masking, a transparent sticky tape for office use. I don´t know how it is called in Sweden (I believe the most internationally known brand this side of the Atlantic is Scotch tape – Ed.). It tended to work as a paint remover on the masked off area, which would be OK for canopy masking, and that it was not at all flexible, so it couldn’t be applied to curved surfaces. Consequently, the waterlines on my battleships were fine amidships yet degraded especially towards the stern. I didn´t even consider painting the cockpit greenhouses then …
As a returning modeller, I brush-painted the first new kits I built. I used a very fine brush and steeeeeeady hand for canopy frames. To be honest that part of the work was hair-raising, and I never managed to avoid some paint getting on the window panes.
Removing the paint overflow is not very difficult. I used a wooden toothpick for the purpose, since the comparatively soft wood wouldn´t leave scratches on the clear plastic surface.
Further troubleshooting on canopies works best with the following sequence:
- wet sanding with paper grit #600-1000
- fine polishing paste applied and polished with a Q-tip (I use the dentist’s Ivoclar polishing paste)
- buffing with a Q-tip or cotton cloth
Despite my efforts, I was never really happy with the brush-painted results, since they couldn’t be made uniform and thin at the same time. So I bought an airbrush which made other solutions necessary.
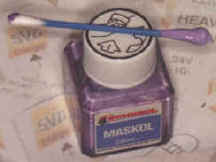
Humbrol Maskol. Using Q-tip as an applicator tool is a good idea as Maskol would permanently clog any brush used for the purpose.
Tapes and Liquid Masks
Experimenting began with very narrow adhesive strips used in electronics. These could be adapted very well, removed without damage, but sometimes they wouldn’t stick tight enough and the borders tended to be blurred. Moreover, you had to mask the area next to the strip to prevent overspray. That was when I first used Humbrol Maskol or Revell Color Stop. This silicone goo flows into any irregular surface and leaves a sharp demarcation line, yet not a straight one. I used it with my canopies, applying it meticulously with a toothpick.
The results were only partially satisfying. As I already mentioned, the main problem remained getting the straight edges.
Parafilm M
Next came the Parafilm M. Well, that was a big improvement.
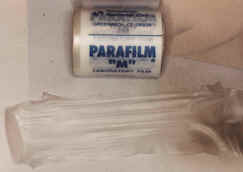
Parafilm is a stretchable foil designed for laboratory purposes, mainly for sealing test tubes and the like. It adheres to a surface in just the right degree, so it sits firm, but doesn´t tear the paint off. It can be adapted to any surface, and be cut to size allowing for easy masking of enough surrounding surface to prevent overspray.
Using Parafilm needs a bit of learning, but it pays off greatly. You stretch a conveniently-sized piece of the foil. pre-stretch it and adapt it to the surface, say the canopy or the fuselage. Then you´ll need a fresh X-Acto blade and some patience to cut out all the framing of the canopy. Unwanted pieces are then lifted off and removed with the tip of your X-Acto blade, leaving only the panes masked.
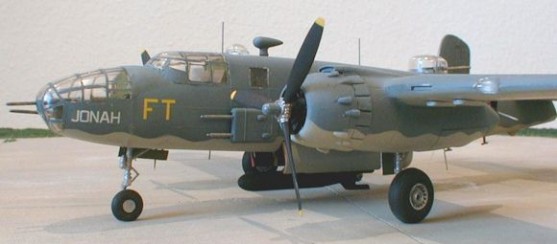
The canopy frames of the B-25 above were masked using Parafilm only. Model by the author.
This method leaves absolutely crisp borders. I also don´t think it is more time-consuming than other methods. It’s disadvantages are that damage my be done to the surface by cutting and that it’s hard to obtain straight lines without a flexible ruler.
E-Z Masks
In an earlier article, I mentioned the trouble with the canopy of my my ProModeler Me 410. The transparent styrene is more vulnerable to cracks than the solid one, and when you have minute cracks filled with paint, you can forget the part.
The complex shape of the 410’s canopy, especially the rear gunner´s compartment with its bulges, would make cutting the Parafilm M masks a very tedious task, so I ordered my first E-Z Masks. I had to interrupt my work on the 410 for several weeks. Now, after having done it, I can say that it was worth the wait. Using E-Z Masks is a lot easier than all the other methods described above.
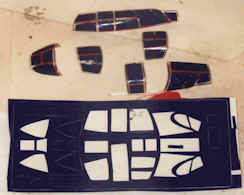
E-Z Masks at work. The Me-410 canopy parts have been covered with pre-cut masks and are ready for painting.
What the modeller gets are two sheets of pre-cut vinyl, a red one for the inside and a blue one for the outside. Tricky parts are included twice, as well as some pre-cut strips for emergencies- very thoughtful! The parts for the bulged windows were cut in several parts, so that you could start with the edges and patch the middle afterwards. The vinyl is rather sticky, firm, yet somewhat deformable so it adapts to the curvatures. I regard it as a very fine material and I´m wondering whether you could get it in uncut sheets for custom-making masks.
The set for the 410 had just two flaws. Whereas the inside masks were absolutely correct and a joy to work with, some of the parts for the outside weren´t cut correctly, so that you only had one part where two or three individual parts were necessary, especially for the access hatches. This can be remedied by measuring on the canopy and pre-cutting before application. It should be added that I recently read Scott van Aken´s report on the 410 in which he stated that this feature was intended, since the framing was partly only on the inside of the canopy. I couldn’t confirm this, so all my canopy frames are double-sided.
My second objection is that the metal plate around the antenna hasn´t been reckoned with, but that is easily corrected.
Summarising, I regard E-Z Masks for a very helpful aftermarket offer, much recommended. However, a word of caution. I removed the E-Z Masks about 3 weeks after masking the canopy. It was hard work! It was considerably harder to do than removing the inner masks, which I did directly after painting. I don´t know whether anyone else has experienced that. I was lucky not to damage anything, since I normally glue the canopies with Kristal Kleer, and only in this case, due to poor fit, had I used cyanoacrylate for fixing those stubborn parts together.
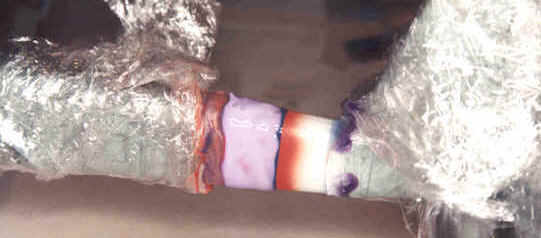
Having sprayed the canopy, I mused about the Reich Defense band. It should be red and yellow, and obviously using the decal would spoil much of the work I have put into this project. So I took the remaining ”emergency” strips from the E-Z Mask to mask the fore and aft demarcation of the stripe. It worked out beautifully. I also masked off the adjacent parts of the plane with a very simple method, using the plastic film you use for preserving food. I wrapped it around the model and sealed it at the vinyl strip with Humbrol Maskol. Quick, secure, cheap and easy.
Well then, my Maskol must have dried by now, so I´ll continue …
Pretty view, uh? This Reich’s Defense band was masked using three different materials, as described in text.
This article was originally published in IPMS Stockholm Magazine in October 1999.
