by Öken-Erik Ahlström
photos by Martin Waligorski

Despite its antiquated looks, the Marmon-Herrington armoured vehicle remained the mainstay of the British armoured car regiments in the Western Dessert until 1942. Marmon-Herringtons were used by the Indian Army in the Middle East, and the British and Indians between them had almost 1200 vehicles. They stayed in service until the end of the Tunisian campaign, some of them being used also in Italy. The British had also used them in Malaya. The South Africa, the original and main user of the type, had over 4500 in total, and they were also used by the RAF for airfield defence in this region.
The venerable american Marmon-Herrington company was one of the pioneers of the American auto industry. It was originally involved solely in civilian machinery and cars. Only in 1930s the Marmon Car Company was joined by Colonel Arthur Herrington, an ex-military engineer involved in the design of all-wheel drive vehicles. What followed was the development of military vehicles. Their armoured car concept was not an entirely original design, but rather a 4×4 conversion for a commercial 4×2 truck chassis suitable for use with a variety of armoured car bodies. In 1939, South Africa purchased these kits together with chassis from Canadian Ford and subsequently built them to armoured cars. Therefore, the car as a whole was acutally a South African product. 135 of the initial Mk. I model were manufactured, followed by 887 Mk. IIs. There were also a Mk. III and Mk. IV which looked compeletely different from the first two models. Mk. III was the most numerous version, 2260 being produced in total. The Mk. IV appeared too late to see combat in the North African campaign, and by the time it arrived, better British and American vehicles were already available in quantity.
Other users of the Marmon-Herrington included New Zealand, Free Greek, Free French and Polish armed forces. Some examples were also captured and used by Germans.
The build
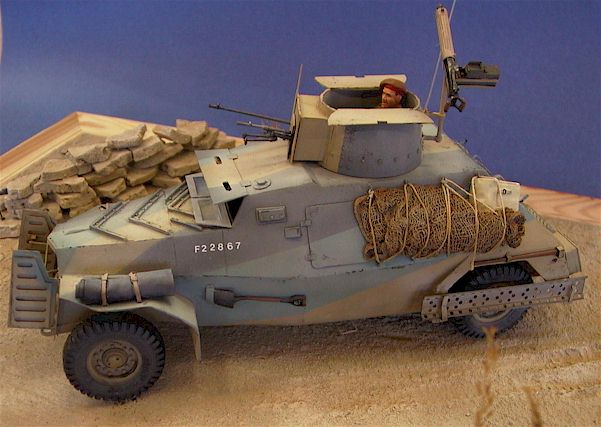
This is an older resin kit from Commander, one of the first produced by  that company. The kit represented a Marmon Herrington Mk. I model but I have converted it to Mk. II. This had a welded hull in place of the rivetted one of the Mk. I. Deliveries of this model started in 1940.
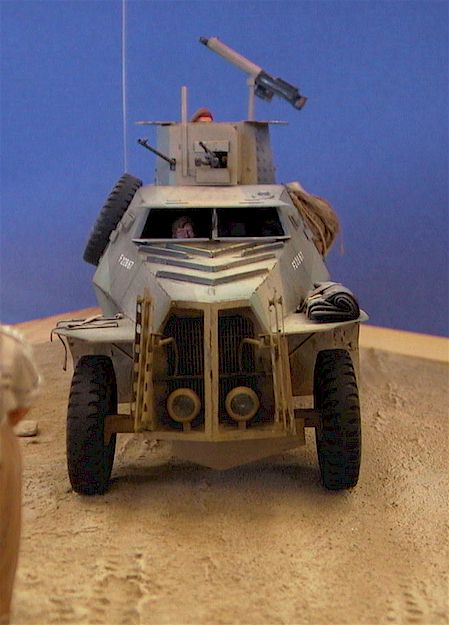
The Mk. II was manufactrued in two basic variants: MFF for use in South Africa,armed with one Vickers machine gun in the turrent and another in the hull, and ME which was designed for use in the Middle East. This model had an enlarged turret with a protruding mantlet giving room to more extensive weaponry as shown in my model.
Embarking on the project, I concluded that the outline of the kit was accurate, even perfect, but the kit would be a real dog to put together. After some dry-fitting and thorough consideration I opted to use only the solid one- piece hull, the suspension assembly and nine of the included phtoetched parts. Everything else was put aside to eventually end up in the scrap box with a prospect of never making any use.
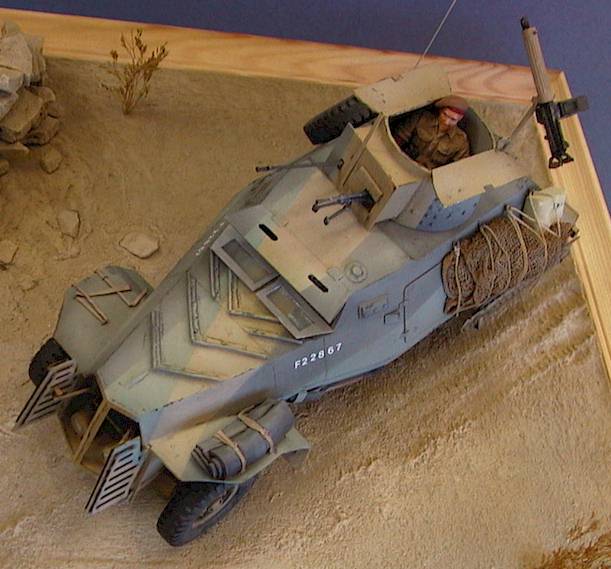
As I wanted to depict the vehicle with open hatches, the first step was to hollow the hull. Mind you, the hull was a solid resin piece! This work turned tout to be very messy and I conducted it outside in the garden to avoid all the resin dust getting into my lungs. I used the garden hose to spray water around the working area in attempt to limit the spread of dust. Still the smell of resin could be felt from the other side of the block!
I drilled my way down from the turret opening and the bottom of the hull and then worked outwards. The driver’s compartment was first hollowed this way, and then also through the front hatch. The result was merely a hollow space with the shape of a cave, but as I intended to put the driver and commander figures in the openings it was enough. I simply painted the interior with matt black to create depth and eliminate any light reflexes that could reveal the lack of internal detail. I think that the result is perfectly OK.
 The new scratchbuilt turret was turned on a lathe. I asked a colleague who works at the mechanical workshop to turn the shape from metal according to the drawing I provided him with. He succeeded beautifully, and I had now a hollow metal turret instead of the solid resin part of the Commander kit. Contrary to the hull, the turret of the Mk. II model was rivetted, so I carefully transferred the rivets of the original resin turret onto the new one.
I then cut a rectangular opening in the front for the gun housing. The mantlet structure itself was added from plastic card. The weapons came from Italeri and Resicast.
Another job that proved to be as tedious as hollowing the hull was removing the panel lines and rivets of the Mk. I model to represent the welded surface of the Mk.II. The kit featured massive Matchbox-like panel lines that shouldn’t be there even for the rivetted version. I filled and sanded them all – more resin dust!
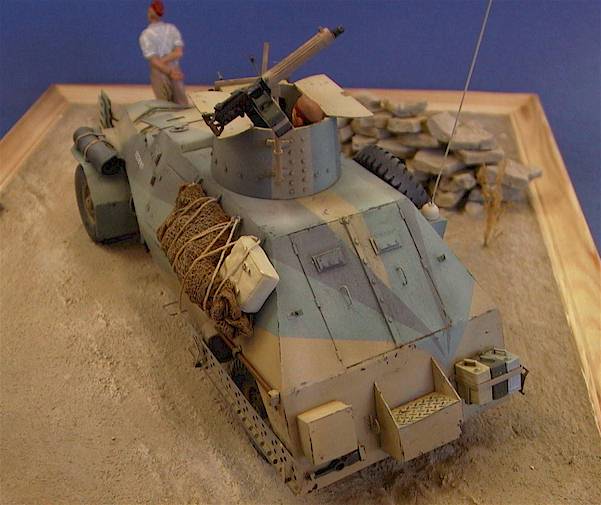
I replaced the wheels with new ones ”borrowed” from Italeri’s Chevrolet truck kit. Various exterior details were added using parts from my spares box plus some imagination.

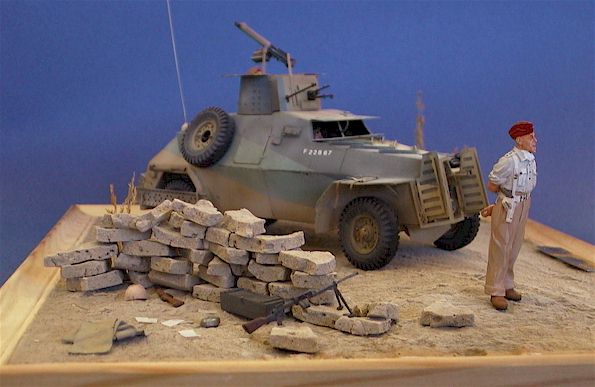
The standing gentleman figure comes from Verlinden, and started its life as Chota Sahib if I remember things correctly. It had a pair of those correct Courderoy pants so it fitted the bill perfectly, I only had to modify the upper body. I replaced the head with a new one from Hornet. The ”sitting” crew were Cromwell figures.
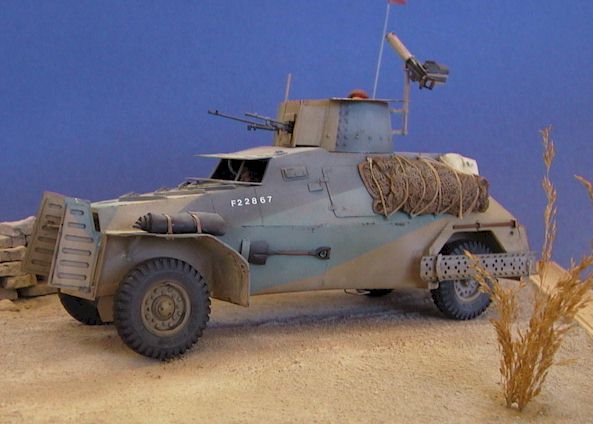
For the base I used copious amounts of stone dust. Stone dust is great because it simulates ”itself” perfectly, but the best part is that it you can obtain a lifetime supply for free by contacting your local building stone supplier and asking for it. Be pepared to see some long faces when you mention that you only need a couple of kilos…
Another tip for dried and cracked sand surface is to use fine cat sand, I use one named ”Katty”. Mix the sand it very thinly with water and a little white glue, then spray on the surface. As the mixture dires, it will shrik and develop a pattern of small cracks. The width of the cracks will depend on the amount of water used, so if you are not entirely pleased with the result, just repeat the process and add more or less water.
I hope you like my Marmon-Herrington, I certainly do.

This article was originally published in IPMS Stockholm Magazine in January 2004.