by Göran Nordin
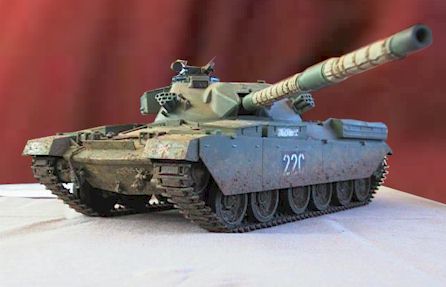
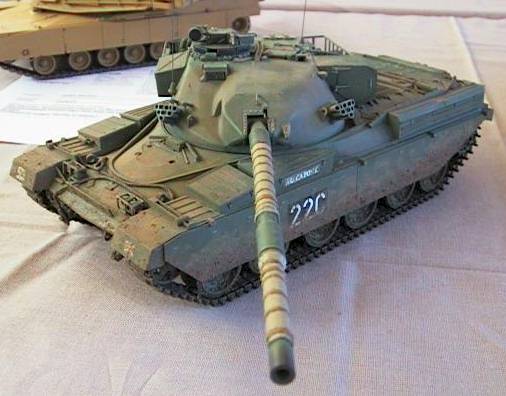
I was quite surprised when a fellow modeller more experienced than myself approached me at one of our club meetings and asked (a rookie like me) how I had managed to get my Chieftain Mk.5 so muddy and weathered. He also inquired whether I would like to write an article or not – so here it is.
I’ll will do my best to keep the descriptions short and simple: the technique itself is not such a big fuss. The Tamiya Chieftain shown here was my third armour model ever, as I primarily prefer 1/48 aircraft subjects. The ”end product” I wanted to achieve was a very dirty and weathered tank that had been out in the fields for weeks without any cleaning effort from the crew.
Making the ”Cocktail”
The basic idea for my method of simulating mud, dirt and grime is using the real stuff – soil and sand. I found that fine soil of the variety used for growing pot flowers inhouse works best for me. Basic ingredients that you will need are: soil used for pot plants, white glue and water. Like in its intended use, flower soil works best when fresh.
Other ingridients that you will also need are fine sand and acrylic model paints. Fine sand can be obtained in the nearest pet shop. Be certain to purchase the finest variety you can get.
The process goes like this.
Take a drinking glass and mix the water with white glue 50/50. Then add some soil mix it all together. You will find that the colour of the resulting mess is close to brownish – yellow. Keep mixing for a while to ensure that it all blends together properly. At this stage add some sand into the mixture. I also add some small pebbles that you can find in an ordinary gutter to simulate small stones and rocks.
Why using both soil and sand you might wonder? There is a simple reason for that. Without sand, the mixture doesn’t look right or up to scale as a professional modeller might put it. The sand also improves the consistency of the mixture making it more adhesive.
Having added all ingredients to your taste, stir it all again thoroughly. If you have done it right, the resulting goo will look like the ”cocktails” we used to make in kindergarten, if you get my drift.
The final preparation step is adding paint. If you don’t, the mixture will more or less turn black after the glue and water dries out. For modelling purposes, some earth-brown tone would be far more desirable.
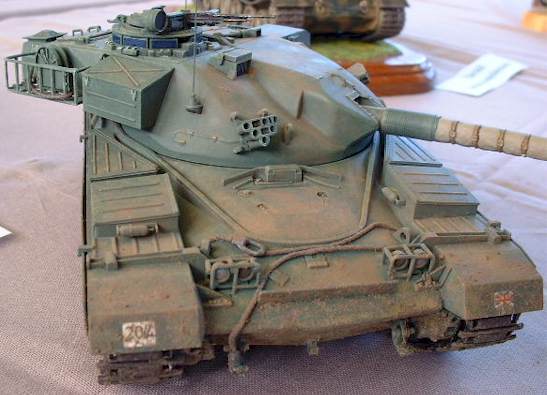
The grainy structure of mud visible here on the front armour has been achieved by… using the real stuff. Even the true-to-scale color tone can be obtained with the help of suitable acrylic paint.
Choose an earth coloured acrylic paint of your liking and add it to the mixture. Be sure to use acrylics: enamel paints don’t like this kind of company.
The entire mixing process should not take more than 20-30 minutes.
Applying the Dirt
I use a small screwdriver, toothpicks and small brushes as applicators.
At the beginning you may find that the dirt flows in some other direction than desired. Obviously you do not need to follow any strict pattern, but practising on some scrap parts first may be useful. Also remember that it is up to you to decide how much/little or where to apply the dirt.
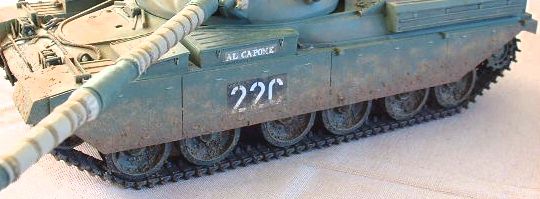
Largest amounts of soil mixture were applied to the wheels and tracks.
Note varying shades of the mud on the skirts achieved by dry-brushing with pastel chalks.
As seen on the pictures I applied liberal amounts of the ”cocktail” on the wheels and tracks of my Chieftain. After that was done I picked a larger brush and dipped it into the mixture and carefully stippled some dirt on the skirts and at the front and back of the tank. This in order to create minor ”build ups” that I could dry-brush later.
When you are happy with the application, let the kit dry overnight. The following day you will find the mud on the wheels stable enough to be further dry-brushed, if you desire to do so.
On my tank model, I opted to dry-brush the stained parts with further tones of brown and sand to achieve additional depth. I used different shades of brown pastel chalks on the skirts, starting with the dark brown closer to the wheels and lighter shades in the higher areas. You can use your own imagination. Even the smaller particles on the skirts can take the beating of a dry-brushing, if you’re gentle enough in your strokes.
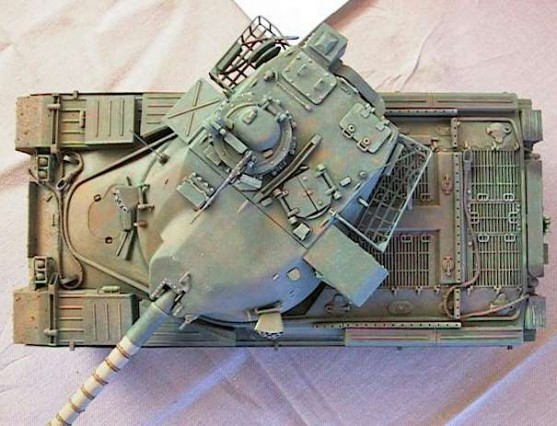
Higher areas of the vehicle like the tower are usually less exposed to dirt and dust.
Note how the dirt cover is made finer and thinner in these areas.
The results can be judged from the pictures. I hope this article has been of some help and inspiration to you. Good luck and happy modelling to you all. Oh, and I almost forgot: the drinking glass you ”borrowed” from your kitchen can be restored to normal use. Just clean it as usual (while still wet) and then being a true gentleman, make a real cocktail for your understanding partner – so that she stays that way.
This article was originally published in IPMS Stockholm Magazine in May 2001.
