by Magnus Fridsell
The MPM Fw-190 V1
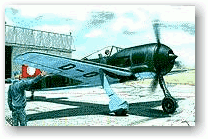
As a start to my collection of famous fighter prototypes,  I choose the MPM short run injection kit of the Fw-190 V1. Built and flown at the very end of the 1930s, the full size aircraft ranks among the top fighters of World War II. Continuously improved during the war years, it always was a dangerous adversary for the allied pilots.
The MPM kits are generally ”better” than the majority of short run kits. There is always a small etched fret of cockpit detailing from Eduard and fit is often quite OK. Surface detailing is of the shallow, recessed type and usually gives a very nice result.
Construction
The kit is very simple to build, the only tricky part is the cockpit. Side consoles are supplied (The FW-190 was the first aircraft in the world with this ”modern” cockpit layout) but there are no positive location points on the floor for these. Therefore, careful dry-fitting including the photoethed parts is necessary. Also, the coaming over the instrument panel is horribly thick, I filed it off from the fuselage halves and reinstalled it, built from thin plastic card, from the outside once the halves had been joined.
 The wheel wells badly need some interior to look reasonably good. I thought about stealing some pieces from an old Airfix Fw-190 but this was at my parents’ place, 500 km away so rather than waiting until Christmas, my next planned visit there, I scratchbuilt something that looked OK.
After sanding down the trailing edges of the wings and all mating surfaces, time had come to glue all the major parts together. The fit was good with a little filler and packing with plasticard, needed only between the fuselage and the wing centre section.
The most characteristic part of this aircraft was its huge spinner with a cooling fan inside. This is well represented but the blade throughs need to be drilled out. A not to tricky operation for a modeller with a few earlier kits under the vest since the positions are indented in the plastic but it might cause trouble for the novice.
 The only parts that really fell under the expectations are the landing gear legs. Thick and oval, not even the inclusion of etched scissor links could save them. I might have to reconsider that Airfix Fw-190 again! I tried to scratchbuild some from syringes, this proved somewhat troublesome, especially after I almost pressed a real King Size one through my thumb. Ouch!
The canopy is vacformed and only one is supplied with the kit, so be careful with the scalpel! It also needs polishing for improved clarity. A small problem is that the windscreen angles up to steeply, more like the production aircraft. The windscreen of the prototype sloped backwards in a very pronounced way. I suppose it would be possible to file it down for a better look. I did not do it to mine, simply because I did not notice it until it was almost finished!
Paint scheme
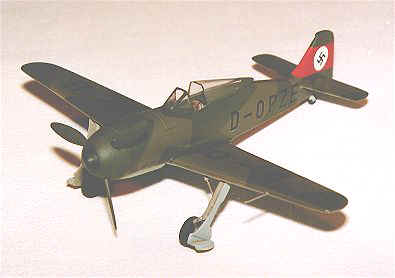
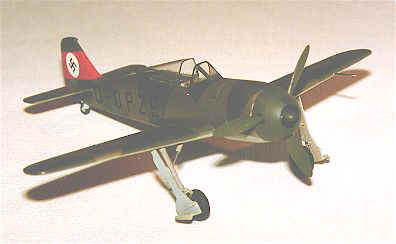
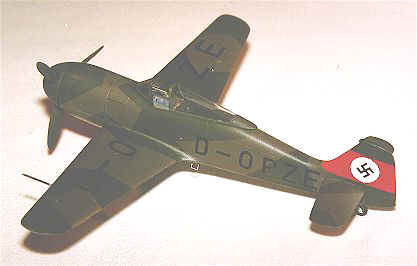
Before applying the camouflage, the fin was painted white. A small circle was then masked off and the fin painted red. Finally, I masked off the red band and did the rest of the camouflage. This was done using Aeromaster Acrylics. Starting with the upper surfaces, these were given a coat of RLM 71 Dark Green. The various fields for the ”splinter” camouflage were then masked using thin strips of tape, filled in afterwards with larger tape pieces. RLM 70 Black Green was then sprayed. After demasking the undersurfaces were painted RLM 65 Light Blue.
Aeromaster make big noise about their exact paint matches but I think (oh no, not again!) that the contrast between the two greens is too great. The next time I will try to mix the lighter shade with some of the dark. This is really a matter of opinion but another thing that Aeromaster make big noise about is the ability to sand away mistakes. I used 2000 grit wet and dry to eliminate overspray from the wheel wells after making a silly masking mistake. It ended with me repainting all the blue areas since the paint turned yellow during sanding, like if it decomposed into differently coloured pigments. Strange! Gaston Barnal of Aeromaster told me at the IPMS-UK Nationals that this COULD happen sometimes, so I guess I have to be more careful with the masking after this!
A thin coat of Micro Gloss prepared the model for the decals.  And here the big trouble started: the decals were simply awful. They were fragile, produced an unpleasant white edge if not cut clean and they tended to break into zillions of pieces when moved on the model. I have had problems with decals before but these really win first prize! It would not be totally impossible to find rub-down lettering of the correct size and font since the only decals included are the German civil registration D-OPZE in four positions. If I built another one today I would certainly look around at the Stationers before trying the original again! Another alternative which I have used in another project is CAD-drawing the decals and then laser-printing them on to clear decal sheet. To complete the model, a swastika was needed for the fin. I suppose most modellers have some in the spares box, otherwise there are special sheets with just these items on the market.
In the end…
The end result is quite acceptable, not really competition class but that was mostly my own fault. I was quite fed up and wanted to get it finished, had I waited and found better registration letters the result had probably been much better! Except for the decals, I can recommend this kit to anyone interested in odd-looking aircraft!
Other kits of famous fighter prototypes are for instance: MPM Bf-109 V1, Aeroclub Supermarine 300 conversion (for Airfix Mk I) and High Planes Me-262 V1.
This article was originally published in IPMS Stockholm Magazine in February 1999.